Installing and Using VMware Server

This procedure explains a VMware product, called VMware Server. It is software that runs on top of an operating system, usually Windows 2003, VMware Server would be installed on it and virtual machines would run on it. The Bad, that the S.O. base is already consuming resources that could be leveraged by VMs, or we have to pay Microsoft directly for a Windows license 2003 that we won't use for anything, just to have VMware Server installed. The Good, which is totally free and we can have several machines installed and running at the same time, We can manage them remotely with the “VMware Server Console” from any PC on the network, We can run scripts…
– VMware Server Installation – HERE
– VMware Server Configuration – HERE
– Create a Virtual Machine on VMware Server – HERE
– Install VMware Tools, USB devices, Remote Management – HERE

First of all, We need to download the installer from the www.vmware.com. And we started installing it, An assistant jumps out at us, “Following”,

We accept the license agreement, “I accept the terms in the license agreement” & “Next”,

We can perform a complete installation, I just select the custom one so we can see what components we have,

We can install only what is the server part, which would be to house the VMs (Server Components) or just the console that would be to locally or remotely manage the VMware Server (Client Components). We mark everything and “Next”,

I agree, check to disable the CD author just in case, “Next”
And you're ready to start installation, “Install”,

… Wait a few minutes…

We need to enter a serial number that is free of charge, only that when we download them we must generate them, or else, from here: http://register.vmware.com/content/registration.html, Click on “Enter” to confirm.

And finally clicking on “Finish” We finish with the installation, We can now play with the VMs!

To open the VMware console and manage it, It is done from the desktop icon “VMware Server Console”

How we have it installed locally, Select “Local host” and we give “OK”,

This would be the main screen of the VMware Server, From here we can create virtual machines (“New Virtual Machine”), Open an existing one (“Open Existing Virtual Machine”), Switch from server to manage for a remote one (“Switch Host”), or configure in which we are logged in (“Configure Host”).

If we look at the options that we can configure in the VMware Server, It appears in the “General” where we will save the VMs by default. On the “Memory” is to manage the virtual RAM of the machines, how much we want to give to the VMs and how much we want to the physical machine or how much we want to give to the VM. On the “Priority” we can give more priority or not to VC, The interesting thing is the “Snapshots” o Images, if we want it to generate images of the VMs or not. On the “Devices” We have what we have mentioned above, if we want to disable or enable the authorun of our CDs locally. And on the “Connection” is for traffic between the console and the VM vata encrypted using SSL, for this we would mark “Use SSL for Console communications with this host”.
Create a Virtual Machine on VMware Server,

To create a virtual machine, first we need to have a CD/DVD or an ISO with the OS lying around. that we want to install, We put it in the server drive. To create a VM, click on the console in “File” > “New” > “Virtual Machine…”, we will get an assistant to customize the VM. “Following”,

Select “Custom” & “Following”

We select the operating system that we will put in it, If it's not on the list, nothing happens, “Following”,

We give the VM a name and a path where we will store all your information (it must have enough space to store an entire S.O.!) and if it is in a partition other than the System partition, better, “Following”

We can check the “Make this virtual machine private” so that it can only be accessed with my username, “Following”,

We have several options for switching on and off. Since it is assumed that where we install VMware Server will be a server dedicated to VMs, and if we turn off this physical server, you must turn off the VMs inside you, or when the physical server is turned on, the VMs must also be automatically booted, This is where we'll set it up: “On host startup: Power on virtual machine” and “On host shutdown: Power off virtual machine”. “Following”,

The number of processors we want to assign to it…

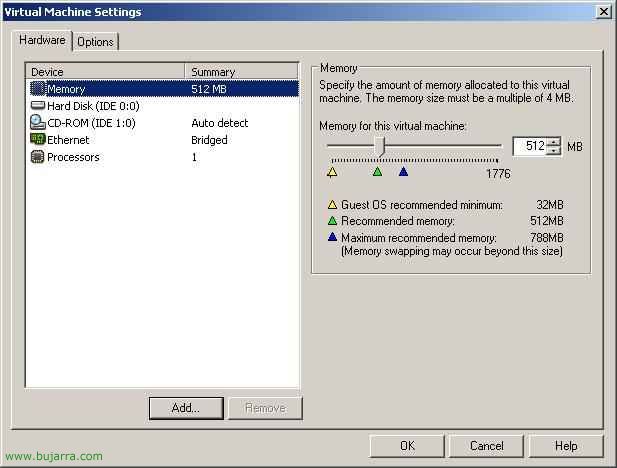
And this would be the RAM that we want to allocate to the VM, depending on the S.O and its functions will be more or less, in the future we will be able to assign more if we are interested (having the VM turned off). “Following”,

It's the type of network connection you'll have, We read the options and mark the one that interests us the most, Normal is usually the first option “Use bridget networking”& “Following”,

Depending on the S.O, we will mark one or the other. For example: “BusLogic” It's for 2000 o NT and “LSI Logic” for XP or 2003, normally if it is an S.O. The latter will be modern.

We create a new album (virtual), it will be a file and on our virtual PC we will be able to format or fiddle with partitions, and our real PC will not be affected at all, since everything is done on the virtual disk which is a simple file. Or we could use the local physical disk, Nothing recommended!!

Select the type of album we are interested in…

We indicate the Gb that we want our virtual disk to have, eye! If we fall short, then it cannot be expanded! It's better to put too much on it, This will not occupy us at the time of our actual physical disk unless we mark “Allocate all disk space now”, if not, what is used will occupy.

We indicate the name of the virtual disk, is a VMDK file, Click on “End” to generate this VM.

This would be the main screen of our MV turned off, We see your virtual hardware, If we click on “Edit virtual machine settings” We will have more options.
In this tab of “Hardware” We can add more devices from “Add…” as floppy disks, More Albums, More Network Cards… or remove any that we are not interested in having.

On the “Options” We have more configuration options, if we do not want our disk to be saturated with automated images of the VM we must disable snapshots…

And by pressing PLAY the MV would start, we can enter its virtual BIOS by pressing F2. And the installation of the S.O would begin. with our CD/DVD or ISO image, or if we already have an OS. installed as normal boot begins.
Install VMware Tools, USB devices, Remote Management,

It's interesting to have VMware tools installed on VMs, to be able to execute scripts for example, to install them, Click on “VM” > “Install VMware Tools…”

To connect USB devices that are physically connected on the server to VMs, we must put ourselves in the VC that interests us, and in “VM” > “Removable Devices” > “USB Devices” > NOMBRE_DEL_DISPOSITIVO.

And if we want to manage a VMware Server remotely, opening the VMware Server Console, It will ask us which host to connect to, we simply dial “Remote host” and we say which, We put the credentials of a user with admin permissions on the machine and go ahead!

This would look like the VMware Server running, whether local or remote, we would see that we have started or stopped MV.
www.bujarra.com – Héctor Herrero – Nh*****@*****ra.com – v 1.0