Virtualize CAG – Citrix Access Gateway on a VMWare VM,

In this article, we'll look at how to mount a CAG on a VMWare VM, How We All Know a CAG – Citrix Access Gateway is a physical appliance, performs the same function as a CSG – Citrix Secure Gateway, but the latter is by software – HERE.

This would be a Citrix Access Gateway – GAG
Well, The first thing is to create a virtual machine where we will put it, To do this, we follow the following steps:

We open VMWare, and we created a new virtual machine, for this, “File” > “New” > “Virtual Machine…”

“Following”
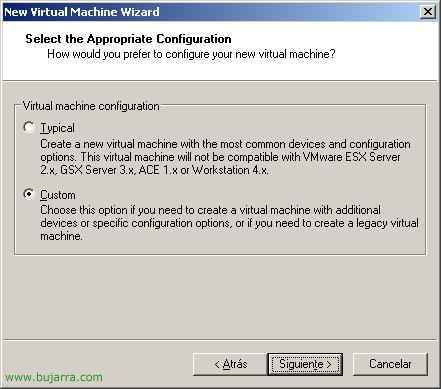
Select “Custom” & “Following”,
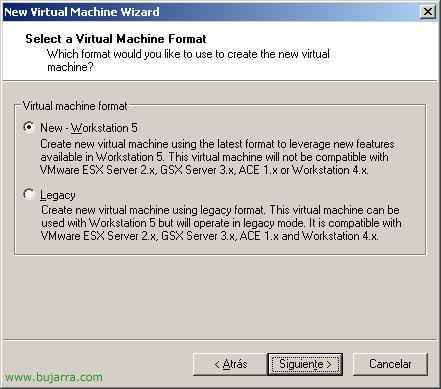
In “Virtual machine fomat” Select “New Workstation 5” & “Following”
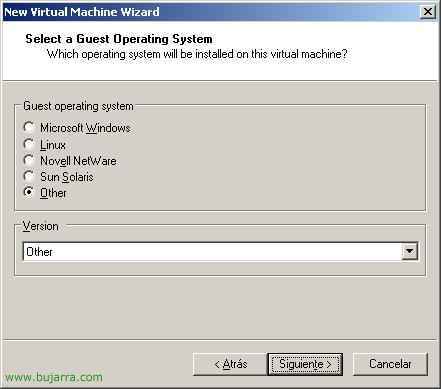
When selecting the operating system, Mark “Other” & “Other”, Continue “Following”,
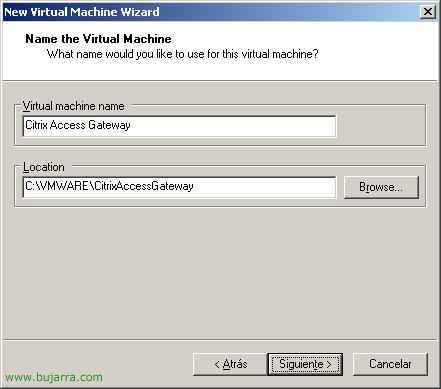
We give the virtual machine a name, For example: “Citrix Access Gateway” and we put a path to save the files, “Following”,

Select the number of processors we want to assign to it, “Following”
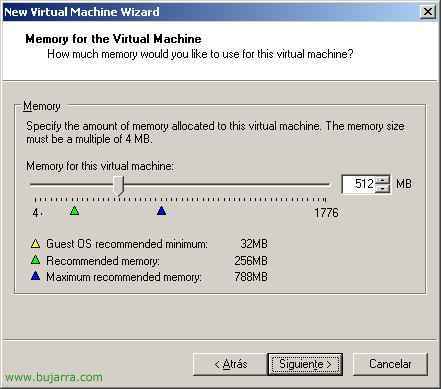
And the amount of RAM we want to allocate to the virtual machine, 512Mb would be enough, “Following”,

In Network Connection Type, Select “Use host-only networking”, “Following”,

Mark “BusLogic”, “Following”,

We create a new album, “Create a new virtual disk” & “Following”,

Select the type of disc, Mark “IDE”,

And we allocate disk space, the GB we think necessary, “Following”

We indicate the name of the album, and we finish “End”

Now, We close the virtual machine, we edit with the Notepad the VMX file that has generated us, it will be in the path where we created the virtual machine.

And we added a new configuration for the network and COM port:
ethernet0.present = “TRUE”
ethernet0.connectionType = “hostonly”
ethernet0.virtualDev = e1000
ethernet1.present = “TRUE”
ethernet1.connectionType = “hostonly”
ethernet1.virtualDev = e1000
serial0.tryNoRxLoss = “TRUE”
serial0.startConnected = “TRUE”
serial0.present = “TRUE”
serial0.fileType = “penis”
serial0.fileName = “.pipevmwaredebug”
serial0.pipe.endPoint = “client”
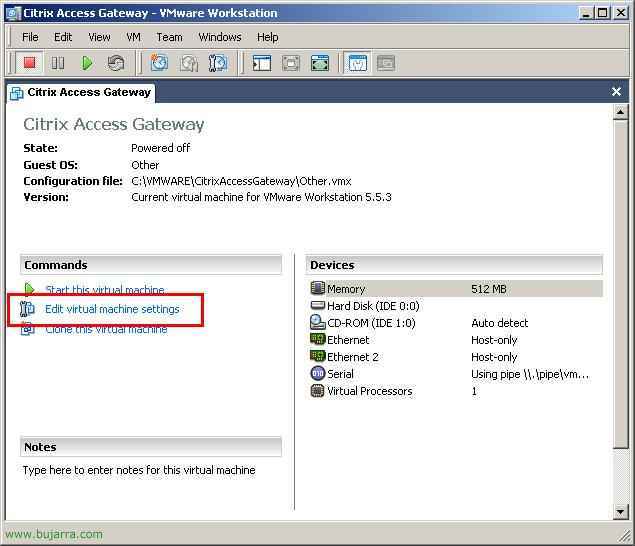
Now, Not bad, We open the virtual machine and edit it, Click on “Edit virtual machine settings”, this is simply to indicate where you will get the CD for installation, if you have it on physical CD you wouldn't have to mount it as in my case that I have an ISO.

What I said, if we have an ISO of the CD is now where we would indicate it, by dialing CD-ROM and on the right in “Use ISO image” We are looking for it.

GOOD, Now we need the tool VMWareGateway.exe we can download it from HERE, We lower it, we decompress it into C: and we execute the command “VMwareGateway /T”, We left the window open… and we continue with the following,

We have to open the Hyper Terminal, for this, since “Beginning” > “Execute” Write Hypertrm and accept.
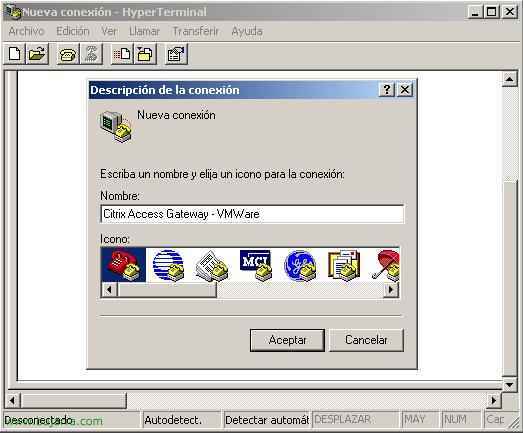
We give any name to the connection and accept,

We connect to ourselves, We put in “Host address” localhost, and we connect to the “Port” 567, “Connect using” “TCP/IP (Winsock)”. And we leave the connection open, we do not close the HyperTerminal.

We will see that our MSDOS screen changes and we see that the telnet connection is accepted…

It's high time to lift our virtual machine to begin installing Citrix Access Gateway on it…

The installation will start from the CD…
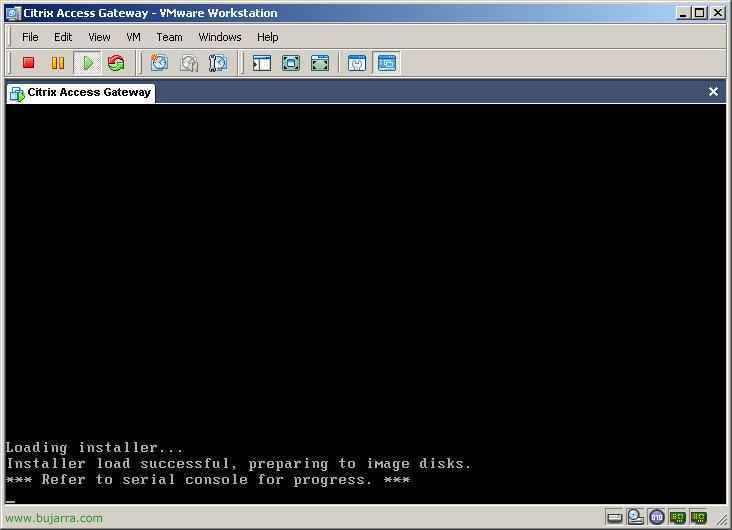
Begin installation on the virtual machine… But for now we'll abandon it, we let it install… Let's go to the HyperTerminal screen,

How we see, here we will see the status of the CAG installation…

It tells us that it will take time 20 minutes to install the Access Gateway, Hope…

Ok, Installation is now complete, Restarting the virtual machine would be enough, We don't have to close this console,

We restart the Citrix Access Gateway VM…

And it will ask us for a login to connect to the CAG server,

To connect, We enter the user in login “root” and password: “rootadmin”, The first thing that would be done for security would be to change the root password by pressing the option 6.

What I'll do now is set up the network for you, for this, first I need to see what IP address your network adapter is assigned to you in the virtual machine, for this, from the virtual machine, “Edit” > “Virtual Network Settings…”

We'll see that in the “Summary” We have several networks, We told you earlier that it is of the Host-only type, So let's see what network configuration it has, We could change it from another tab or from the network adapter “VMware Network Adapter VMnet1”, but for the example I don't care which one he has, we see that my IP range is the 192.168.183.0, Accept.
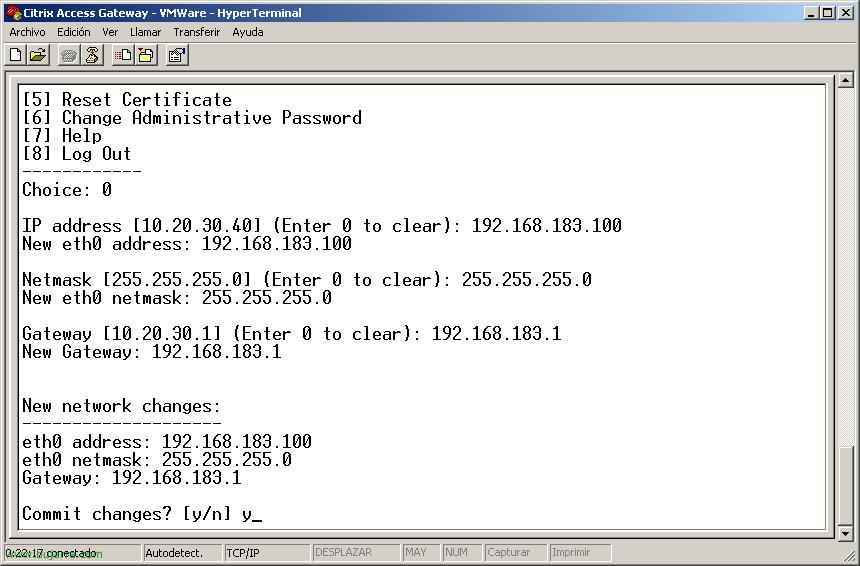
Viewing my network settings, from the HyperTerminal screen, by selecting the 0 I'll set up the network, it will ask me for the IP address, I assign him the 192.168.183.100, with net mask 255.255.255.0 and my gateway which is the 192.168.183.1, To save the changes, click on the “and”.

And from any PC by entering its IP address we can access to configure it, open a browser to the CAG IP with the port 9001 by HTTPS. We accept certificate, “OK”,

And we enter the username and password to access it with administrator privileges (root/rootadmin)

And from here we follow the normal setup process, we would already have our Citrix Access Gateway virtualized.
www.bujarra.com – Héctor Herrero – Nh*****@*****ra.com – v 1.0