Adding a Repository in Veeam Backup & Replication 9.5

We continue with the series of Veeam Backup posts & Replication 9.5! In this document we will see what a Repository is, what types we have and what we can do with them! It will be one of the first decisions, Where do we store our backups??, But before this we have to be clear about our backup policy!
A Repository, as its name suggests, is where our backup will reside, we can have as many as we are interested in and in different locations, We see it.
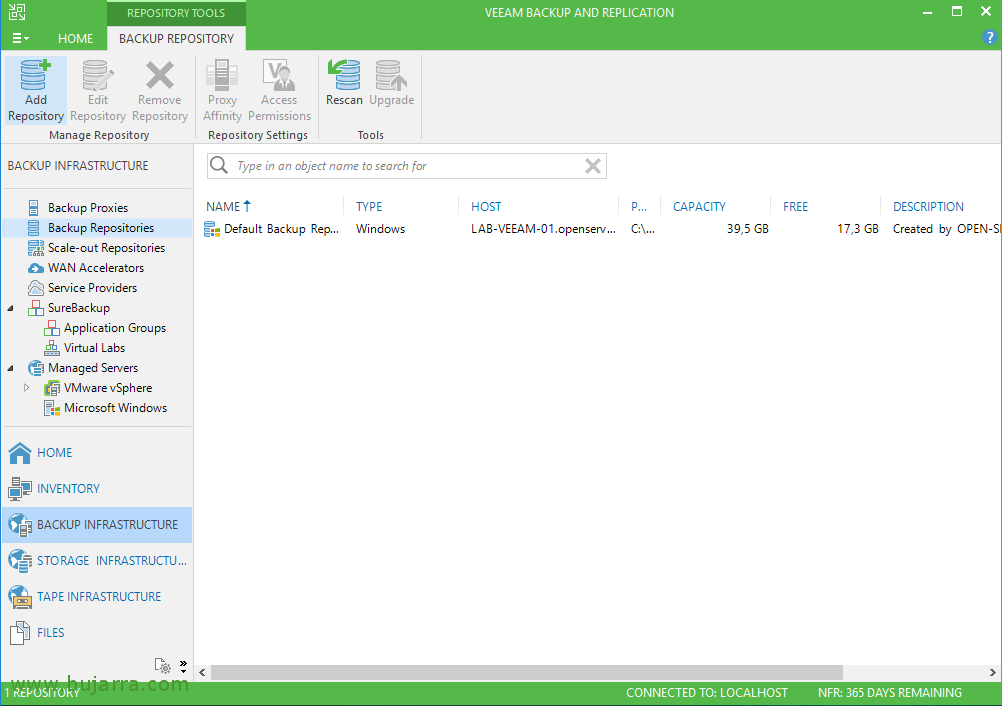
If we go to the menu “Backup Infrastructure”, and we are going to “Backup Repositories” We can start by defining where we will leave the backups, by default it will have already created a Repository if we have not avoided it during installation, So it's normal to start by adding a destination for your copies, Click on “Add Repository”
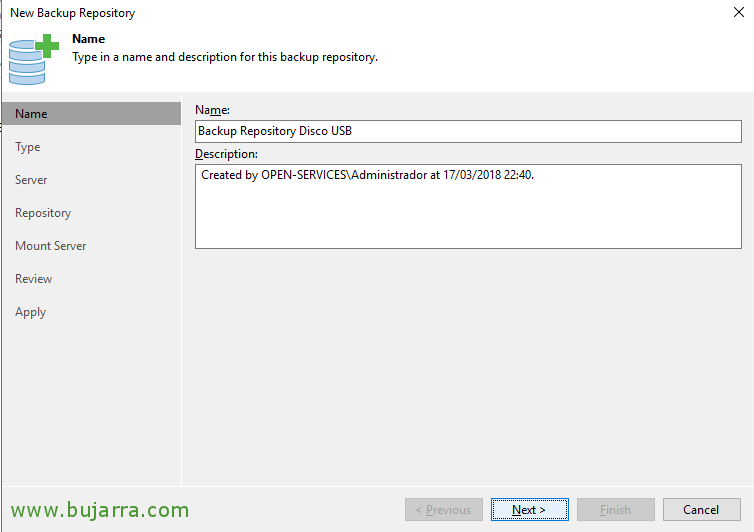
An assistant will open that we must follow to select our option, in this simple example we will use a folder on a USB disk that has this server connected, we give you a name and “Next”,
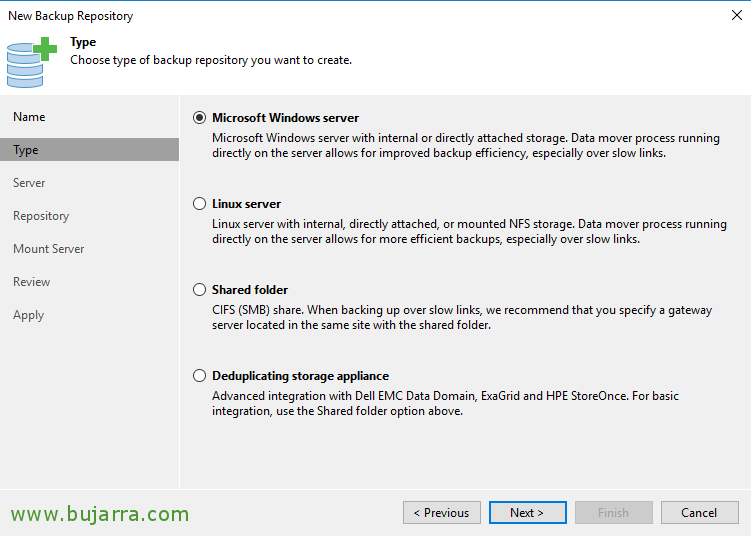
And here's the interesting thing, Where we can store backups? Well, we can on a disk of any computer with S.O. Windows or Linux, in addition to storing them in shared folders with CIFS or in appliances with deduplicated storage (such as Dell EMC Data Domain, ExaGrid or HPE StoreOnce).
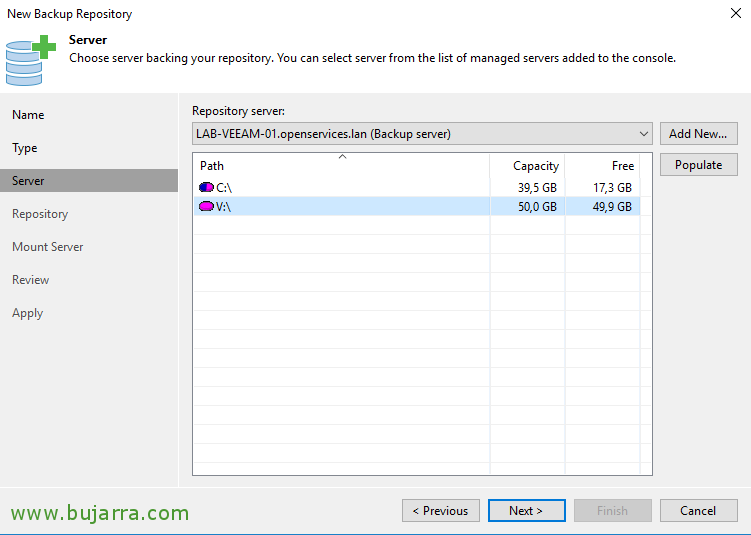
I select the server itself as the destination of the Repository and with “Populate” we will see the units where we can store it, “Next”,
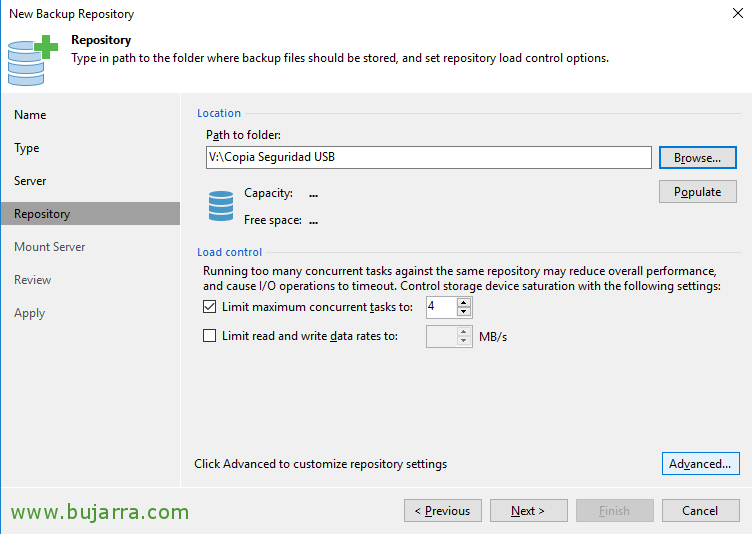
And from “Browse…” we will select the folder where we will store the Repository, we will be able to indicate how many maximum tasks can be executed at the same time in this Repository so as not to saturate it as well as limit the read or write ratio to the MB/s that we are interested in, If we click on “Advanced…”
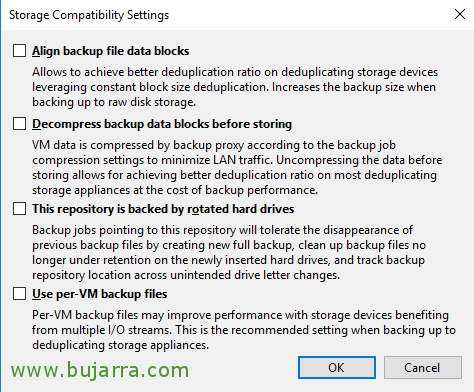
We will have the following options:
- Align backup file data blocks: Enables a better deduplication ratio.
- Decompress backup data blocks before storing: If we want to decompress the backup blocks that arrive before storing them to have a better deduplication ratio, penalizing the copy task in return.
- This repository is backed by rotated hard drives: This option will be interesting to check when using rotating discs, for example typical USB disks.
- Use per-VM backup files: If we want to store the copies separated by virtual machine instead of in a single file.
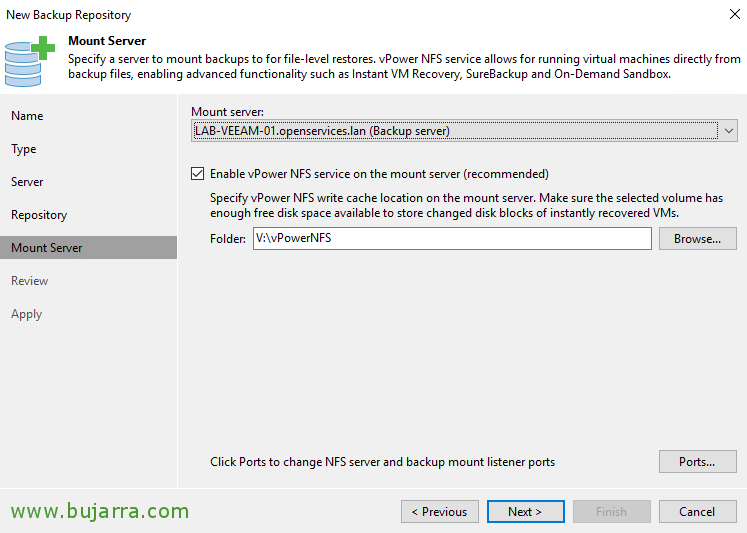
If we continue the wizard, we must select the copy server that will mount this Repository to use file-level recoveries. And if we want, we can enable vPower NFS to be able to lift and run virtual machines from this storage, if you need to immediately put a virtual machine into production from the backup.
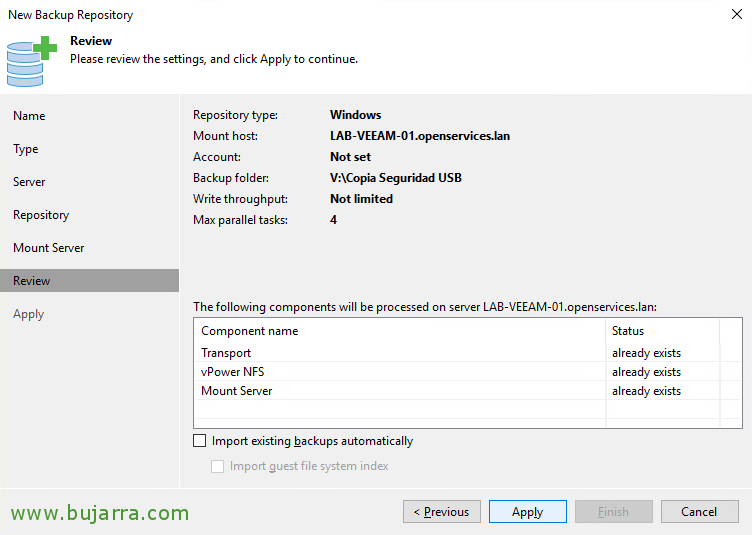
If we review everything, We're ready to create it by clicking “Apply”. Be careful if we have previous backups in that folder and we want them to import them into the Veeam catalog, Press “Import existing backups automatically”.
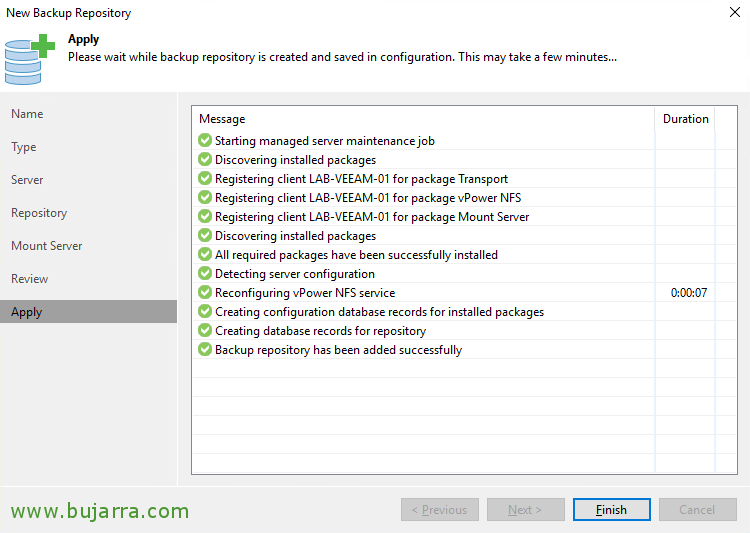
List, Click on “Finish” and we will have the repository created! We already have a place to store our backups! In the next post we will learn how to create backup tasks!