CAG Configuration and Management – Citrix Access Gateway

This procedure explains how to configure a Citrix Access Gateway device that allows us to connect to our VPN using this device. If we don't physically have the hardware, we can create a CAG virtual machine to perform tests, Never for End Use – HERE.
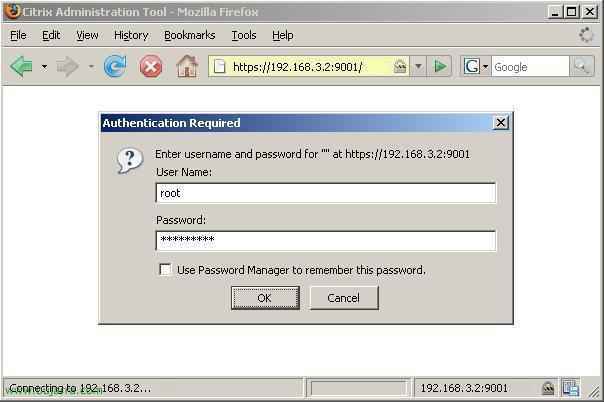
Lo primero de todo una vez instalado es conectarnos al dispositivo con un navegador, si no hemos cambiado su dirección IP, la que trae siempre cómo predeterminada es la 10.20.30.40, entramos y se la cambiamos, suponiendo que eso está configurado, abrimos un navegador a su IP por HTTPS y al puerto 9001. Pedirá usuario y contraseña, si no se la hemos cambiado el usuario por defecto es “root” and the password “rootadmin”.
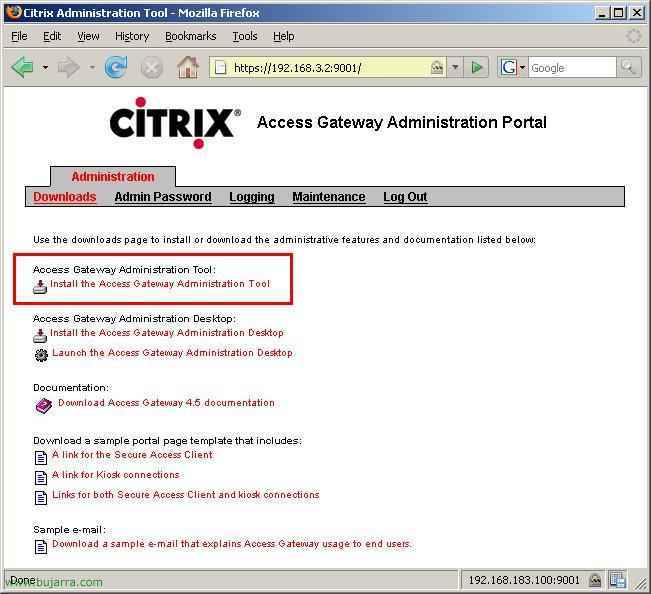
First of all, necesario es instalarnos la consola de administración, si no la tenemos la bajamos pulsando en el link “Install the Access Gateway Administration Tool”. Nos bajamos el instalador y lo ejecutamos para comenzar la instalación.

Comienza con un asistente para instalar el Access Gateway Administration Tool 4.5, “Next”

We accept the license “I accept the terms in the license agreement” & “Next”

Indicamos el usuario y la organización, Continue “Next”,

“Install” to start installing,
…
Tras unos segundos ya lo tenemos instalado, “Finish”,

Now, We run it by clicking on the desktop icon “Access Gateway Administration Tool 4.5”
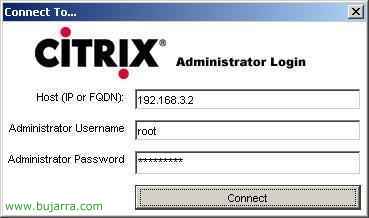
We enter the IP address of the device we will connect to for management, our CAG, the user and the password, Click on “Connect”,
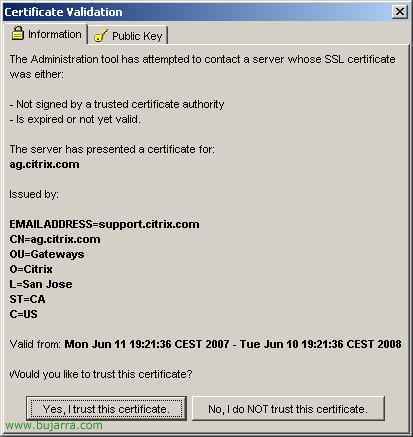
If this is our first connection, it will ask us to trust the certificate, Click on “Yes, I trust this certificate”
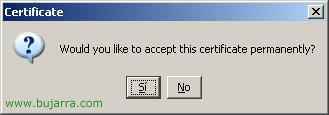
If we want to trust the certificate forever, “Yes”,

From the “Access Gateway Cluster” we have several interesting options to configure it, first inside, we go to the tab of “General Networking”. First we configure the DMZ, we indicate how many we have, if it is a simple configuration, normally we have one DMZ, and we configure the two network interfaces, the ones we are interested in, if we only need one of them, We will mark “Only use interface 0” or if both are of interest to us then “Use both interfaces”. We check that the network configuration is correct (IP address, Subnet mask Default Gateway IP address…) and we specify the name that this CAG will have from the outside on “External FQDN” with the full name.
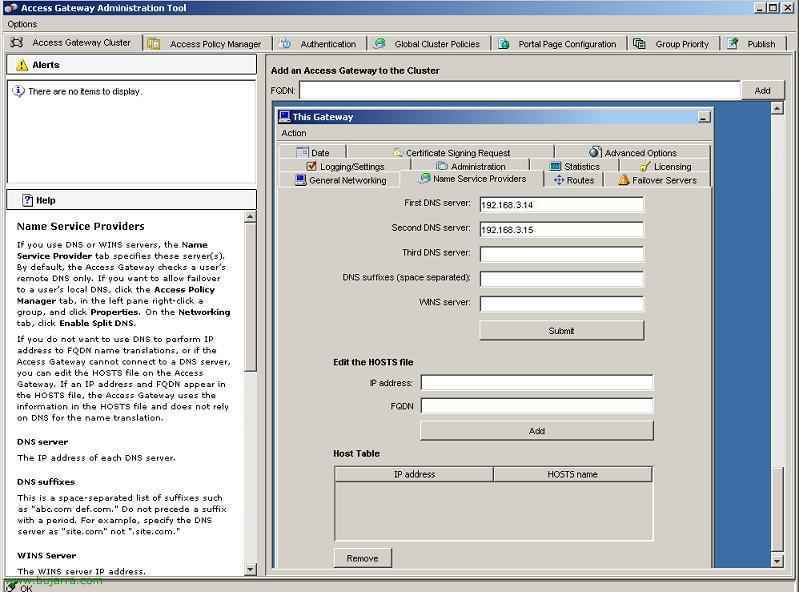
On the “Name Service Providers” we enter the DNS servers that will resolve the DNS names for this device.

The tab for “Licensing” we will use to configure the licenses, if this appliance will be a license server (if it is the first one it will be) We mark the first option “Use this appliance as the license server” and click on “Browse…” to install it, then we will click on “Submit”. If we already have a CAG device as a license server, we can connect to it by selecting the second option “Use a different appliance as the license server”.

To apply the changes it is necessary to restart the CAG, it tells us how to do it. “Accept”.

To restart or turn off the appliance, we go to “Access Gateway Cluster”, in the “Administration”, pulsate “Restart” or “Shutdown”.

It will ask for confirmation and will restart with “Restart”.

GOOD, now we explain how to create local users so that we can connect to the CAG with the VPN. Eye, we do not have to use them, we can use Windows Active Directory and connect to it with RADIUS – HERE, or in more ways. This is the simple, we create some user accounts that we will then give to our end users so they can use them to connect. To create these users, Let's go to the tab “Access Policy Manager” and right-click on “Local Users” Select “New User”.

We indicate the name of the user in “User Name” and assign a password to them, Click on “OK”.
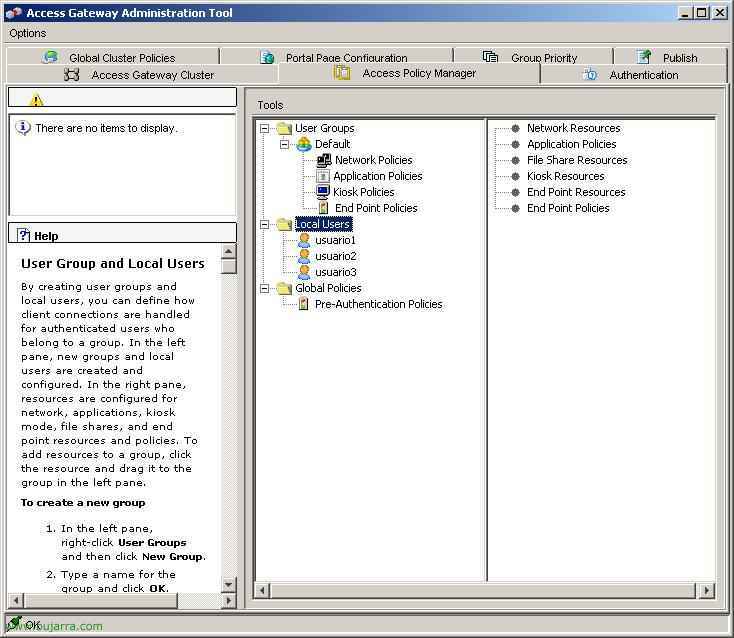
There we can see the user accounts we have, in “Local Users”,

If what we intend is for a user to connect to our VPN with the CAG without all traffic going through our network, we must enable an option called “Split Tunneling”, for example, if you want to browse the internet while connected to the VPN and don't want all internet traffic to go through the VPN. To do this,, Let's go to the tab “Global Cluster Policies” and we enable the check of “Enable split tunneling”. In addition, in “Accessible networks” this is where we will indicate to which network connections they will connect when they log into the CAG, we can enter as many as we are interested in, separated by ; or Enter. Even instead of entering a network, we can enter just a host, and then they would only be able to enter that and not the others on the network. When we finish configuring it, we save the changes with “Submit”.

“OK”

If we want to save a backup of our configuration, we connect with a browser to the CAG via HTTPS and to the port 9001, we authenticate and once inside we click on the tab “Maintenance”, and simply clicking on “Save entire system configuration” > “Save Config.” it will save a file named “config.restore” on our PC. We will store the backup in a safe place, and if we ever need to restore everything, we just need to format the CAG and load this configuration again, since “Upload Server Upgrade or Saved Config.” searching for the file using the button for “Browse…”

If what we want is to request a certificate to be able to work with SSL, and it should be an authentic certificate for our public CAG name, that proves who we are and does not cause issues for users saying we are not trustworthy. From the console of “Access Gateway Administration Tool”, in “Access Gateway Cluster”, on the “Certificate Signing Request”, we fill in the data they indicate to request a certificate and obtain the CSR that we will later send to a certificate issuing entity (AC), To do this, click on “Generate Request”.

It will save the CSR file named “myserver.csr” & “Save”,

“Accept”

If we edit the file with a notepad, we will need the key to request a certificate.

For example, I will now use a free temporary certificate from rapidssl.com, if we fill in all the steps, this is where we must paste the CSR (Certificate signing request).

Once we have the certificate, to input it in the CAG would be from the console of “Access Gateway Administration Tool”, in “Access Gateway Cluster” on the “Administration”, in “Upload a .crt certificate” by clicking on “Browse…” we select it.

We look for it on our PC and click on “Open”.
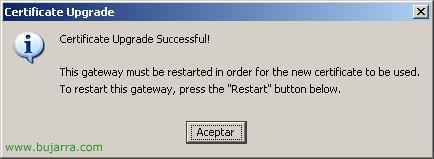
“Accept”, the certificate is now installed.
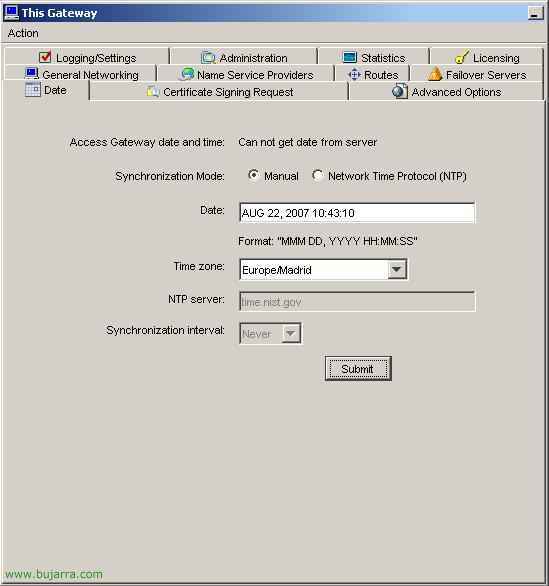
To configure the time and date in the CAG, from the “Access Gateway Administration Tool”, in “Access Gateway Cluster” on the “Date”, we select the synchronization mode to “Manual” unless we have a time server on the network, and we enter the date and time in the field of “Date” with the format specified to us “MMM DD, YYYY HH:MM:SS”, when it looks good, Click on “Submit”.
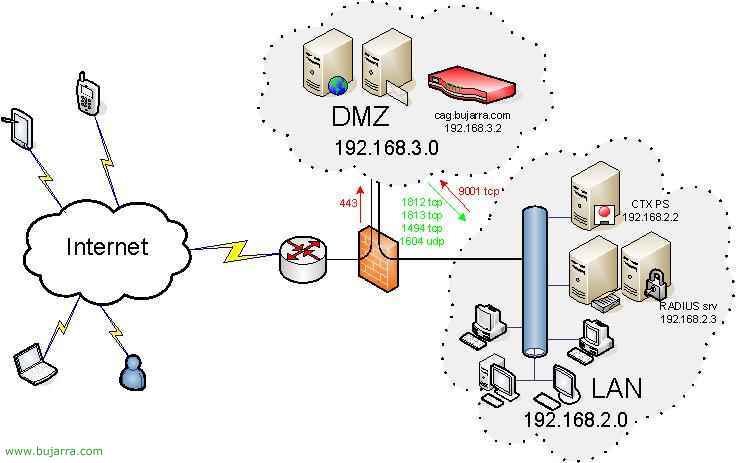
This would be the final CAG configuration in the DMZ:

From the internet FW side, we should only open the port 443 tcp to the CAG so that clients can access to download the client software and connect to the VPN. From the LAN network to the DMZ network, we should only open the port 9001 tcp to the CAG to be able to manage it remotely with the Administration Tools. And from the DMZ network to the LAN network, we should open the ports that we are interested in, if we use RADIUS we will redirect the 1812 tcp and the 1813 tcp to the IAS server. The 1494 TCP (or the 2598 tcp if we use “Session reliability”) to the Citrix server and if we are interested in the 1604 TCP for when from the Citrix client (PN or PNA) we browse to look for the Citrix community.
www.bujarra.com – Héctor Herrero – Nh*****@*****ra.com – v 1.0