Encrypting Hard Drive with Bitlocker on Windows 2008 o Windows Vista
This is one of the new features that Windows Server presents to us 2008 also available on Windows Vista, the possibility of encrypting our hard drive so that it is impossible to remove any type of data, all encrypted. We can store this key on a USB device such as a USB Pendrive or directly on a floppy disk, without this, The computer will not be able to reboot or decrypt the disk. The typical thing for when they boot our computer from a LiveCD of some tool to extract data or break the Windows password. It's ideal for when you go to the USA and your laptop is taken away at customs, he, Even though they definitely ask you for the password or… They take out the rubber glove ;), but in principle it is information that could not be accessed since it is encrypted.
Optionally use a trusted platform module (TPM) for enhanced data protection. However, it can also be used on computers without a compatible TPM module, With this, Volume encryption is offered but not the added security of preboot file integrity validation. Stop that, we will use a USB drive or diskett validating the user's identity at startup. In short:
With TPM we have two ways: One, Only TPM: It would be transparent to the user and does not change the login mode. However, if TPM is missing or has been modified, BitLocker will enter recovery mode and have a password or recovery key to access the data again. And two, with Startup Key: The user will need a login key to log on to the computer. This key can be physical (on a USB flash drive with a readable key on your computer) or personal (A key set x the user).
And without TPM: (which will be the example of this document) it will be through USB flash drive key. The user inserts a USB drive into the computer before activating it, The key to the Pen drive, will unlock the equipment.
Well, Started, to encrypt a disk with BitLocket or BitLocker Drive Encryption, First of all,, is that we have to partition the disk BEFORE installing the operating system, since two partitions are necessary on the disk. The First Partition (System Volume), has the login information in an unencrypted space. The Second Partition (Operating System Volume) It is encrypted and contains user and operating system data to be encrypted. So we need to create these partitions before installing Windows Server 2008 o Windows Vista.
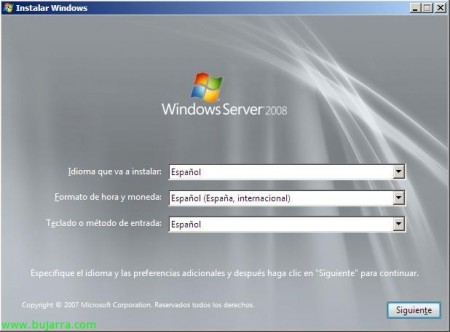
Turn on the computer and insert the Windows CD, We start the installation wizard in it, “Following”,
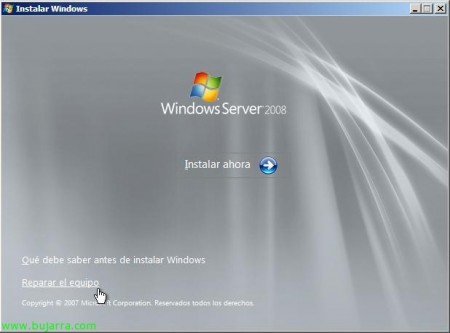
Click on “Repair the equipment”,
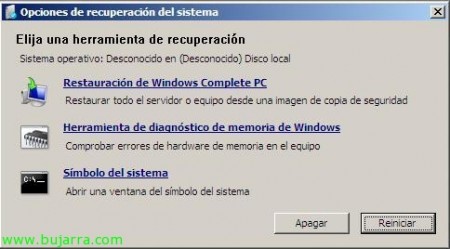
“Following”,
Pressed “Command Prompt” since from the command line we will create both partitions.
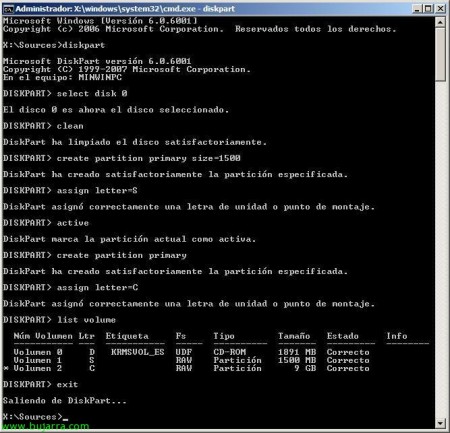
GOOD, We must create the two partitions, the first with a minimum of 1.5Gb and the second with the rest of the space on our disk, since it will be there where Windows is installed and we have our data encrypted. From the DOS console, Run “diskpart” to enter the Microsoft partitioning utility. Select our hard drive to partition, If we only have one, Write “select disk 0” > “Clean” > “create partition primary size=1500” > “assign letter=S” > “active” > “create partition primary” > “assign letter=C” > “list volume”. With this, we create a partition with 1.5Gb needed by BitLocker and create a C partition: where we will install Windows, We checked it and came out with “exit” of the DiskPart,
What we need to do now is to format both partitions with the NTFS format, for this:
“Format C: /y /q /fs:NTFS” and “format s: /y /q /fs:NTFS”
We came out of DOS with “exit”,
Eye, Now we must exit the system recovery options by clicking on the “X” of the window to be able to 😉 continue with the installation of the S.O..
We follow the normal wizard to install our equipment, So we click on “Install Now”,
The partitions that we have created from Diskpart will come out and we select the large partition that will be where we install Windows 2008 o Windows Vista, “Following” and we continue with the entire Windows installation wizard, Once we finish with the installation we will continue with the document.
Ok, once Windows is installed, let's activate BitLocker, but before, we will have to install it, as it is a new feature of Windows, We open the “Server Administrator” and we are going to “Characteristics” > “Add Features”,
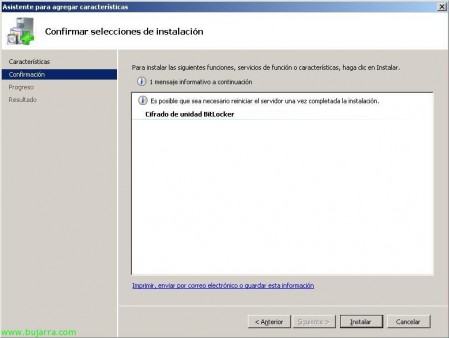
Mark “BitLocker Drive Encryption” & “Following”,
OK, Click on “Install” to install it…
…
GOOD, We must restart the computer for what we have just installed to take effect, So we click on “Close”,
And we restart now or whenever we can,
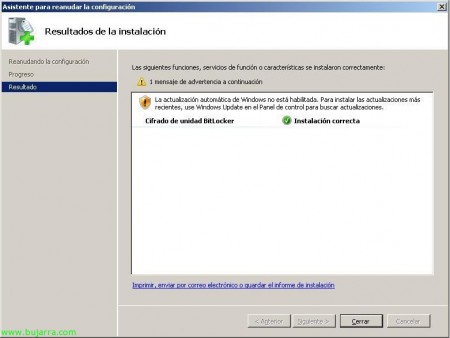
Once rebooted, the BitLocker installation wizard will appear and confirm that the installation was satisfactory. “Close”,
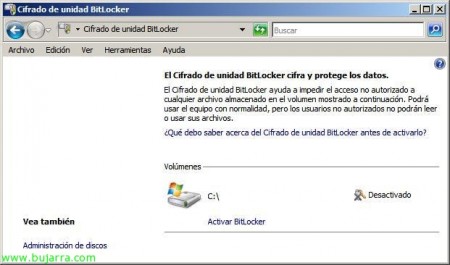
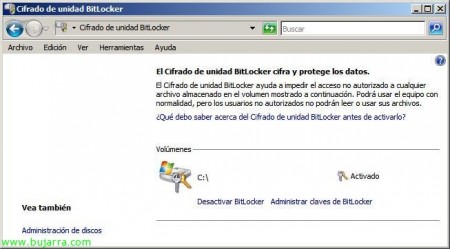
Well, Now it remains to activate it, for this, We're going to the “Panel de Control” and there we will have him in “Safety”, Click on “BitLocker Drive Encryption”,
It tells us that our computer does not have a microchip that supports TPM, so we have no choice but to use key encryption on a USB device or floppy disk. Um.
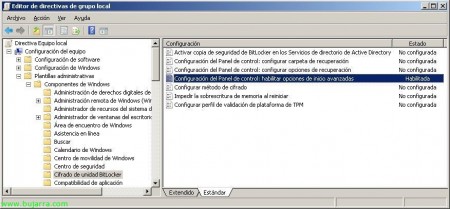
Well, we are going to allow BitLocker to be used without the TPM-compatible chip, We can do this for example by editing the local policy of the computer, for this: “Beginning” > “Execute” > “gpedit.msc” & “Accept”.
We're going to “Equipment Setup” > “Administrative templates” > “Windows Components” > “BitLocker Drive Encryption”. And we modified the directive “Configuring the Control Panel: Enable advanced startup options”.
We enable and mark it “Allow BitLocker without a supported TPM”, as well as in “Configure TPM Startup Key Option” and “Configure TPM Start PIN Option” a “Allow the user to create or skip” whether we are interested or not. Of course, this GPO that we are editing, it could also be modified at the Active Directory level to all the computers in our network.
Once modified, we close the MMCs and update the policies with “gpupdate /force”,
Once ready, If we return to the “Panel de Control” > “BitLocker Drive Encryption” we will already be able to have BitLocker if we activate it from “Enable BitLocker”,
We would click on “Continue with BitLocker Drive Encryption”,
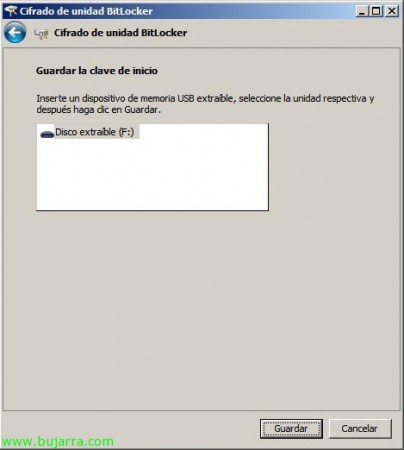
We will store the startup key on a USB device by dialing “Require USB Boot Key on Every Boot”,
We insert a removable USB memory into the computer and press on “Save”,
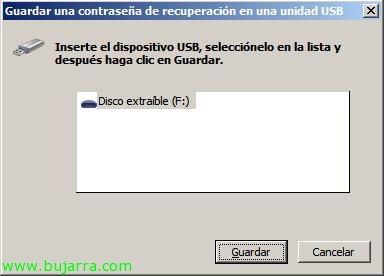
Apart from this, we can save the recovery password on the same USB device, in a network folder or print it directly, This is in case we block the start of the computer. In my case I will score “Save password to a USB drive”,
IDEM than before, introducing the Pendrive & “Save”,
Once saved, click on “Following”,
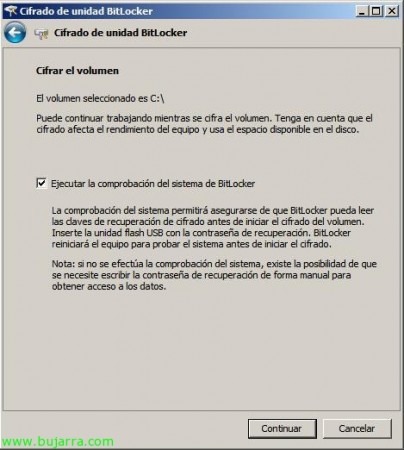
And we could already encrypt the volume or partition of our disk, Marking “Run the BitLocker System Check” & “Continue”. In my case I will not do it through GUI since by the way we see the commands available by DOS.
In this case to save the password instead of a USB device to save it on a floppy disk, So with this script we will activate and start the encryption of our disk by saving the key in a floppy. “cscript C:WindowsSystem32manage-bde.wsf -on C: -Hard Answer -Sk A:” (-on indicates the unit to be encrypted; -rp instructs you to use a numeric key and -sk to indicate the destination of the key),
Once the command is executed, we will have the key on the floppy disk, Now we should write down the recovery password (the one that shows us) out there in case it is necessary in case of loss of the startup key. We will have to restart the computer to run the hardware test,
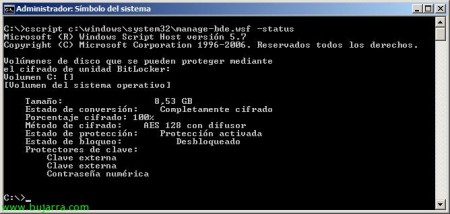
After the computer restarts, If we run the script: “cscript C:WindowsSystem32manage-bde.wsf -status” we will be able to check the status of BitLocker encryption, In this case we see that the disk is not yet encrypted, That goes for the 47%, We give him time to finish…
Ok, ready, AES 128bit encrypted my disk!
We can also check it from the disk manager, will indicate that it is “BitLocker encryption”,
And we can also disable BitLocker if we are interested at any time, from the “Panel de Control” or by command line: “cscript C:WindowsSystem32manage-bde.wsf -protectors -disable C:”
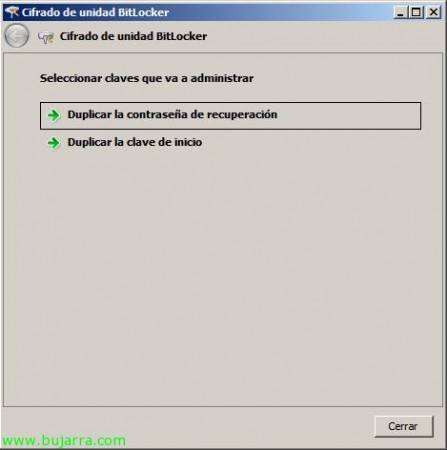
Or we can duplicate both keys, the recovery password or startup key.
Well, Once the disk is encrypted, when it boots we will be able to check how it asks us for the startup key that we will have it or on a USB device or on a floppy disk, We insert it and that's it, We will be able to start.
Ok,
If we look at any Linux distro, it will no longer mount NTFS partitions automatically since it is unreadable to it,
Or if we try to assemble them manually, we will see how it fails (in the example you can see how if you mount disk D: correct, but the C: No, since it is encrypted).
This procedure is fully supported in a virtual machine environment, If we want to encrypt the virtual hard disk of a virtual machine, whether in VMware or XenServer or Hyper-V environments.
Recommended Posts
Post does not have featured image
Post does not have featured image


