Creating and Distributing VMware ACE Packages
Ok, once we are clear about how VMware ACE works, we have a VMware ACE server mounted and we have an instance of a virtual machine created, ready for distribution, and we have configured your policies, In this document, shows how to create packages and how certain policies we've previously configured would affect you. Being able to later distribute these packages to be able to run the virtual machines of it.
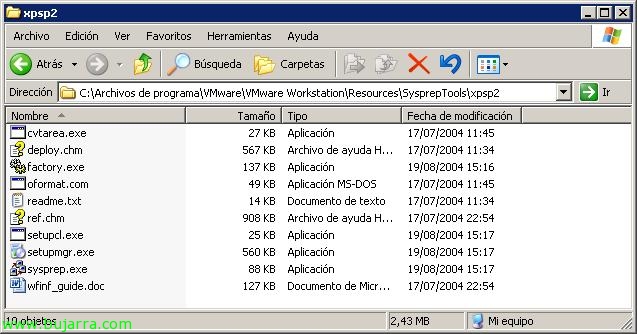
One thing we have to keep in mind, It's just, since we are going to display images of our 'template', we'll need Sysprep if we're going to customize each VM, We will have set it up previously, How it's normal to do it, keep in mind that you have to leave Sysprep (Or good, Also known as Deployment Tools) on the right path, depending on the S.O. of the client virtual machine, by default in “C:Program FilesVMwareVMware WorkstationResourcesSysprepToolsxxxxx” of the machine where we create these packages.
Well, Once we have this ready, we will now be able to generate ACE packages, for this we have two possibilities:
– ACE Package: It will be a package that generates an identical copy of the virtual machine that we are going to distribute plus the VMware Player installer to be able to run it.
– Pocket ACE Package: It will be a package that generates an identical copy of the virtual machine that we are going to distribute plus the executable to be able to run the VMware Player VM for Windows or Linux but basically designed to be executed on mobile devices such as PenDrive drives.
First we will generate a 'normal' package’ since “Create new package”,
We get the wizard to create it, “Next”,
We indicate the name of the package, the location where it will stay and also a note to indicate a description, “Next”,
We can create a complete package “Full” or simply a package with existing policy modifications to be executed where this package is already running “Policy Update”, “Next”,
We can indicate that you believe us in the location we mentioned above, or it will directly create different directories in case we burn it to CD/DVD… being able to modify the size in which we will split the package. “Next”,
We specify the password to be able to activate this instance, if we are interested in that when they turn on the VM it asks them for a password, “Next”,
As well as being able to indicate the Windows user & Your password, “Next”,
We check the summary of the package generation, “Next” to start generating it,
We wait a few minutes while it generates a package for us with this virtual machine, we will be able to observe how the virtual machine will start in order to execute the SID change or the necessary modifications, We wait while you generate this package…
Ok, once generated, We can check the route where you will have left them, This is what we should give to whoever we want to have a copy of the virtual machine that we will have generated. “Finish”.
And from the console itself we will see the packages that are generated from this virtual machine/instance.
If we go to the parcel route, AS USERS, This is, We are the end user, and we are going to use the virtual machine that our IT administrators have prepared for us. We will be able to observe that we have a setup.exe, that will be what we have to install to have the virtual machine running, Wherever we go.
If we start the installation wizard, we verify that it is a VMware ACE package, it will tell us the name we set for the virtual machine, With that we will know if it is the correct package that we have to install or not. “Next”,
Select the package installation path, by default it will be in “C:Documents and SettingsAll UsersProgram DataVMwareVMware ACExxxx” & “Next”,
We indicate that it generates a shortcut on the desktop… “Next”,
Click on “Install” to proceed with the package installation,
… we wait while VMware Player installs us and copies the VM…
Ok, after a few minutes we will have the VM installed and ready to run, “Next”,
Ok, ready, “Finish”,
We check that we have the shortcut and open it.
We get the EULA we indicated above, We accept it,
As we have indicated above, It will ask us for an activation key and we can change or remove it if necessary, “OK”,
…Wait for the VM to boot…
Ok, ready, we would already have the package distributed and prepared for the 'commercial’ Demo with the product inside… we can also see that when starting it would give it an expiration message of the VM,
If we want, we can create a package of the Pocket ACE type to distribute it more comfortably on light USB drives and be able to run the virtual machine without having to install anything where we go. To do this,, Click on “Create Pocket ACE package”,
We get the preparation assistant, We indicate the name of the package, and the path where the package will be created although we can later distribute it to portable units, “Next”,
Select the VMware Player we want to embed, Windows only, Linux 32-bit and/or Linux 64-bit, “Next”,
Enter the password so that it can be asked later when activated., “Next”,
And we also enter a password so that when they want to distribute it to portable/USB devices they can do so with our permission, “Next”,
We set the password for the administrator of our OS. of the virtual machine, “Next”,
We check the package generation summary, “Next” to create it,
… We wait while you generate the package…
“Finish”, now it would be necessary to distribute it to external units.
To do this,, where we have stored this Pocket ACE type package, We will have a 'deploy.exe', we run it to save it on our pen drive,
We can select an external device such as HD, USB or Pendrive., but I won't do it in this case since my pen drive is very small and the VM 😉 does not fit and I will put it in a directory as if it were a pen drive 😉
We must enter the password to distribute this package & “OK”,
… We waited a few minutes…
Ok, Accept, We would have the package ready.
This would be the content, and as we can see, we would not have to install any VMware client to be able to run this virtual machine, how during the wizard I told you it would be for Windows, I believe run.exe
We accept the license agreement upon opening,
And we will already have the VMware Player with its virtual machine inside and all the directives that we have generated on this package,
Same as before, Enter the password to activate the virtual machine,
and wait while the machine is prepared to be run.
Once executed we could work with it!!
If we look at, We could see the instances we have in use or have had of the packages we have generated, this can be seen from VMware Workstation ACE Edition if we connect to the ACE server or, otherwise, from the ACE server web,
Enter the VMware ACE server URL and from “Help Desk” We could see the instances in use, those that are activated or not, being able to modify the policies for them, in addition to seeing interesting data such as who has activated it, From which team, when…


