Installing and configuring Citrix XenDesktop 5

This article that I had pending publication was the new version of Citrix's XenDesktop where you will see the installation and configuration, this is Citrix's quintessential desktop virtualization infrastructure. What's new in this version: New look, Role-based installation (just like Citrix Xenapp 6), IMA disappears, Active Directory Configuration Wizard disappears, New Management Consoles (Desktop Studio and Desktop Director), Dazzle (http://www.bujarra.com/?p=4157), enabling XenClient for connections and desktop synchronization… With this we will be able to provide our users with virtual desktops, in order to have a thin client environment on our network. With the Citrix controller we can manage the connections to the desktops that interest us (Supports up to 15000 MV cada controller), we will be able to connect to virtual machines based on Citrix XenServer, VMware vSphere or physical directly. We will be able to join different technologies for the automatic creation of desktops such as Citrix Provisioning Server or VMware Composer.

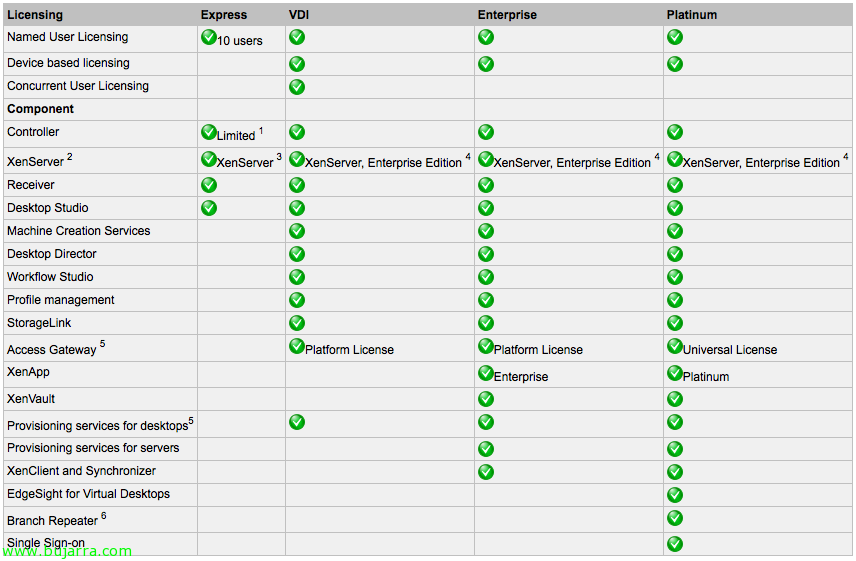
In this graph we can see the different options that each edition of Citrix XenDesktop gives us 5,

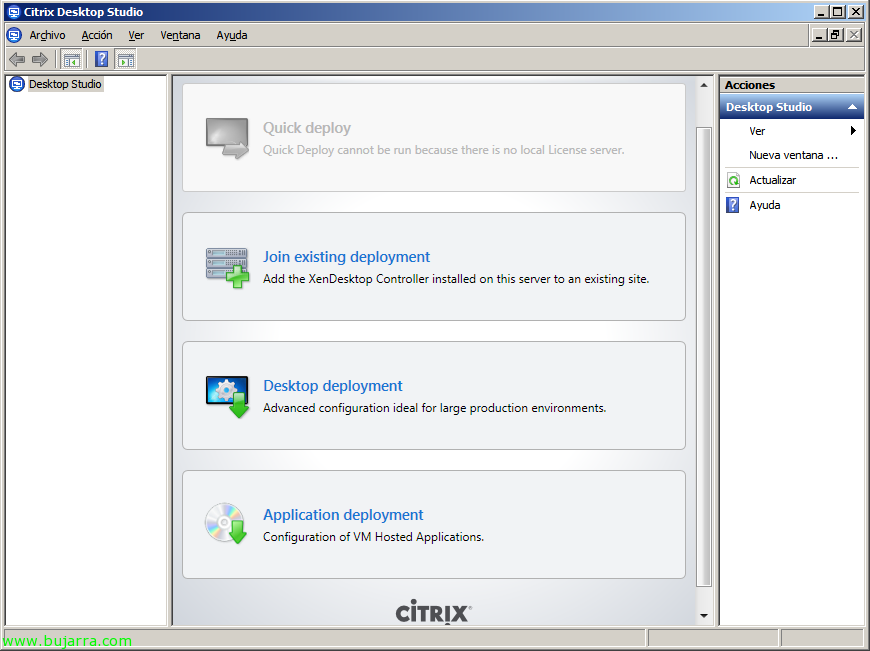
Installation is simple, Click on “Install XenDesktop”,

As we can see, is feature-based, we mark the ones we are interested in installing, In this case I already have a license server on the network, a Web Interface and a SQL Database Server, so we will only install XenDesktop Controller and Desktop Studio consoles & Desktop Director,

It will automatically detect the prerequisites to install or ports to open in the Windows firewall, Pressed “Install” to begin your installation,

…

List, Keep “Configure XenDesktop afer closing” to immediately set up our first community,

If it is the first controller we must first make some configurations from “Desktop deployment” on the Citrix Desktop Studio console

We give the site a name, We enter the name of the license server and verify it, then we indicate our edition and a database server where we will store the database, Click on “Test connection…”

“OK”,

“OK”,

Now we must select a connection to the machines, in my case I will use VMware virtualization and indicate the address of the vCenter server (Learn more about XenDesktop integration with VMware), we will indicate a name to this connection and we will indicate if XenDesktop will be able to create the VM's, “Next”,

We must add where the VM's will be executed and stored, “Add…”

We give the resource a name, We indicate a cluster, the datastores where we will store the new VMs and your customer network, “OK”,

GOOD, We finish the wizard, “Finish”,

We check that we have it correctly configured, Now we need to add the users' desktops,

To do this,, since “Machines” > “Create Catalog”, to deploy users' desktops, we will have to choose the type.

These are the types of machines that we can create:
– Pooled: Pool of automatic machines that does not maintain information at the end of the user's session, We will create the number of virtual machines we are interested in from a 'master' image’ (we will indicate the virtual hardware they will have, automatically create the computer account in the AD and its naming when naming VMs), Users can be assigned manually or dynamically.
– Dedicated: Pool of machines that does maintain information and configurations at the end of the user's session, We will create the number of virtual machines we are interested in from a 'master' image’ (we will indicate the virtual hardware they will have, automatically create the computer account in the AD and its naming when naming VMs), Users can be assigned manually or dynamically.
– Existing: We will indicate existing machines in our virtual network.
– Physical:We will indicate existing physical machines in our network.
– Streamed: We will rely on Citrix Provisioning for the creation of machines by indicating the provisioning server and the collection of machines.

In this example, we'll do something simple by selecting the only two virtual machines in the LAB, two existing Windows XP MVs,

We indicate the MV's and your account,

The administrators, “Next”,

And we indicate a name to the catalog, “Finish”. With this we already have the virtual machines presented in our XenDesktop environment 5 now we must assign them to their end, in this case I will use one of them to be used as such, like a 'desk'’ to one user and the other I will use to distribute applications (VM Hosted Apps).

Well, well, First I will create a desktop group for the IT department > “Assignments” > “Create Desktop Group”.

Select the catalog created previously and how many machines we need, “Next”,

We must assign the users we want to give access to these virtual desktops, “Next”,

Administrators of this desktop group,

And we indicate the name that the desktop group will display. “Finish”.

We will be able to publish applications to users instead of desktops, in the same way that a XenApp server would behave. “Assignments” > “Create Application Desktop Group”.

Select the catalog created previously and how many machines we need to run the applications we need, “Next”,

We will have to assign the users that we want to be able to run these applications,

The administrators of this application group,

And we give the application group a name. Now these computers will only be available when an application requires this desktop group to run.

Well, let's publish an application with XenDesktop, since “Applications” > “Create Application”.

Select the group of application desktops we have, In my case I will publish the 'Calculator’ that is 'installed’ In those MVs, “Next”,

We must select the executable from “Browse…”,

We are looking for “Browse” on the local disk of one of the VMs,

List!

We indicate the users/groups that we want to access the application, “Next”,

Icon and location,

We also configure the advanced features (Access Control, appearance, Content redirection, audio, Resources and encryption). “Next”,

We give the app a name,

We check if everything is correct,

and that's it, Now we try it!

We enter the web interface that we have configured and we validate ourselves,

We see how the 'management’ it runs as if it were a XenApp server (designed for applications that we must run in S.O. customers due to limitations),

And we check that we can also open the desktop!