Exchange Migration 2003 to Exchange 2010
In this document, we'll look at the steps to take when migrating a Microsoft Exchange Server organization 2003 to Microsoft Exchange Server 2010, we will note that in this document we will migrate an Exchange server 2003 with mailboxes, Public Folders, policies and OWA to an Exchange server 2010 With all the roles (Transport Hub, Client Access, Mailbox and Exchange Management Tools). If we want to get an Exchange organization 2010 With the separate functions we can use the document as a guide, since each migration is completely different from the rest.
Anyway, the first thing to recommend is one of the best things Microsoft has done in this life, an Exchange deployment wizard 2010 call “Microsoft Exchange Server Deployment Assistant“. It is a guide that, depending on the options we select, will indicate the steps to follow, we must complete a check indicating what our Exchange organization is like and what we want to achieve.
Exchange servers 2003 must have the Service Pack 2 (SP2) Exchange 2003 installed at least. If we intend to install Exchange 2010 on different servers, Distributing the roles, The order in which the roles are installed should be as follows: 1º Client Access, 2º Transport Hub, 3º Unified Messaging (UM) o Unified Messaging and 4th Mailbox.
Migration steps:
1. We must Change the mode of operation of our Exchange organization, We must have “Native Mode”. To do this,, from the console “Exchange System Administrator” > right click on the ORGANIZATION > On the “General” button “Change the mode”.
2. We must preparing the Active Directory so that you can have a first Exchange server 2010. http://www.bujarra.com/?p=3700.
3. We must Prepare the equipment where we will install Exchange 2010, Depending on the roles to be installed, it will have more or less requirements. http://www.bujarra.com/?p=3698.
4. We must carry out the Microsoft Exchange Installation 2010 (or of the roles in order). After installation of the prerequisites and indicate the language of the installation, we start the Exchange installation 2010 on the server. In the installation wizard I will select “Typical Exchange Server Installation”.
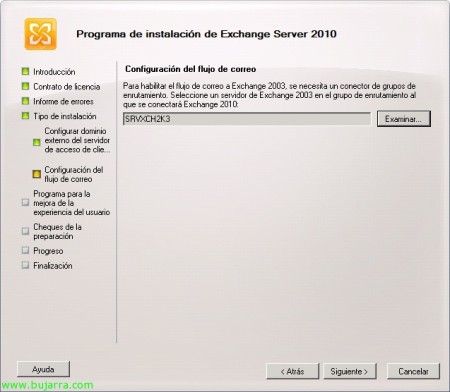
During the wizard before you start the installation, we must indicate an Exchange server 2003 to create a connector against that server. Once installed, Restart.
6. DWe must change who will be the Offline Address Book generation server (Offline Address Book – OAB), This server will be in charge of keeping the notebook updated.
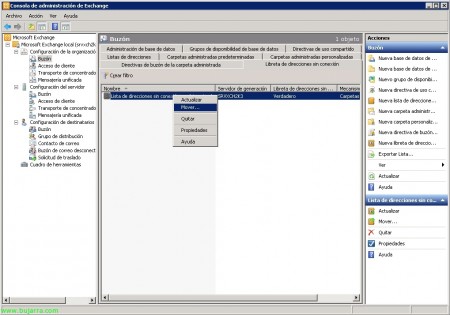
To move the notebook, We open the “Exchange Management Console”, We're going to “Organization Settings” > “Mailbox” > Eyelash “Offline address book” and right-click on the notebooks we have “Move…”,
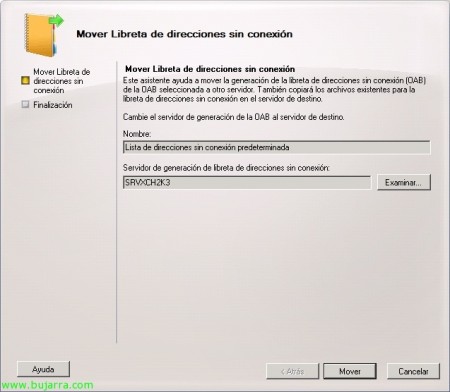
Click on “Examine” to move the notebook generation from one server to another.
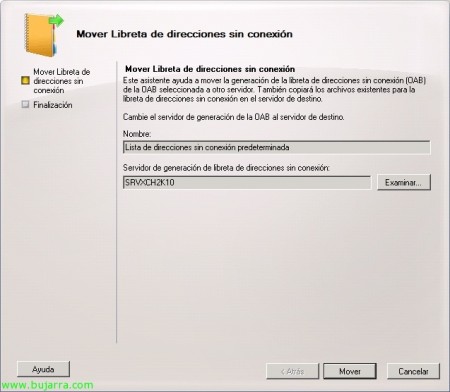
We select the new Exchange server 2010. “Accept”,
Click on “Move” to move the function,
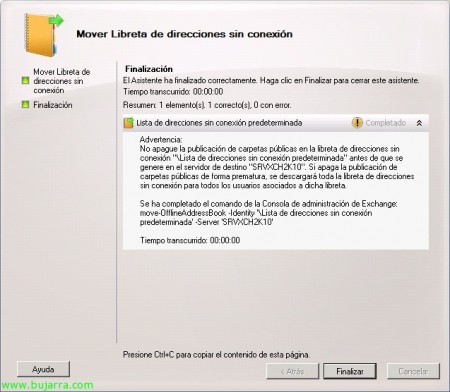
And that's it, Click on “End”. We can see that through the PowerShell if we run: move-OfflineAddressBook -Identity' DEFAULT OFFLINE ADDRESS LIST’ -Server 'SERVIDOR_DESTINO’.
7. Create a shipping connector. We have to create such a connector to allow the egress of the emails from this server, We will need to create and configure a connector (or connectors) how we have it on the Exchange server 2003 of our organization, either direct sending to the Internet or a personalized connector through a Smart Host.
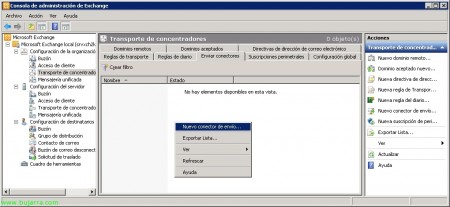
To do this,, We open the “Exchange Management Console”, We're going to “Organization Settings” > “Concentrator transport” > Eyelash “Send connectors”. Right Button “New Shipping Connector…”,
We give the connector a name and define the type of connector, In my case it is a simple connector that is simply to be able to send emails directly through my network settings, by my gateway… “Following”,
Click on “Add…” To create an address space, how I want it to be for all recipient domains in “Address” orangutan “*” and weight/priority/cost “1”. We accept and follow the assistant,
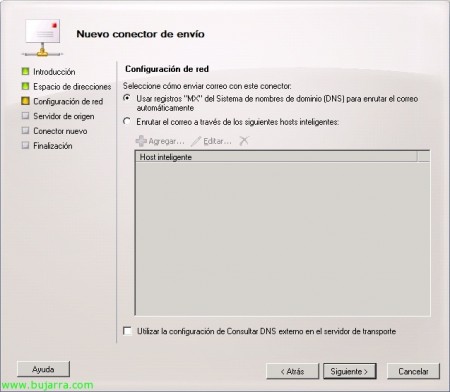
In my case, it should come out directly through the MX records that I resolve from the DNS, So the first option, If we want to route the mail through another smart host then we would check the second option. “Following”,
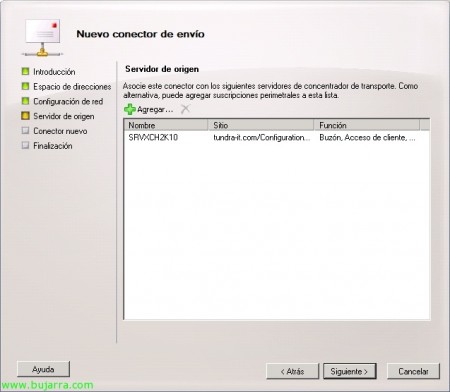
“Following”, unless we have more servers and we want them to send through this connector.
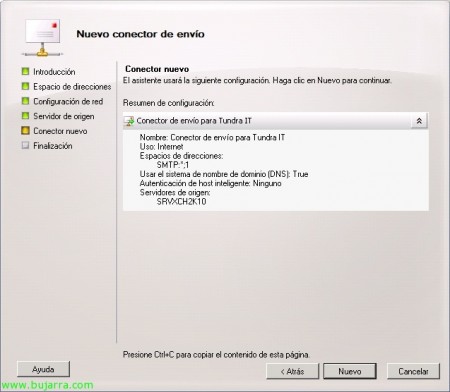
We confirm that it is correct and press “New” to create such a connector.
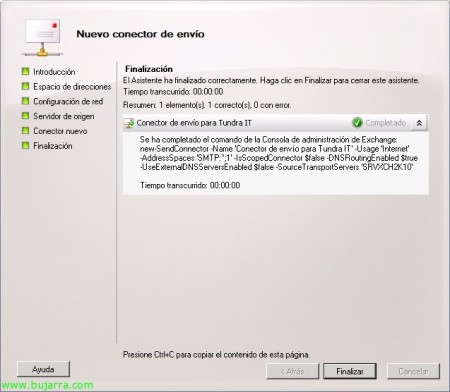
“End”. Like all attendees, it gives us the possibility to copy the command and run it in PowerShell for the next time or to make our own scripts. Command: new-SendConnector -Name 'NOMBRE_CONECTOR’ -Usage'TIPO_CONECTOR’ -AddressSpaces 'SMTP,DOMAIN,WEIGHT’ -IsScopedConnector $true/$false -DNSRoutingEnabled $true/$false -UseExternalDNSServersEnabled $true/$false -SourceTransportServers 'NOMBRE_SERVIDOR'.
8. Migrate user mailboxes. Now it's time to start migrating user mailboxes. Be careful, if we want before this, we can move the existing database on the Exchange server 2010 to the correct location in addition to renaming it or creating more mailbox stores.
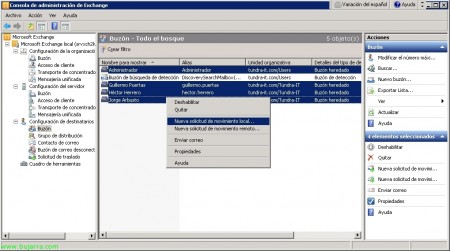
To move users' mailboxes, Let's go to the “Exchange Management Console”, We're going to “Recipient settings” and on right-click user mailboxes “New Local Move Request…”
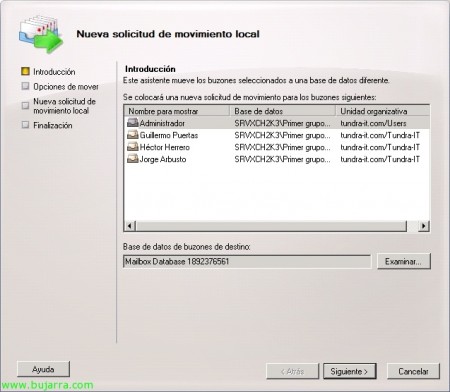
We must select a database of destination mailboxes from “Examine” to locate users' mailboxes, “Following”,
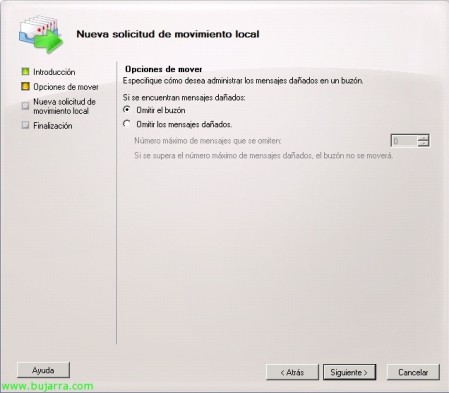
If any mailboxes are damaged (or some element of it) We may skip the mailbox movement or ignore its corrupted messages. “Following”,
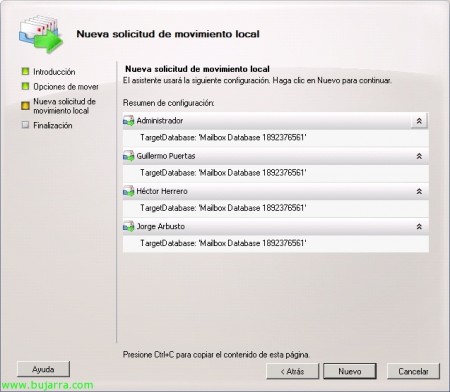
Mailbox Movement Overview, Click on “New” to move them,
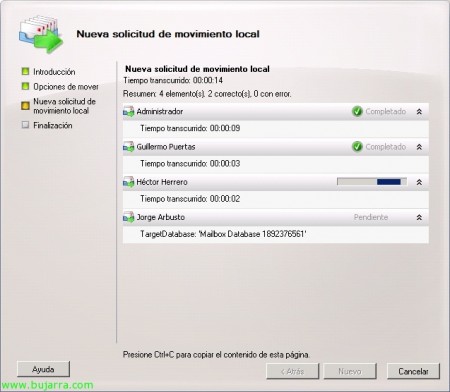
… Depending on the size of the mailboxes this could take several hours…
“End”, Ok, With this we also have the mailboxes of the users moved to the new server.
9. Migrate public folders (If we have them, Of course). To move public folders between different Exchange servers, we have to enable replication on them to replicate them to the new server and once replicated, delete that replica. Eye! It's also a good time to move public folders before replicating them, to place them on a correct disk or partition… We have several options to move public folders, two through consoles (one more manual and one more automatic option) or directly with the PowerShell, We see all three options:
To do this,, We have to open the “Exchange Management Console”, We're going to “Toolbox” and we opened the “Public card management console”. Once on that console, We have the option to replicate the folders one by one, it is the recommended option but the slowest, since we have to do this process for each public folder we have. About each of the public caprtas > Right Button “Properties”,
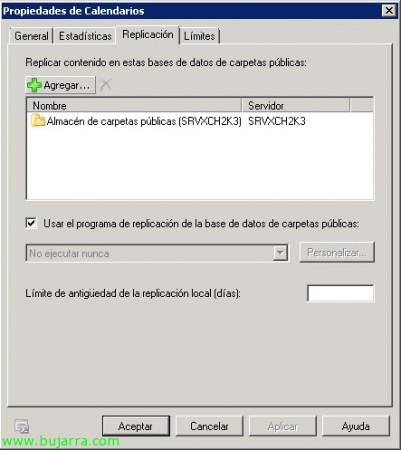
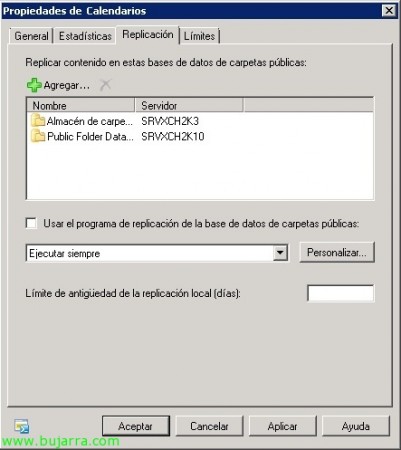
On the “Replication”, we must add the server to which we want to move the folders from “Add…”
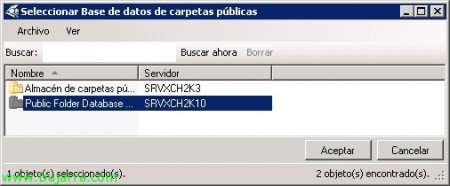
We select the server with Exchange 2010 & “Accept”,
We check that both servers are there, We uncheck the option “Using the Public Folder Database Replication Program” to indicate that the replication is always made “Always run”. Once the contents of the folders are replicated, We will come back here, we will select the Exchange server 2003 and we'll remove it from the reply.
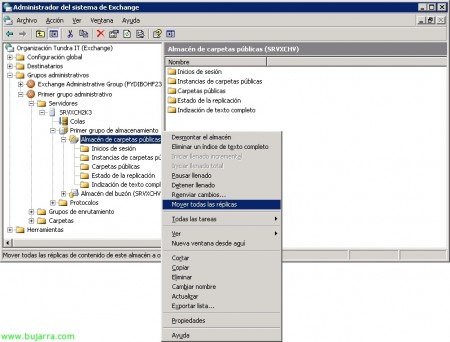
Another way to move folders, this time together, it is for example from the console “Exchange System Administrator” of the 2003, “Administrative Groups” > GRUPO_ADMINISTRATIVO > “Servers” > SERVIDOR_2003 > GRUPO_ALMACENAMIENTO > right-click in the public folder store “Move all replicas”,
We would select the server to take the replicas to and accept. What I said, Depending on the volume of data they have, it will take more or less.
To know the content of the replicas, it has been made, we will be able to check it from the console itself. “Exchange System Administrator” of the 2003, “Administrative Groups” > GRUPO_ADMINISTRATIVO > “Servers” > SERVIDOR_2003 > GRUPO_ALMACENAMIENTO > ALMACEN_CARPETAS_PUBLICAS > “Public folder snapshots”, the folder must be completely empty.
To view the status of replicas, we will be able to check it from the Exchange PowerShell 2010, Running: ‘Get-PublicFolder -recurse | Format-List Name,Replica‘. To view the list of public folders in the system: ‘Get-PublicFolder NON_IPM_SUBTREE -recurse | Format-List Name,Replica‘. And if we want to move the folders using PowerShell we can use the MoveAllReplicas.ps1 script in the “%ProgramFiles%MicrosoftExchange ServerScripts”, Running: ‘MoveAllReplicas.ps1 -Server SERVIDOR_ORIGEN -NewServer SERVIDOR_DESTINO‘. And simply to check if we have any public folders left to move, We can run: 'Get-PublicFolderStatistics -Server SERVER’ and check for any public folders left on the Exchange server 2003 To remove.
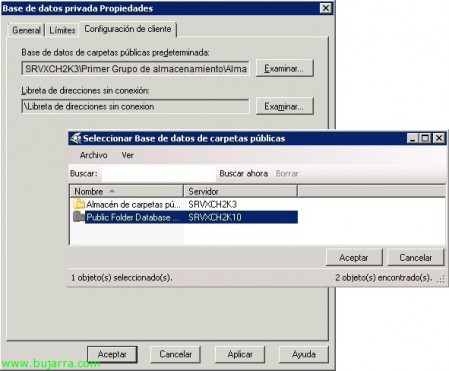
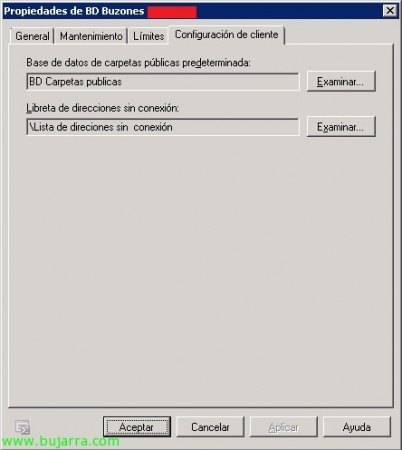
And we must indicate in each database we have mailboxes, what your default public folder database is. All this from the “Exchange Management Console” of 2010 > “Server Configuration” > “Mailbox” > Right-click on the private database “Properties” > Eyelash “Client Settings”, and we must click on “Examine” to indicate the default public folder database. “Accept”.
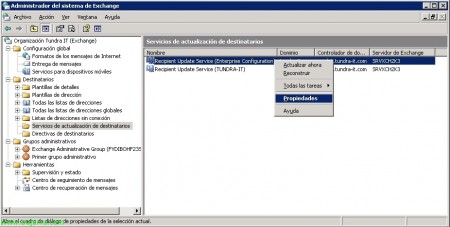
10. We must change servers with the recipient update feature. We'll do it from the “Exchange System Administrator”,
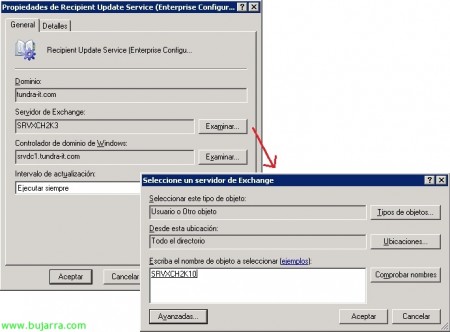
We need to change which server is the RUS or Recipient Update Service for our organization, to do this we open the "Exchange System Manager" console, let's go to "Destinatatios" > "Recipient Update Services" and in each container with right button > "Properties",
In “Exchange Server” Pressed “Examine” and select the new Exchange server 2010. We'll perform this task on each recipient update service.
11. Update the default address lists LDAP filters (used in Exchange 2003) to OPATH filters (Used in Exchange 2010).
We must run the following commands in PowerShell to update the address lists to use the OPATH filtering syntax and no longer use LDAP-based filtering.
Set-AddressList “All users” -IncludedRecipients MailboxUsers
Set-AddressList “All Groups” -IncludedRecipients MailGroups
Set-AddressList “All contacts” -IncludedRecipients MailContacts
Set-AddressList “Public folders” -RecipientFilter { RecipientType -eq 'PublicFolder’ }
Set-GlobalAddressList “Default global address list” -RecipientFilter {(Alias -ne $null -and (ObjectClass -eq 'user’ -or ObjectClass -eq 'contact’ -or ObjectClass -eq 'msExchSystemMailbox’ -or ObjectClass -eq 'msExchDynamicDistributionList’ -or ObjectClass -eq 'group’ -or ObjectClass -eq 'publicFolder'))}
Note, Depending on the language of our installation we will change: “All users” by “All Users”, “All Groups” by “All Groups”, “All contacts” by “All Contacts”, “Public folders” by “PublicFolders” and “Default global address list” by “Default Global Address List”.
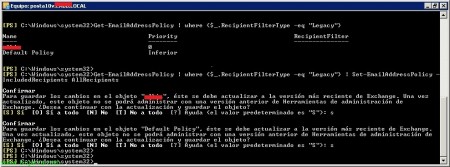
12. Update recipient policies. Later we will update the policies that we have defined for our recipients.
With 'Get-EmailAddressPolicy | where {$_. RecipientFilterType -eq “Legacy”}’ We will observe the recipient policies that we have defined in our environment, and with 'Get-EmailAddressPolicy | where {$_. RecipientFilterType -eq “Legacy”} | Set-EmailAddressPolicy -IncludedRecipients AllRecipients’ We'll update all policies.
13. Select public folders and offline address book, from the Exchange Management Console, “Organization Settings” > “Mailbox” > “Database Administration”, in each database that we have with right click > “Properties”.
On the “Client Settings”, Select the database of public folders we have (in Exchange 2010) and offline address book.
14. Elimination of connectors. We must remove the connectors associated with the Exchange server 2003 to disappear.
We need to remove the connectors that associate with the Exchange server 2003 with Exchange 2010. From any console or PowerShell.
15. Uninstalling Exchange. We must uninstall the server(s) running Exchange now 2003 who no longer have a role in our organization. http://www.bujarra.com/?p=982.


