Migrate vCenter Server to vCenter Server Appliance 6.5

When migrating to VMware vSphere 6.5, we have the possibility to decide if we want to continue with vCenter Server installed under a Windows Server, or leverage and migrate to Linux with the vCenter Server Appliance. In this document we will see the advantages and how to proceed!
If we have a vCenter 5.5 or 6.0 we can proceed to migrate to vCSA, being therefore the first element that we will migrate to the version 6.5, are servers with embedded or external databases. vCSA 6.5 finally comes with integrated VMware Update Manager or VUM, so if we also have an older version of Update Manager it will migrate it! And if we don't have it set up, It's a good time to think about whether we need it to automate host or virtual machine updates.
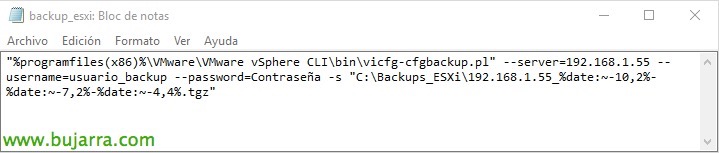
Also, vCenter Server Appliance 6.5 It is designed to work in a high-availability cluster, being able to easily mount an asset/liability and always have the service up. And finally and also very interesting, we will be able to make backups and restores of the vCenter configuration, In the event of a disaster, so simple it will be to deploy a new OVA and in the installation wizard load this restore; we will be able to program them and make copies via HTTP(s), FTP(s) o SCP!

If we have a server with all the roles (PSC + vCenter Server) we will run the Migration Assistant first, Before you start migrating. If we have the roles separately, first, we will run the Migration Assistant on the PSCs and finally on the vCenter Server. And that's it, we can start deploying our vCenter Server Appliance by obtaining the configuration of these servers.
After the migration, the new appliance will be exactly the same as the vCenter server under Windows, will maintain the same vCenter Server instance, The name, the IP address, UUID and certificates, but with the new version 6.5!
KB Important Before Upgrading to vSphere 6.5: https://kb.vmware.com/kb/2147548

GOOD, Started, As we said, first, We will run the migration wizard from our current platform, In this scenario, I have a vCenter Server with PSC on the same computer. We copy the folder “migration-assistant” from the vCenter ISO to the Windows server, and we execute “VMware-Migration-Assistant.exe”.

It will ask us for the credentials of Ad***********@*****re.local To proceed, to later validate the configuration and verify that we will be able to migrate, We will see that during the migration process in this window status information appears, for now it will wait for the vCSA installation to connect 6.5, Once all the information is migrated, This Windows Server will shut us down.

Now, from another machine other than the one we are migrating, could be any other Windows, Mac or Linux, we will be able to start deploying a vCenter Server Appliance 6.5 with VMware ISO. This installer will allow us to make a new installation of a vCSA, an Upgrade in case you want to upgrade under Windows, An option to restore from backup settings, and the one that concerns us, that of Migrar.
We will boot the installer from the ISO, in “\vcsa-ui-installerwin32installer.exe” in case of Windows.

A migration wizard will open for us, where it already tells us that a vCenter will migrate to us 5.5 or 6.0, a vCenter SSO 5.5 or a PSC 6.0 to the version 6.5, Click on “Next”,

We accept the terms of the agreement & “Next”,

We must indicate the name of the source server, be the vCenter, vCenter SSO, or the PSC we want to migrate. Previously we must have started the migration assistant, eh! Enter the FQDN of the server, The default port of the wizard will be the 9123, we indicate the SSO user with privileges, normally Ad***********@*****re.local and your complex password, “Next”,
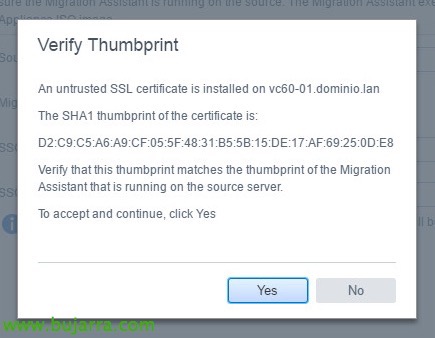
Click on “Yes” to trust the certificate,

We indicate the IP address or FQDN of an ESXi server or vCenter Server where we will deploy in the new vCenter appliance that we are going to deploy, We indicate the port, the username and password, “Next”,

Click again on “Yes” to trust the certificate,

We indicate the name of the new machine that will generate us (at the VMware level, No OS), in addition to the password for the root user.

We select the size for the implementation, we choose the one that best suits our needs and we continue.

Select the datastore where we will store the vCenter Server appliance, and we will also select whether we want thin or thick disk.

We now indicate a temporary IP address, will be used to power on the appliance and begin importing data, later it will release this address, if we have DHCP it would be enough as long as we have visualization with the current vC.

We confirm that everything is correct and click on “Finish” to get started with the migration!

GOOD, We wait for the process to finish, the appliance must be deployed to us with the temporary data, It will take a few minutes,

Once the new appliance is deployed, we will be able to continue with the Paso 2 of the deployment process, Click on “Continue”,

This step will allow us to migrate a vCenter Server instance, Continue “Next”,

The wizard tells us that the source vCenter was joined to an Active Directory domain, so we will have to come back together, we indicate a privileged user to join the AD again.

We select the data we want to migrate, if only the configuration, or also the events & The tasks, or if also the performance metrics.

We select whether we want to join the Customer Experience Improvement Program, “Next”,

We confirm the data, If everything is correct, click on finish, In addition, we will indicate that we have backed up the source vCenter and its database.

It reminds us that it will turn off the source vCenter once the network is enabled in the destination vCenter, “OK”,

We wait while you copy the data…

And after a nice while, the migration will have ended, both version and Windows upgrade to Linux!

We will be able to enter the new vSphere Web Client environment, and to see that we are starting to like this web environment much more! Once we have successfully migrated the vCenter server, we will have to migrate the ESXi hosts! I hope you have been interested!