Other – Basic Configurations 2/2

Well, I leave you here what I promised, a second delivery with base configurations that would have to be carried out in an OTRS installation, In this part, we'll look at how to set up reports and visualize your data, as well as conducting satisfaction surveys to our Customers, we'll customize the OTRS input interface and we'll see a few more things! In future documents we will delve into the ITSM part for all issues of internal processes or inventories, o Nagios integration…
We continue where we left off!!!
Surveys,

One of the interesting free utilities we'll look at for now is the use of surveys, in other documents we will see other types of more complex and interesting apps such as the integration with Nagios for the self-management of equipment incidents. But what has been said, Let's go with something that follows the thread of this document, after managing the tickets of our dear customers, we may automatically send a satisfaction survey to find out your opinion on the resolution of the Ticket, and then we will be able to know the individual or global result of satisfaction.
To do this,, First we must install the customer survey tool, We're going to “Admin” > “System administration” > “Package Manager” > “Update repository information” and the 'Survey' application will be released among several. select it and click on "Install".
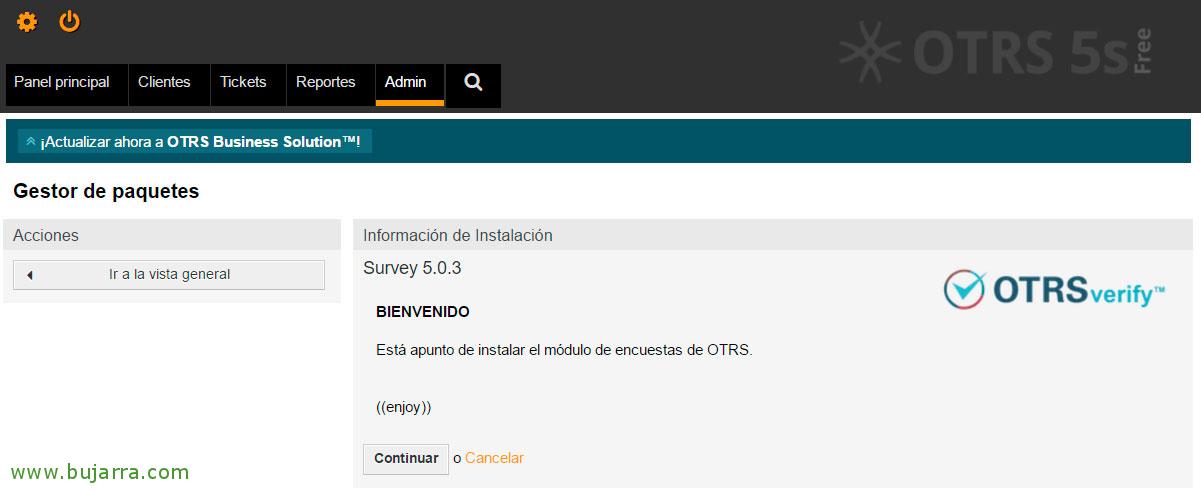
Tells us the version of Survey, at the time of this document it would be the 5.0.3, Click on “Continue” to begin your installation,
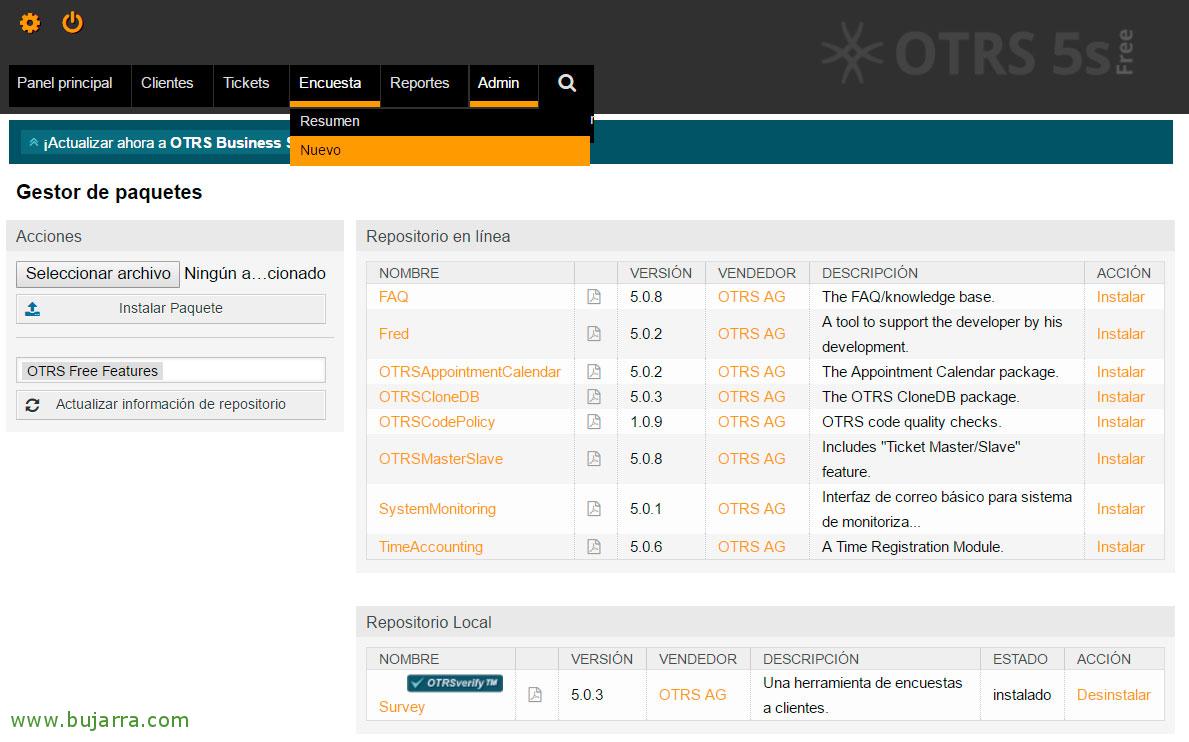
We confirm in the Local Repository that we already have the app installed! GOOD, now the next thing will be to create a Survey, to do this from the top menu “Survey” > “New”.

And we fill in the following data to register a new Survey, I leave you with an example:
Title: Ticket Closure Satisfaction Survey
Introduction: Survey to score the quality of service obtained on this occasion.
Sender: We indicate the original email address for sending this Survey.
Affair: Your opinion matters to us!
Body:
Hello,
How we have closed a ticket in the Open Services IT support system, If you like., with the mere fact of improving our quality of service and attention, We ask you to please rate us the assistance received!
<OTRS_CONFIG_HttpType>://<OTRS_CONFIG_FQDN>/<OTRS_CONFIG_ScriptAlias>public.pl?Action=PublicSurvey;PublicSurveyKey=
Thank you for trusting us,
Queues: Add it to queues that we want to associate with that survey, so that closed tickets can use it.
Internal Description: Give it an internal description =)
We record with “Create”,
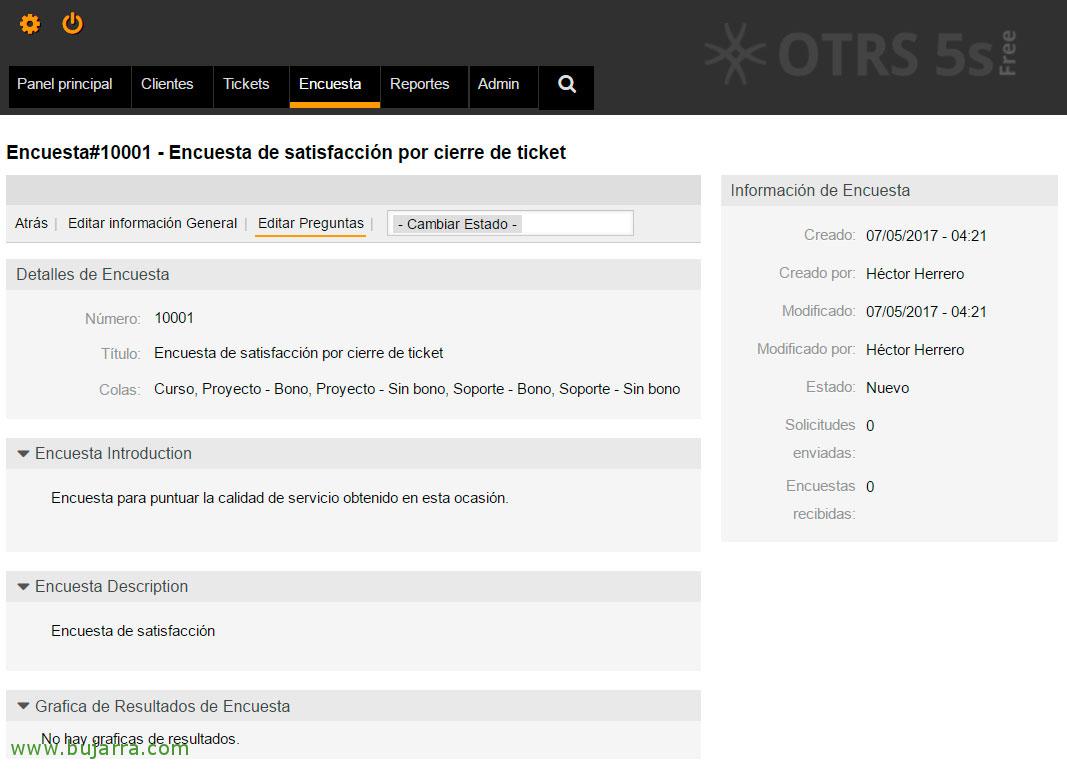
Once we have the Survey created, What We Will Do, it will logically be adding questions, Not many, Not even long, that we want them to answer! 🙂 . Click on “Edit Questions” in the top menu.

And this will be where we will be able to add the Questions that we will send with this Survey, We add a question and indicate the type of answer we expect, For example; Yes/No, whether you should choose only one of the answers (Radio) or if we give you several answers and you can choose the ones you want (Option), or if we want you to write us a small comment…). Example of a couple of very typical questions:
Is satisfied with the solution of the problem?
Please, Score the 1 to the 5 Your satisfaction
Any comments?

Once the Questions have been created, if we want that when a ticket is closed, send this survey directly, we will change your Status in the top menu to “Teacher”
Reports,
Another of the great qualities of OTRS is that we can generate reports of all kinds, are fully customizable with the data we want to exploit. We will make a very typical example, and again, following the thread of the document… It would be interesting to report on the tickets that have been created, for example, on a monthly basis, where we will export customer tickets, We may, for example, use it to invoice customers, or see the times dedicated to these. Therefore, The example we will make will be that same, Report all customer tickets, but only those that are already closed or have a solution,
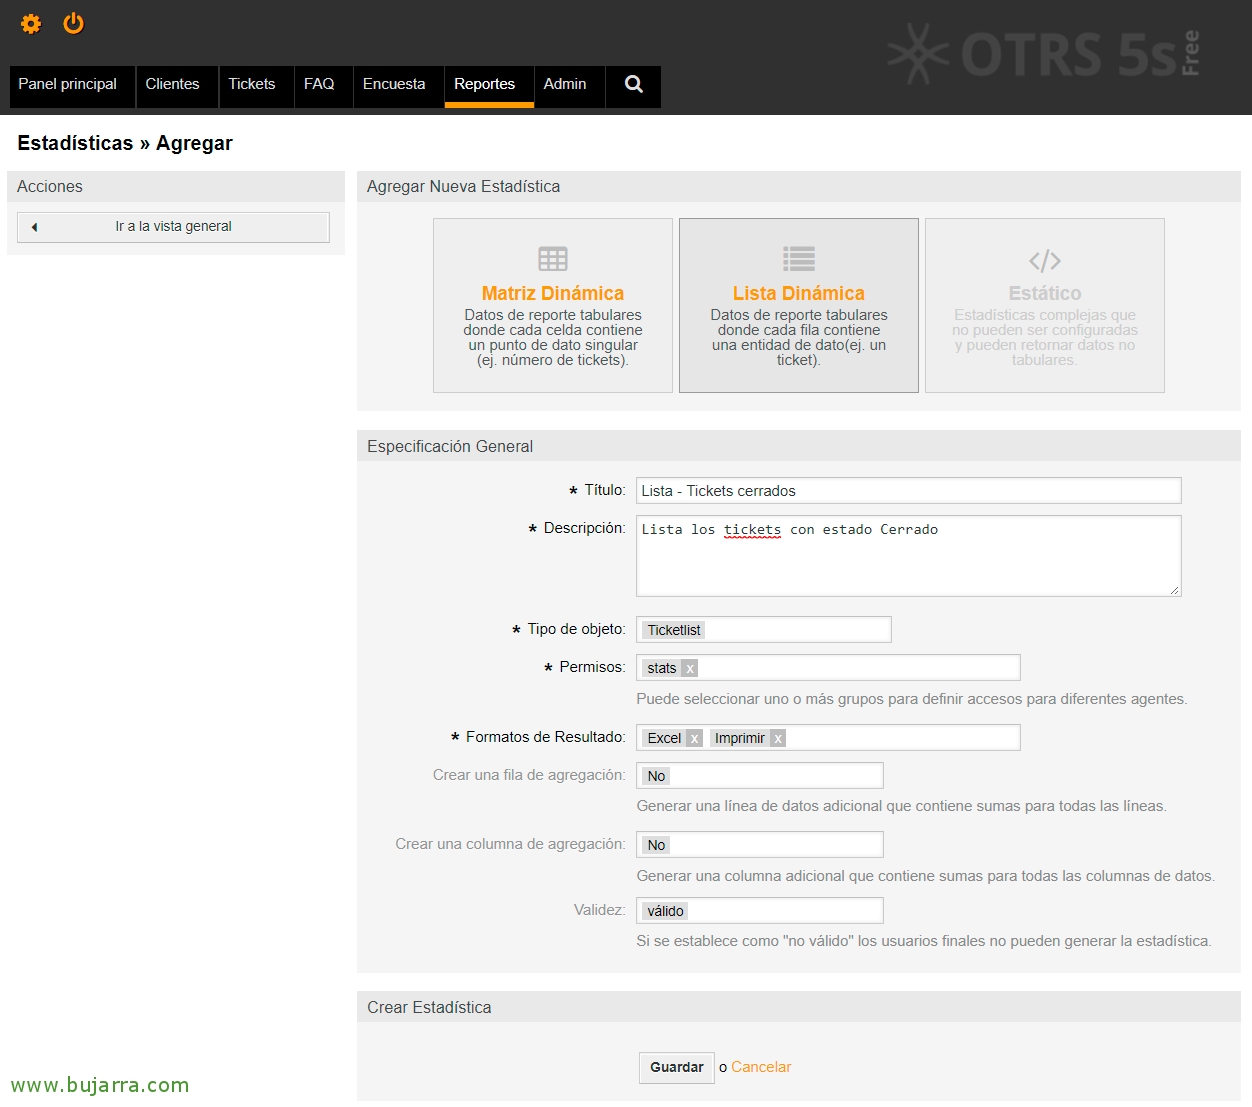
Getting Started, We're going to “Reports” > “Statistics” > “Add” and create a Dynamic List, We indicate the following data:
Title: List of closed tickets
Description: List of closed tickets
Object Type: Ticketlist
Permissions: Stats
Result Formats: Excel & Print
Create an aggregation row: No
Create an aggregation column: No
And we click on “Save” to create the Report.

Now that we have a preview of the information we are going to obtain, we are going to modify the Axes and the Filter to customize the report to our liking. Click on “Y-axis”,
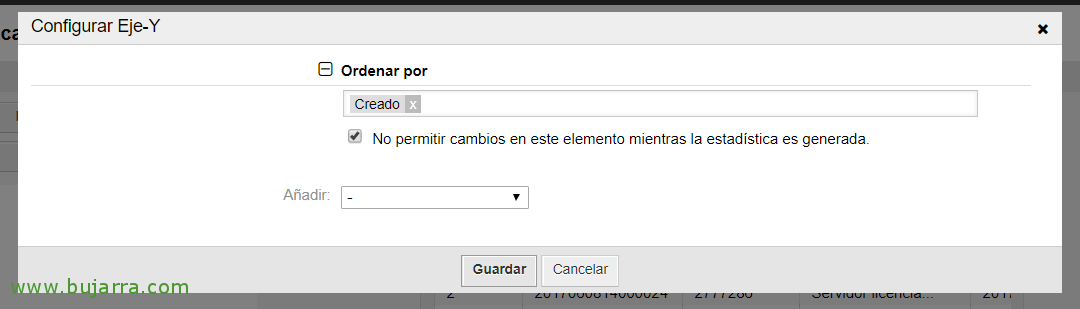
We select an Order, in my case it will be by the date of Created, We could add more conditions if we were interested. “Save”
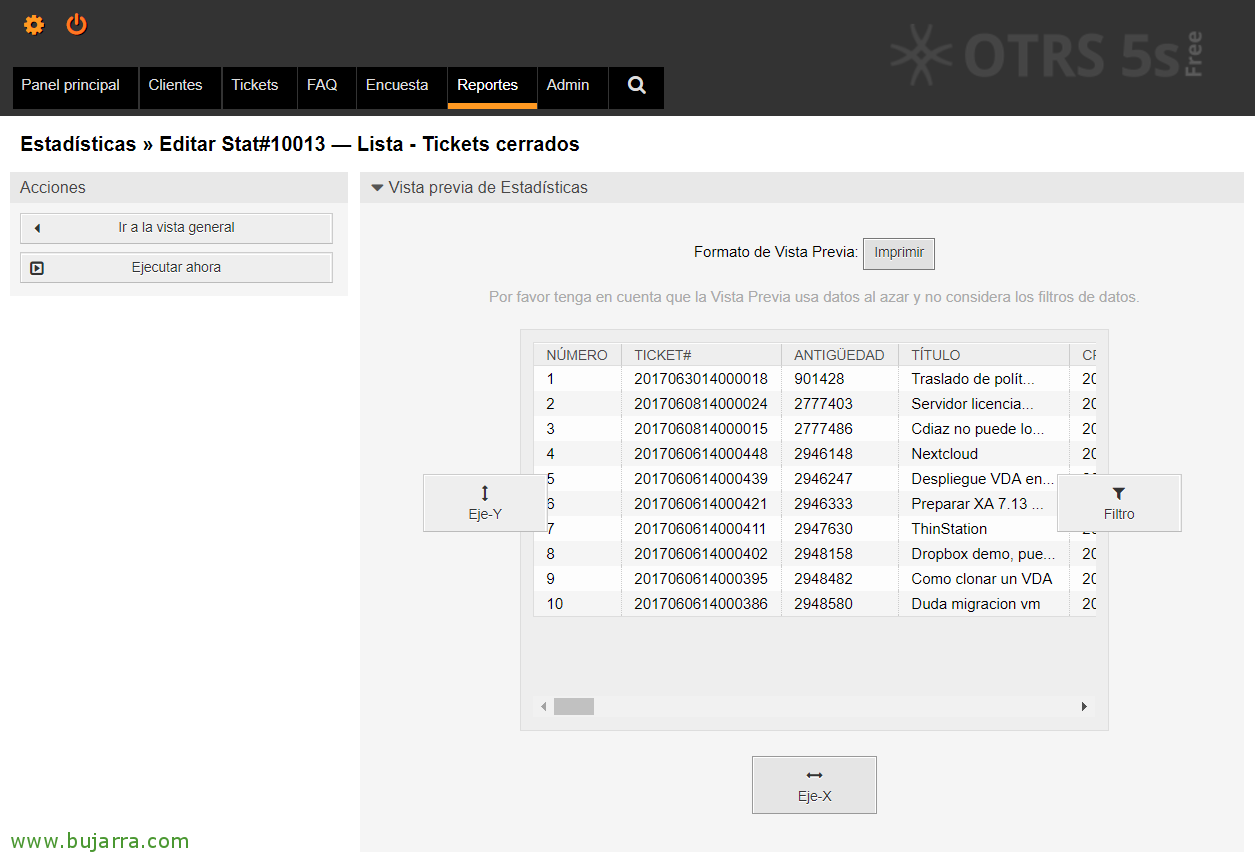
He will have updated the list with what we have just indicated, Click now on the “X-Axis”,
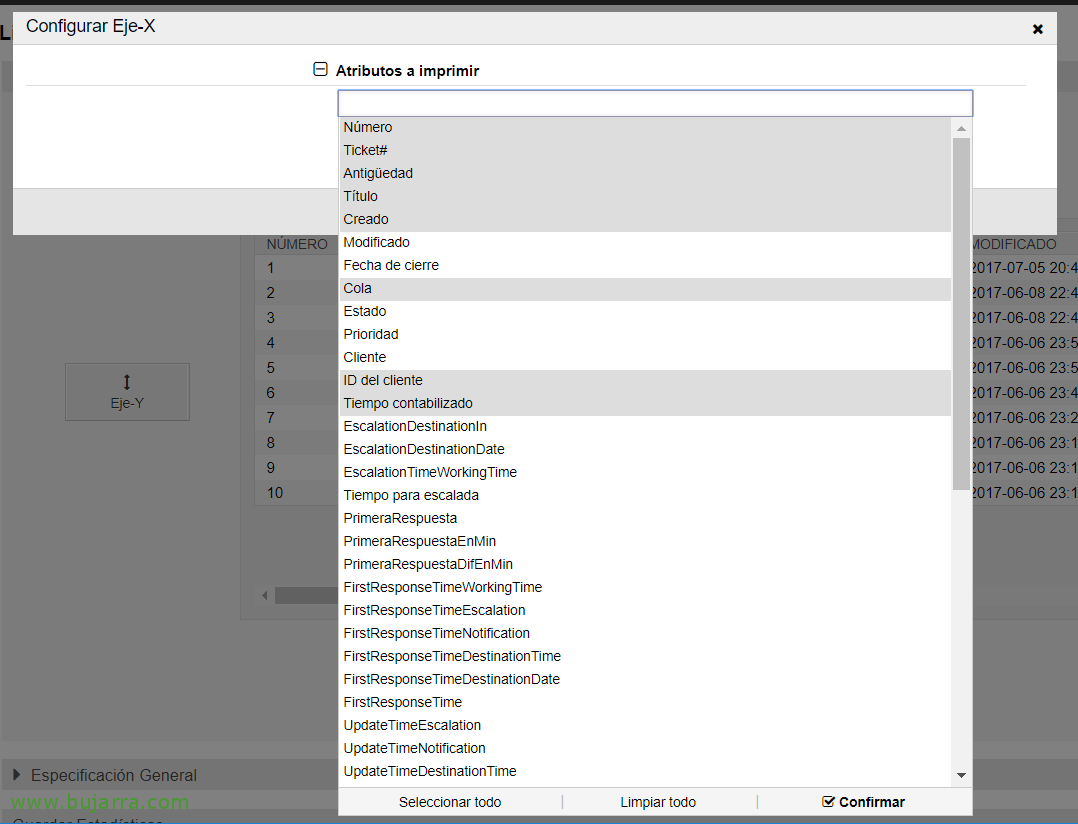
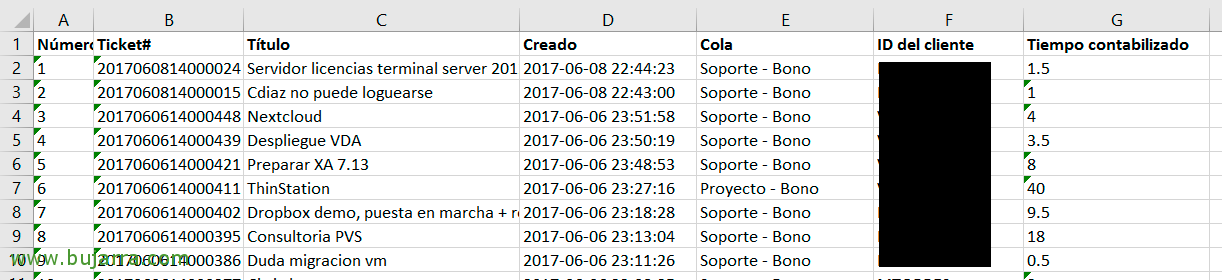
And this will be where it will show us the fields that we want to visualize. In this case, in the Reports you generate, I want to display the following fields: Number, Receipt, Title, Created, Tail, Customer ID and Time Posted.

We see again that it will have refreshed the list with the requested changes, and now we would only have to apply the necessary filters, Click on “Filter”,

As I only want to get the tickets that are closed, good with a good or bad solution… Well, we filter by “State”…

And in the filter we add 'closed successfully’ and 'closed without success’ to meet the needs we have!
Click on “Save” and in principle we already have the Report fully configured. As we can see, we can make all kinds of reports, it is nothing more than playing with the conditions we have and applying filters!
Pulling out a report,
Once a Report is set up, We will now be able to generate reports and visualize the data to be able to exploit them as we need!
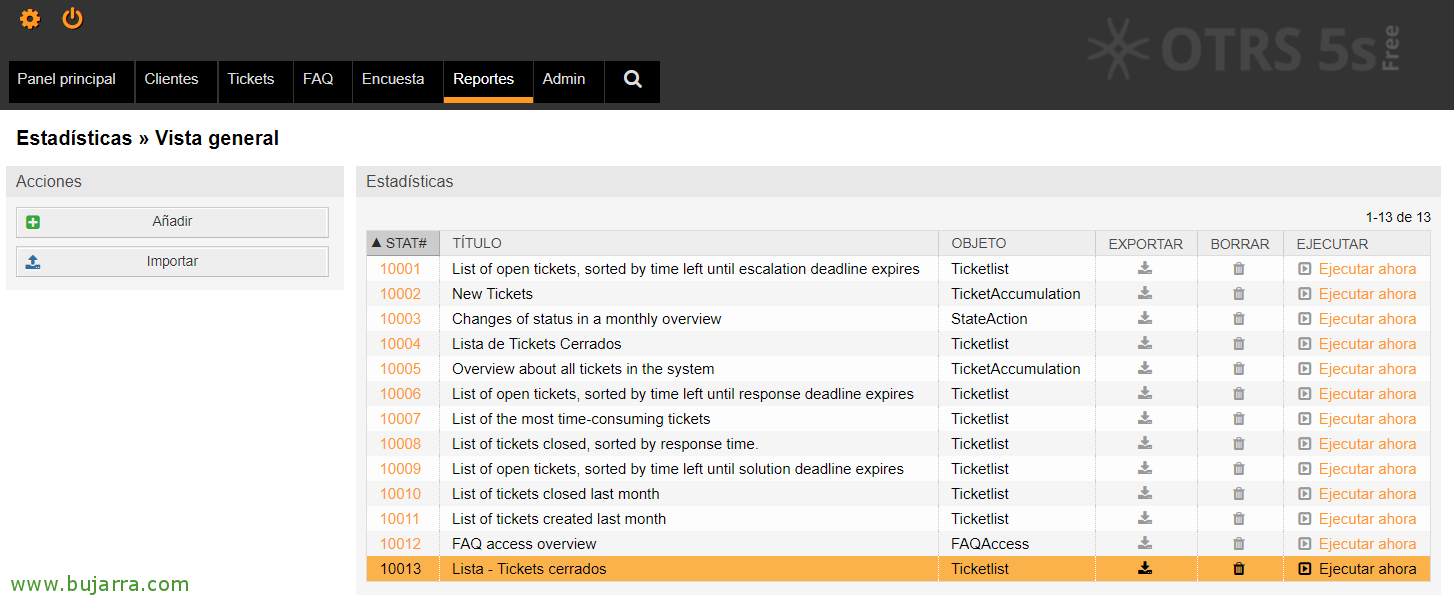
If we are going to “Reports” > “Statistics”, We will have all types of listings, both those that come by default and the one we have just generated. To obtain the report click on “Run Now”.

We selected the output format and as I had allowed Excel and PDF format, I choose the one I prefer at the moment, Click again on “Run Now”, and that's it!
Well, We have already learned how to produce a very interesting report! Now you can customize it to your needs, adding filters after the fact for example for date filtering, etc…
Customizing the OTRS theme,
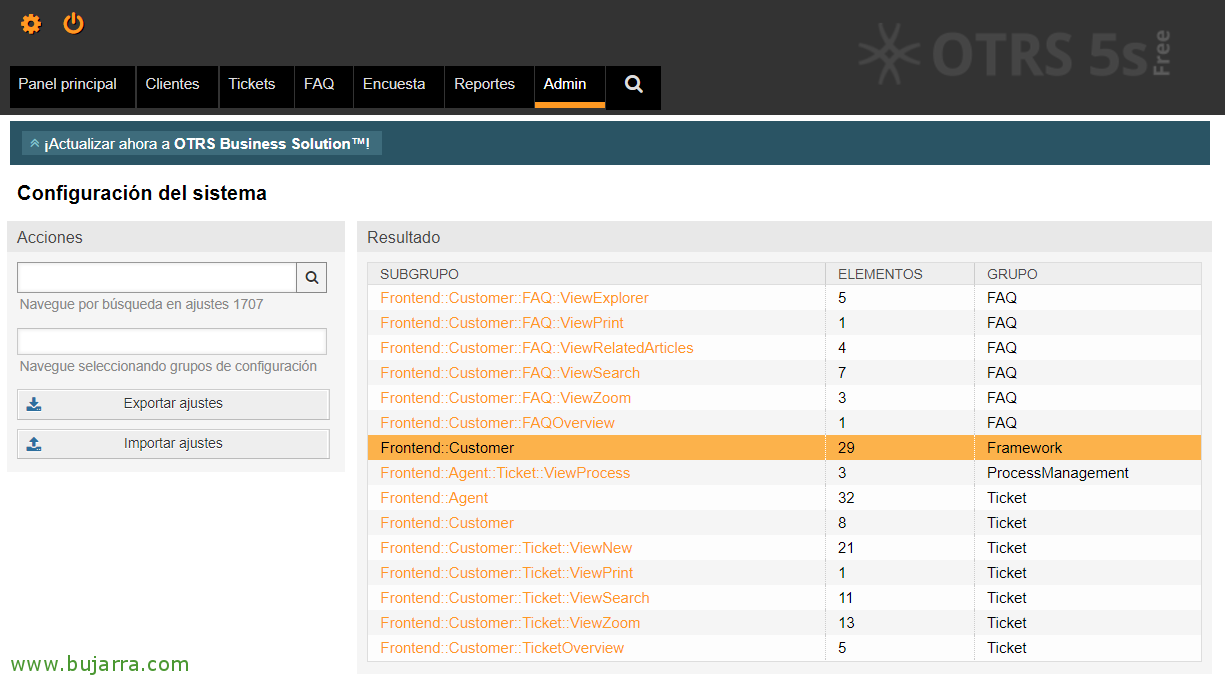
If we want for example, customize the Client dashboard a little more, what they will see in their access via the web, we can go to “Admin” > “System Configuration” > “Frontend::Customer”
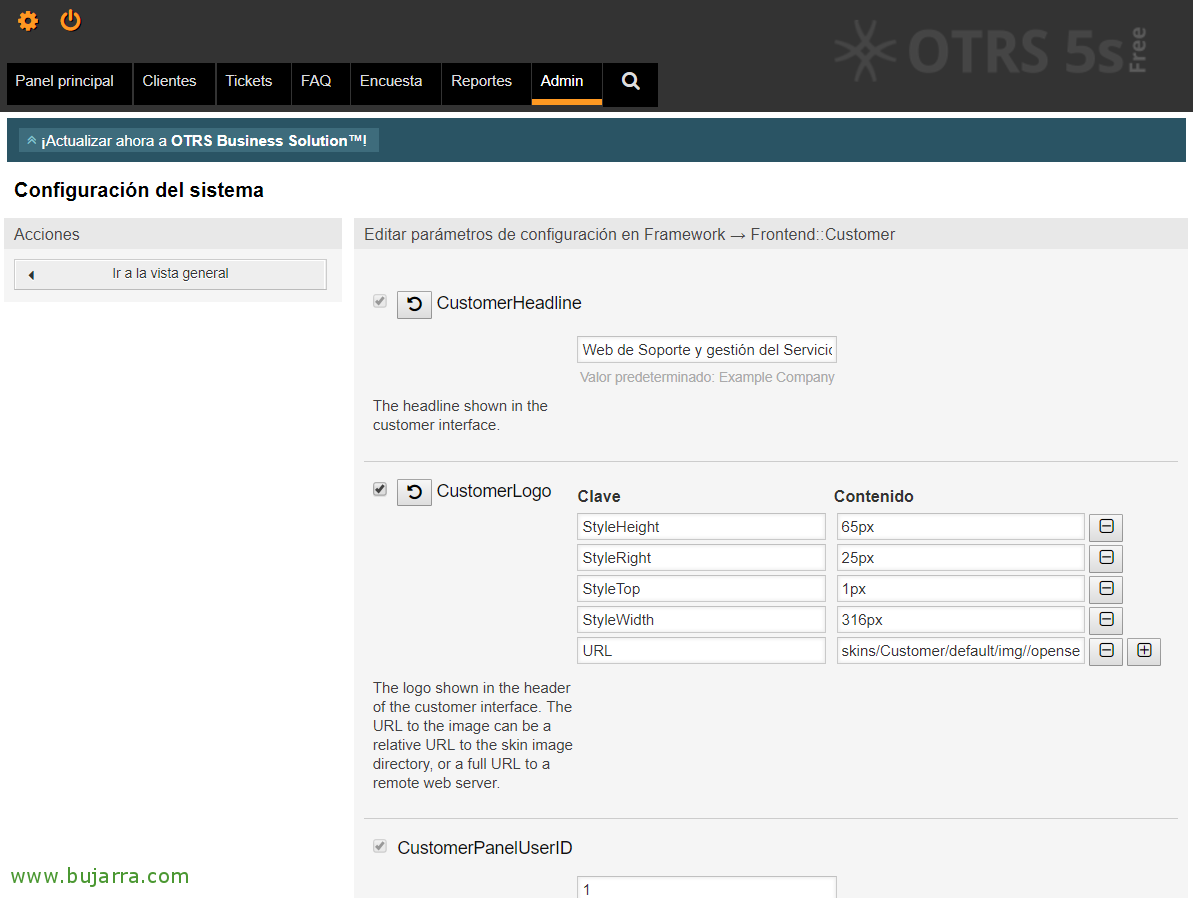
And here we can make the changes we need to personalize the entrance a little more to our customers, We see that there are a lot of customizable parameters. Here are some examples where we will change the text of the entry header, Company Logo, We will disable the creation of accounts from the web, or we will translate certain texts! It would look something like this:
CustomerHeadline: Support and Service Management Website
CustomerLogo: We check and modify this file with the company logo: /opt/otrs/var/httpd/htdocs/skins/Customer/default/img/logo.png
CustomerPanelCreateAccount: NO
CustomerPanelSubjectLostPasswordToken: Request a new password
CustomerPanelBodyLostPasswordToken:
Hello <OTRS_USERFIRSTNAME>,
You have requested to change your password for the Open Services IT Support panel.
To do this,, Click on the following link:
<OTRS_CONFIG_HttpType>://<OTRS_CONFIG_FQDN>/<OTRS_CONFIG_ScriptAlias>customer.pl?Action=CustomerLostPassword;Token=<OTRS_TOKEN>
If you have not requested this, You can ignore the email.
CustomerPanelSubjectLostPassword: New password
CustomerPanelBodyLostPassword:
Hello <OTRS_USERFIRSTNAME>,
Your new password, Store it well: <OTRS_NEWPW>
You can access it through the following address:
<OTRS_CONFIG_HttpType>://<OTRS_CONFIG_FQDN>/<OTRS_CONFIG_ScriptAlias>customer.pl
CustomerPanelSubjectNewAccount: New account in oServices IT Support
CustomerPanelBodyNewAccount:
Hello <OTRS_USERFIRSTNAME>,
We have created an account for you to use technical support in Open Services IT, You will be able to monitor and manage any incidents or new requests!
Full name: <OTRS_USERFIRSTNAME> <OTRS_USERLASTNAME>
Username: <OTRS_USERLOGIN>
Password : <OTRS_USERPASSWORD>
You can access it through the following address:
<OTRS_CONFIG_HttpType>://<OTRS_CONFIG_FQDN>/<OTRS_CONFIG_ScriptAlias>customer.pl
Defaulting the Customer Portal to Apache,
Something very common will be to define the Customer Portal as a predefined site on the website, thus avoiding having to make them memorize a complex URL. And so it is Apache that will directly redirect our users/customers.

We edit the file '/etc/apache2/sites-available/000-default.conf’ and within the 'VirtualHost' section’ we add:
[SourceCode]RedirectMatch ^/$ /otrs/customer.pl[/SourceCode]
We restart Apache and that's it! Our users will now be able to access via http://fqdn_otrs or as traditionally as http://fqdn_otrs/otrs/customer.pl, I remind you that agents must access via HTTP://fqdn_otrs/otrs/index.pl. In future documents we will see how to enable secure connections, we will see other interesting apps such as FAQ…
To finish, I leave you with some videos that I have found quite interesting in this matter of the Internet, related to the habitual use of OTRS, especially for those who have doubts about its use, Okay?? Greetings and take care of yourselves!!!
Demo of how to use OTRS ITSM,
If you have 20 minutes and you don't know how to use or what OTRS can offer you, I think this is one of the best videos!
How to create a Ticket,
How to close a Ticket,
Add Notes to Tickets,
Modifying the Owner on a Ticket,
Assigning tickets as a Master / Slave,
Modifying the Client on a Ticket,
Changing the queue on a Ticket,
Modifying the Agent on an already created Ticket,
Reclassifying a Ticket, Priorities or queues,
Viewing a Ticket's History,