Using VMware Update Manager
Good, primer documento en formato WordPress, a ver que tal va 😉
En este documento se muestra cómo utilizar VMware Update Manager para mantener actualizados todas nuestras máquinas virtuales y los hosts con VMware ESX. En un documento anterior se comenta cómo se instala y cómo se habilita el plugin (HTTP://www.bujarra.com/?p=1115), en la instalación del VirtualCenter escojeremos si instalamos el componente de VirtualCenter o no. Well, Start,
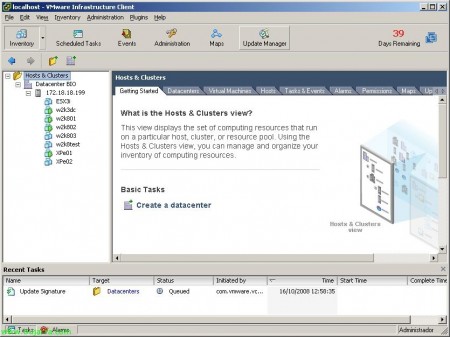
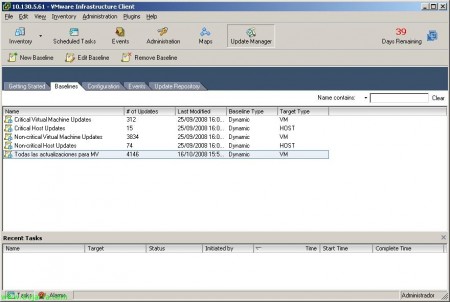
Click on the button “Update Manager” para iniciar su configuración,
Lo primero de todo es crear una ‘baseline’ que será una lista de parches aplicados a máquinas virtuales o hosts incluyendo actualizaciones especificas o todas. Subsequently, aplicaremos esta ‘baseline’ a las máquinas virtuales o host que nos interese. What I said, We create a new one from “Create a new baseline”,
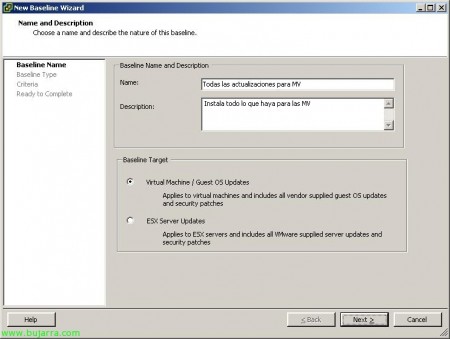
Indicamos un nombre y una descripción a esta baseline. Y sobre todo si queremos actualizar máquinas virtuales o los host ESX. En mi caso Máquinas Virtuales, “Next”,
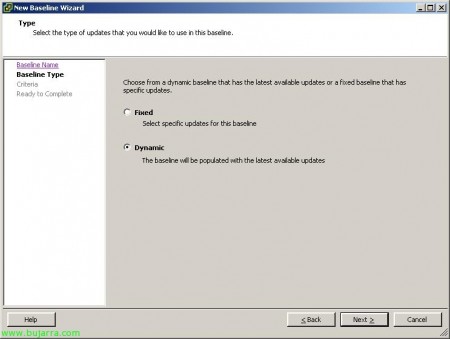
Indicamos si queremos especificar alguna actualización concreta (fixed) o que nos mantenga actualizados los equipos con las últimas actualizaciones que vayan saliendo (dynamic). “Next”,
GOOD, now, debemos seleccionar qué es lo que queremos actualizar, si los parches de una aplicación cualquiera (Product), o todas en general; el tipo de severidad que nos interesa que se aplique, si parches de seguridad, Critical, importantes… además del idioma de la aplicación. Si queremos actualizar todo lo posible en una máquina virtual, any, any y any :-P. Además podemos especificar las fechas del parche o el fabricante. “Next”,
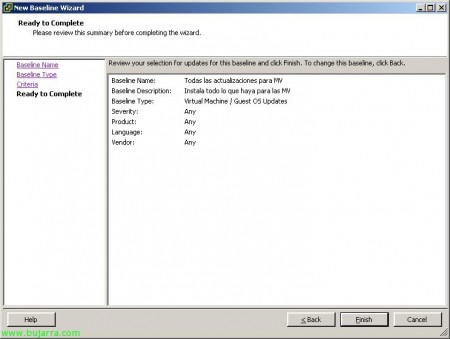
It shows us the summary of the assistant for the baseline. “Finish” if it is correct.
There we have our baselines on the tab “Baselines” it shows us the updates that each one has and if they are of type VM (Virtual Machine) or ESX host.
On the “Configuration” > “Guest Settings”. We have the option to take a snapshot of the virtual machines before updating them, in case any of them is problematic. Eye, if we enable this, keep in mind that a VM loses performance when using snapshots.
In “Configuration” > “ESX Host Settings” we have the configuration that we can apply to the hosts in case an update fails, the action in case of update installation failure or the retry times.
In “Configuration” > “Update Downloads” es donde podremos configurar las opciones del Update Manager, sobre qué tipo de actualizaciones tendremos, cada cuanto mirará si hay updates nuevos…
In “Configuration” > “Internet Access” podremos configurar el proxy si es que tenemos uno en la red, ya que VMware Update Manager se conectará a internet para ver qué actualizaciones hay disponibles o descargárselas directamente.
In “Configuration” > “Port Settings” es donde podremos cambiar todos los puertos usados por VMware Update Manager (para los agentes…).
Ahora por ejemplo agregaremos a una máquina virtual este ‘baseline’ que hemos creado, seleccionamos la vista de “Inventory” con vista de máquinas virtuales y plantillas, pinchamos sobre una MV; tenemos una pestaña llamada “Update Manager” donde podremos pinchar en “Attach Baseline…” para agregar la ‘baseline’ that we created earlier.
It shows us all the baselines of 'MV'’ that we have, we select the one we created earlier and it will show us all the updates it has available to install. “OK”.
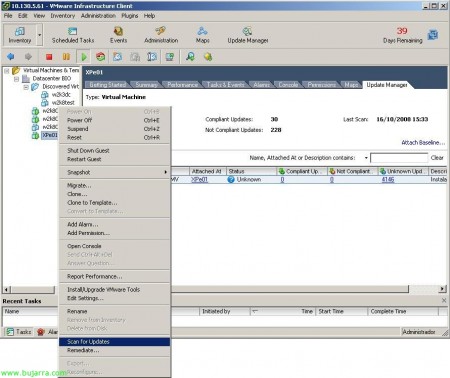
Now, with a right-click on a specific MV > “Scan for Updates”
“Yes” to confirm that we will scan this MV.
We check in the taskbar that it is scanning the MV to see which patches are necessary for its OS.
Once we see the 'Status'’ of the MV is not appropriate as it indicates (Not Compliant) it is because it has certain updates already installed, but quite a few that are not, so we must remediate it, for this, Right-click “Remediate…”
Our baseline comes up, “Next”,
It shows us the updates that it will install, We can uncheck any if they don't interest us… “Next”,
In “Schedule” it's when we will be able to schedule these updates, immediately or according to what we specify, also depending on the state of the VM we will be able to configure different options.
In “Rollback Options” we see the options to avoid having a disaster in case the VM gets corrupted during its update, the use of snapshots. We can use snapshots and if we want them to be automatically deleted after a few hours. “Next”,
We check if everything is correct and press “Finish” to start the update of this VM!
We check in the taskbar that there is a VM that is being remediated, this task will take the necessary time to install all possible updates.
Si abrimos la consola de la MV podremos obsevar que monta una unidad de CD con las actualizaciones que ejecutará y vemos el administrador de tareas funcionando.
Una vez que se instale todas las actualizaciones, veremos el “Status” de la MV como ‘Compliant’ si todo fue satisfactorio o quedó algún parche pendiente.


