VMware Horizon Application Manager

In this document, we'll look at deploying VMware Horizon Application Manager, which is a web portal where we will have two interfaces, one for management and one for our users, where we can present our ThinApp applications. Relying on a SaaS cloud service (Software as a Service) users will be able to open the ThinApp applications they need in a very simple way. Also with the recent version of VMware ThinApp, we will be able to integrate our packages more easily with the Horizon App Manager portal.
Among other features, From the Admin console we could monitor the use of our applications, as well as (optionally) assign licensing to applications and check internally if we comply with our agreements.

The components of VMware Horizon Application Manager are:
– Horizon Service: It would be the part we could have in the cloud, we would have both the user portal and the administration portal (where we would assign applications to users). Users will see the applications that we have provided for them automatically and they will also be able to manually assign the same applications that we have made available to them.
– Horizon Connector: This will be in charge of contacting the Active Directory and the repository of the ThinApp binaries.
– Active Directory: Our Active Directory to perform user authentications and allow a Single Sign On:P
– ThinApp Repository: It is a share of Windows where ThinApp packages reside.
– Horizon Agent: It should be installed on the computers that will be running the ThinApp packages provisioned for Horizon Application Manager, if you do not have it, It will install automatically when you run the first package. It will allow users to have a list of their apps, as well as shortcuts on the Desktop or some extra functionality from the notification bar.

We will download Horizon Application Manager from its official website, We import the Horizon Service virtual appliance as usual,

We indicate a fixed address during the appliance wizard,

As we start the VM, We will connect to your console to set a password to the 'root' user’ and 'shuser’

We will confirm the network parameters,

We will set your fully qualified DNS name,

And we will also configure the NTP parameters, we will confirm that we resolve your name by creating a A record on the DNS server, as well as the resolves DNS names.

Open a browser to http://HORIZON_SERVICE to begin the setup wizard for your first Application Manager organization with “Begin the wizard”,

Introducing the Application Manager license & We verify it,

Ok, We confirm that it is correct & “Next”,

Enter the name of the organization & Your description, as well as the password that will have to access and the user's email for administration, we will also add if we want a Logo for that organization and it is seen when loading the portal.

We will create an activation token for the 'Connector', if we do not want to install a Horizon Connector server we can skip the step and create a temporary administrator for administration, Select “Generate a Connector activation token”,

We copy the activation code for later use. In addition, we must create another A or CNAME record for the URL of the organization and that points to this Horizon Service.

Well, We have the basic configuration done, We will continue later.

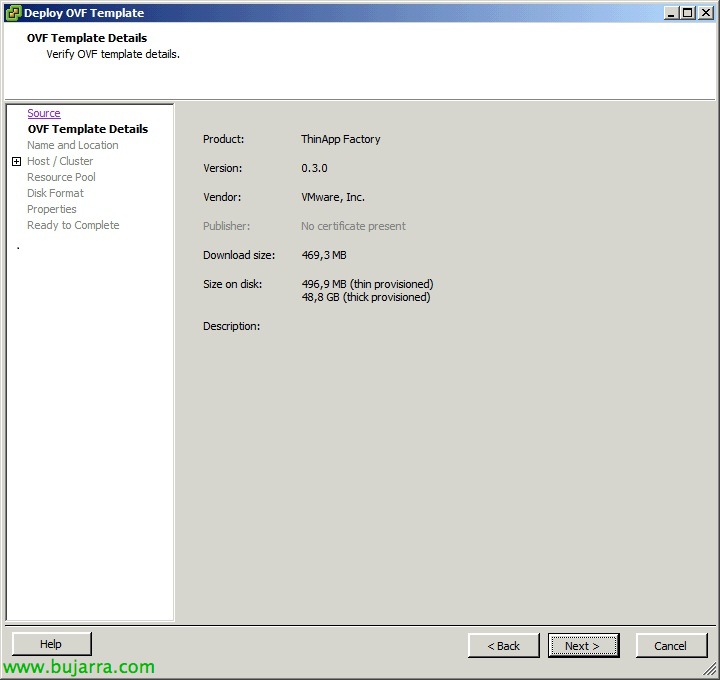
We will now deploy the Horizon Connector, we import the OVF file as usual,

We provide an IP address for this virtual appliance,

When you start it for the first time, We will set a password for 'root', being 'VMware’ the one that comes by default,

Select “Set”

And we'll set up the network parameters, Web Access (HTTP and/or HTTPS), Web certificate, NTP… We must take into account that this computer has a correct hostname, can resolve DNS queries and can reach it by DNS name (creating another A record on the DNS server).

We access https://HORIZON_CONNECTOR and the first time you will be asked to change the password,

And we must paste the activation code that we previously copied in the Horizon Service configuration to enable communication between both virtual appliances

We will need to create a user account in our Active Directory for the LDAP connection of Horizon Application Management, We will need to assign you an email address.

On the next setup screen with Active Directory, select in the directory type 'Active Directory', on 'Server Host'’ We will indicate one of our global catalogs, we will indicate if we want normal LDAP connection (389TCP) or safe (636TCP), in the search parameter 'Search Attribute’ we will indicate that it is by 'sAMAccountName', in the 'DN Base’ we indicate the LDAP base path from where the user accounts will be searched to later assign applications. In 'Bind DN’ we will indicate the LDAP path for the user we have just created and connect via LDAP, as well as your password. Click to verify,

GOOD, With this we already have both appliances connected. It tells us that the account to log in to the Horizon Service will be the newly created user and if we want to connect to the previously created organization we will do so with that URL and the user that we generated during the previous wizard. Now we'll run the wizard to set it up,

In this first step we will join the domain, We indicate the domain of our network, a user with privileges to add our account & Click on “Join Domain”,

Once we are in control, “Next”,

Once we have the appliance in domain, we will be able to enable Windows-based authentication to validate users when they log in,

We indicate if we want SSL security for access to the Horizon Connector, the connector URL will come pre-filled & “Next”,

Also for external access, we will indicate the external DNS name, as well as paste the certificate and the private key, by default it comes with a self-signed one, or we can generate a new one from 'generate new SSL Certificate', “Next”,

We will enable 'Windows Apps', this will be the repository of applications generated with ThinApp, we must specify the UNC path where the applications are and a refresh period to search for new apps. “Save”,

& “Next”,

This attribute mapping will be left as it is unless we have a different option internally.

We will look for the users that we are interested in associating with the applications, indicating the DN route, We may filter them to include/exclude them, it will show us the search result in case we need to refine it more.

As well as the same for the groups, in this case you would only have one group.

And nothing, we will indicate a search frequency to synchronize these users/groups from the AD with Application Manager. Every hour by default,

We will get a summary of the users that will add us at this time, as well as the groups and frequency period selected, “Save and Continue…”

… We wait while you sync…

And that's it, Setup completed!

Now, if we log in to the Horizon, to our organization with our username, we will be able to access the 'Admin' management panel’ to configure the other necessary options, in the 'Dashboard' tab’ we will see a small summary of the operations carried out,

In the 'Applications' tab’ We will be able to manage our applications, we'll be adding them from “Add Application”,

By default it brings a series of SaaS applications such as Google Apps, which will be the one we will add as an example from “Add”,

We will configure the assignments to users/groups of this application,

In this case, we will have the application available to a whole group of users and the deployment will be 'Automatic', so that all users have it already visible so that they can run it, we could also assign it of type 'Manual’ so that users can wear it if they want it,

If we log in to the Horizon Connector we will have more options,

Basically, they would be the ones we set up during the wizard, but if we have uploaded any ThinApp application, we can force a synchronization to associate them with users/groups,

And back in our Organization, we can also associate our ThinApp applications that we have located in 'Windows Apps'’ where we define it with the UNC path.

When you set a Connector Authentication mode, we will have the Horizon Connector within our network, so that users running applications in the Horizon Service will not be asked for passwords, getting an SSO. Will use Kerberos, to configure Horizon with Kerberos we will have to create a user with the format: HTTP/FullyQualifiedConnectorHost@DomainName (that will be used when configuring the Horizon Connector in the wizard, indicating the user for Kerberos and its corresponding password, this could be modified directly from the Horizon Connector, in the 'Advanced' tab). With the advanced view within the Users console & A.D. Teams, we'll set it to your 'servicePrincipalName’ in the 'Attribute Editor' tab.

GOOD, we must install the Horizon agent on the computers that we want to be able to run these applications. We could also automate this installation with parameters in the MSI to make it quiet & Preset,

We will provide you with the URL of our organization,

We will indicate the directory that you will create in the Desktop, which will be where it saves the shortcuts of the Apps,

Default Client Installation Path '%ProgramFiles%VMwareVMware Horizon Agent’

& “Next” to begin installation,

…

And that's it, from this computer we will be able to run these ThinApp applications,

If we connect to the Horizon Application Manager portal, We log in as a user with permissions,

We will see the applications that have been assigned to us automatically, we will be able to run both ThinApp packages, as SaaS or pre-configured applications (as an intranet…), Of course, we could run these applications from the Desktop shortcuts or the taskbar icon.

If we go to the “Application Catalog” we will see the rest of the applications that the administrator has arranged for us in a 'Manual’ and we can activate them as we are interested, such as Zimbra's client SaaS app… -:)

And nothing, comment that with the recent version 4.7.2 by ThinApp, we will be able to more easily integrate the applications we capture with Horizon Application Manager, we can associate them with an organization as well as indicate if it is the update for an existing ThinApp package!