Deploying VMware vCenter Server Appliance 6.5

In this post you will learn how to deploy a VMware vCenter Server Appliance 6.5, By following the steps in this document, you will be able to have a vCenter server deployed on a Linux appliance in a virtual machine to manage your vSphere infrastructure, both hosts and VMs! It is a second basic document in a series of articles to come! I hope that if it is not in this, The next documents will be useful to you!
We already know that vCenter Server is the management server for the VMware vSphere platform, with which we can manage virtual machines, hosts and other objects of our virtual architecture. After having an ESXi host, this would be, let's say, the next step when implementing a new vSphere platform 6.5 and wanting to manage everything centrally. In this post we will deploy a VMware appliance that has Photon OS 1.0 with the necessary services to have a vCenter Server running together with all its components. We can download it from the VMware website and like every product of them, They give us 60 Trial days!
Things to keep in mind, we must deploy the vCSA server from a remote computer, be Windows, Linux or Mac, any, inside the folder “D:\vcsa-ui-installer” We will run the appropriate installer for our operating system. But before you begin, we must register the A and PTR records on our DNS server (inverse) that the machine will have so that the wizard does not give us any error after deploying the vCenter Server Appliance! As well as reviewing that we have resources to deploy this VM 🙂
Deploying the vCenter Server Appliance 6.5
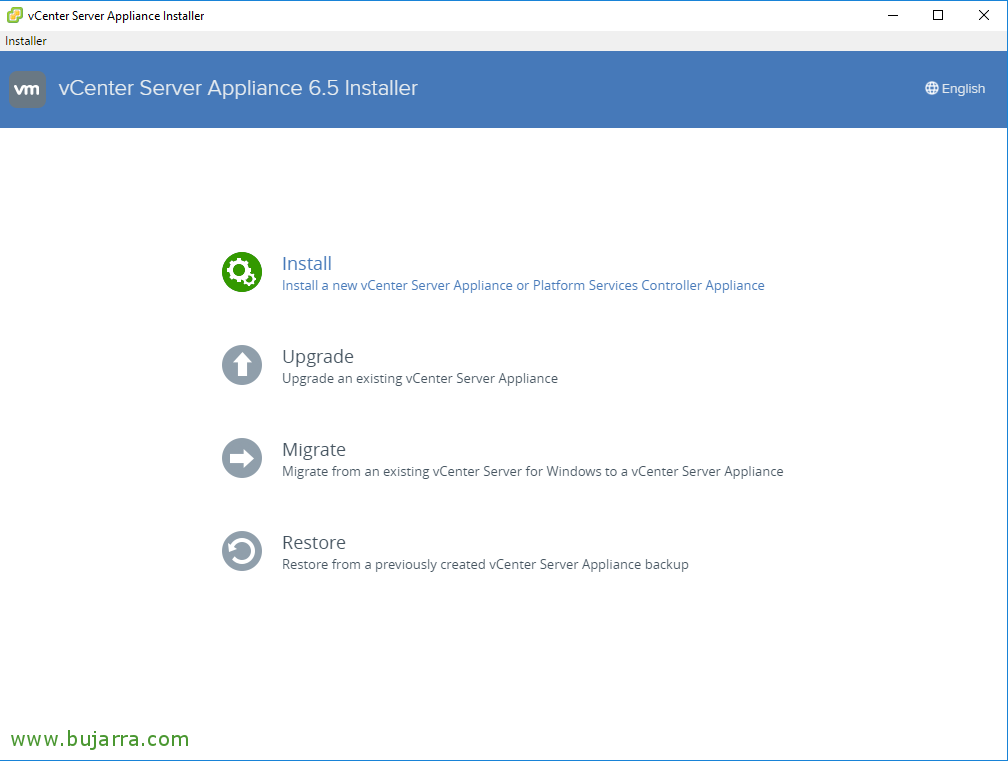
Click on “Install”, to deploy the new vCenter Server Appliance,
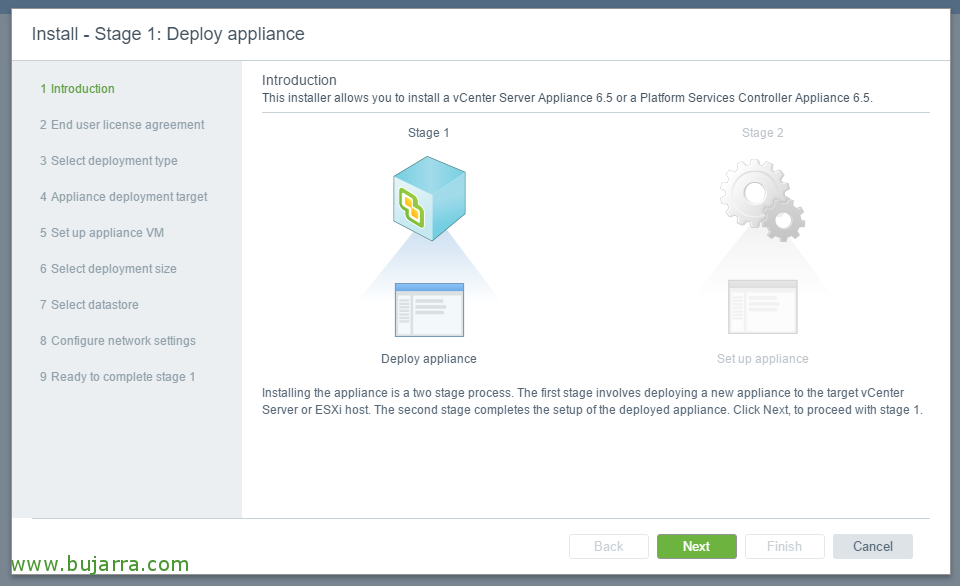
We begin the Phase 1, "Next",
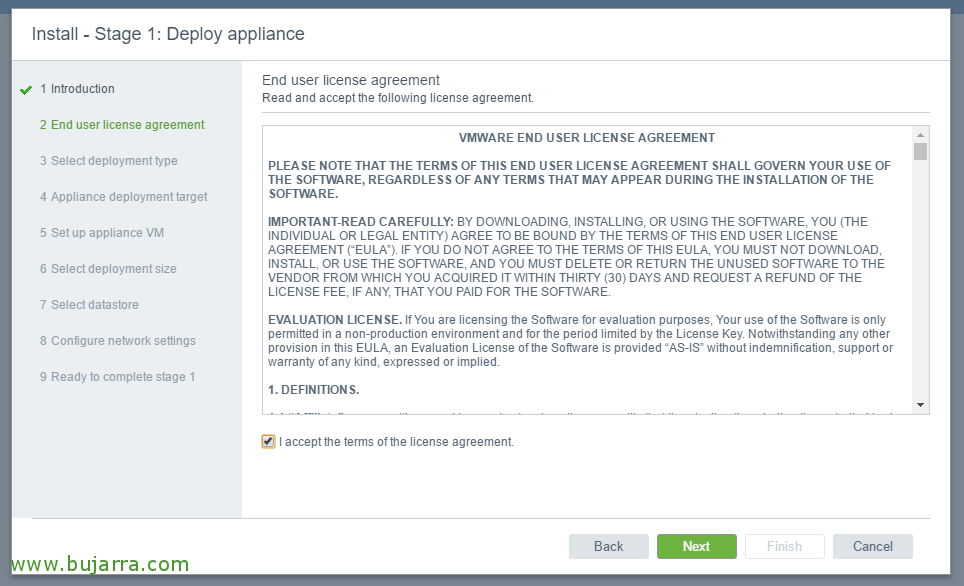
We accept the license agreement, "Next",

We select the deployment method, Usually all embedded, "Next". In future documents we will see how to deploy vCenter with an external PSC and we will make other types of LABs, Today it's time for something simple, deploy a new vCSA server 6.5!

We indicate the IP of an ESXi host and its credentials to deploy the appliance on it, (we can also deploy it in an existing vCenter as well), "Next",
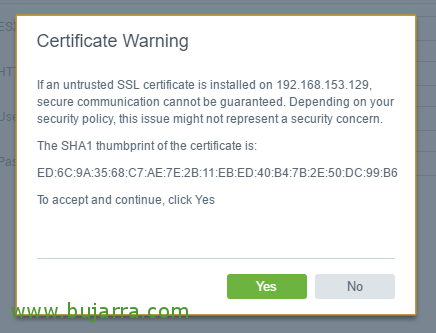
We trust the host's certificate with "Yes",
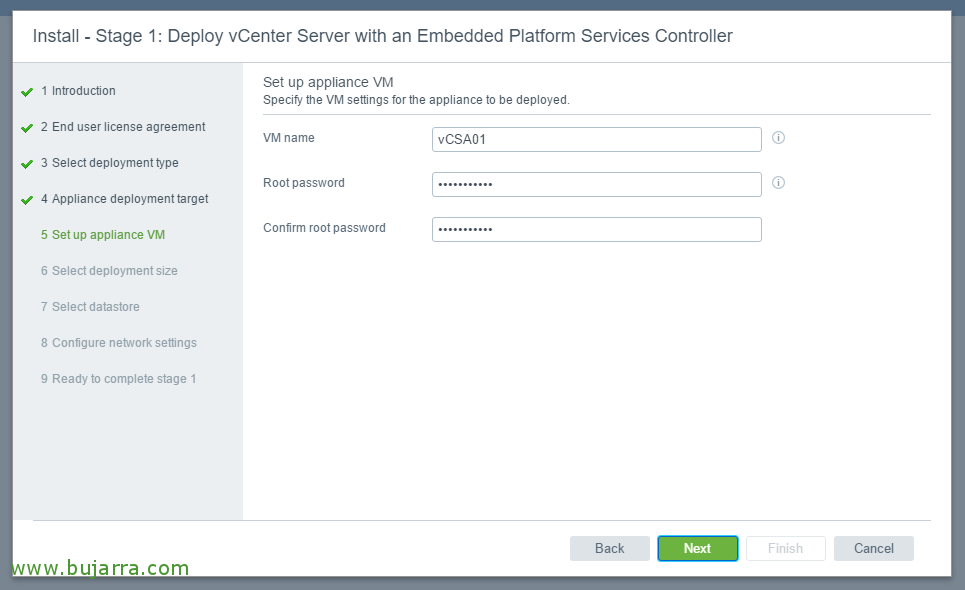
We indicate the name of the VM that is going to generate in that ESXi host, and set the password for the user 'root'’ who will be the system administrator, "Next",

Select the size of the "Next" deployment,
- Tiny: 10 Hosts– 100 Mvs
- Small: 100 Hosts– 1000 Mvs
- Medium: 400 Hosts– 4000 Mvs
- Large: +1000hosts – 10000MVs

Select the datastore where we will locate it in addition to its disk format, "Next",

We establish the network of virtual machines to which it will be connected, your hostname and IP address for the vCSA machine. And watch out, before proceeding, verify that on the DNS server we have created the A record for that hostname and its reverse record, we continue with "Next",
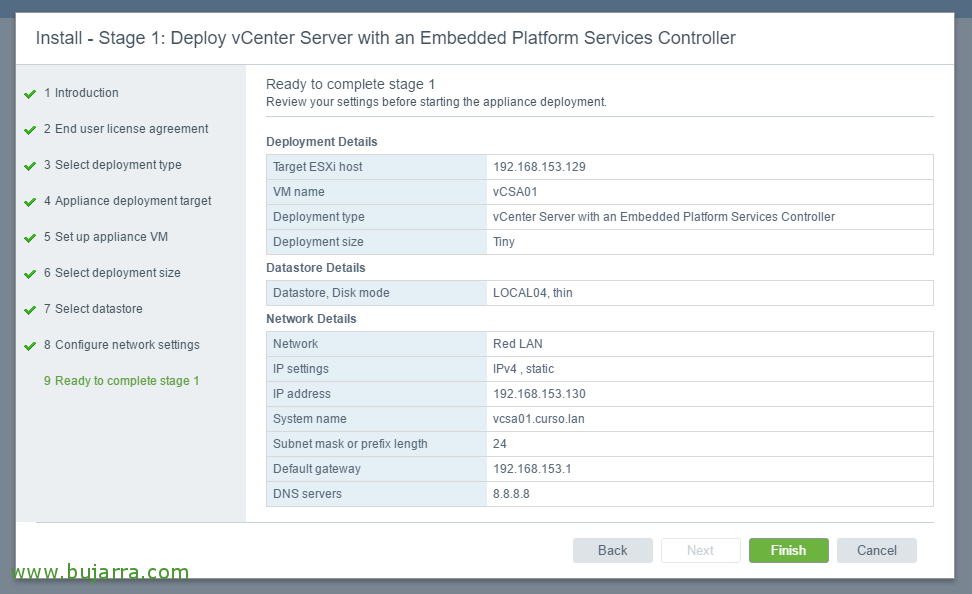
Check the summary and press "Finish" to begin the deployment of the appliance,

… wait a few minutes while the appliance unfolds...
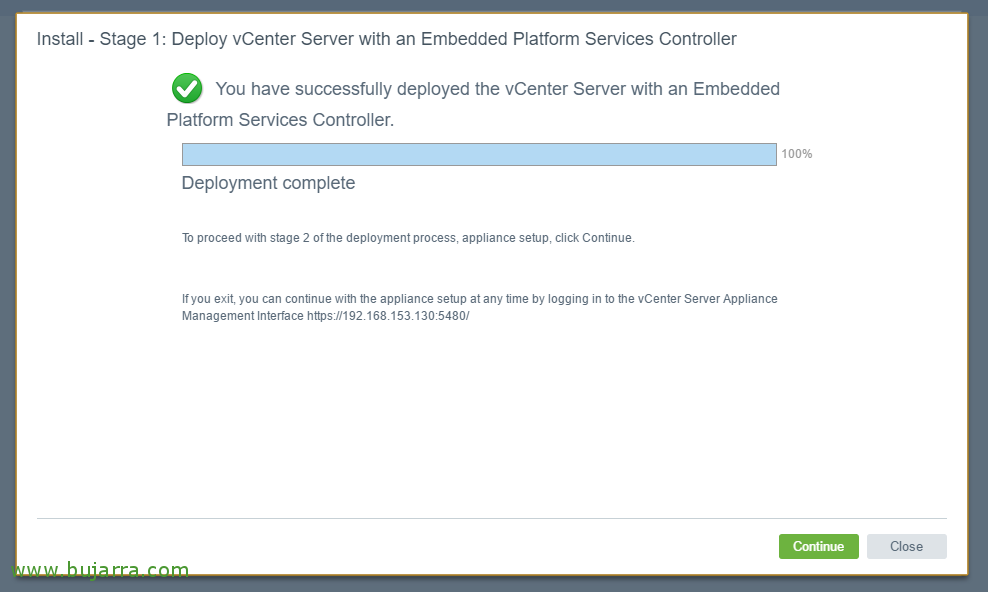
List! We follow, click on "Continue",
It tells us that we can continue with the installation at any other time by accessing the vCenter appliance management URL, from https://IP_VCSA:5480
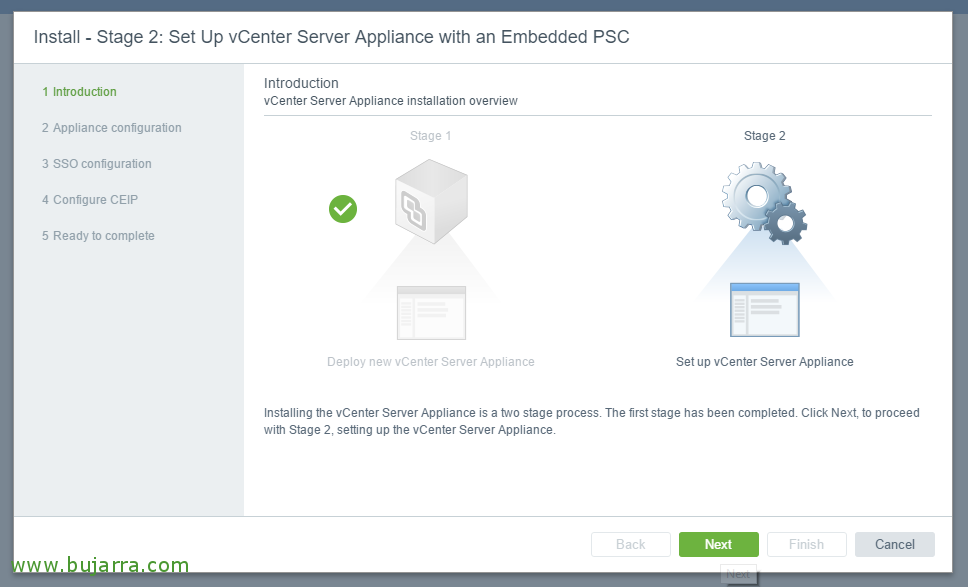
And we end the Phase 2, where we'll briefly set up the vCenter, "Next",

We indicate the way of the time synchronization, "Next",

We create an SSO configuration, we set a domain and assign the password for the Administrator user, as well as create a Site, "Next",

If we want, we can join the program to send information to VMware, "Next",

We review that everything is correct and click on "Finish" to finish the configuration of the appliance.
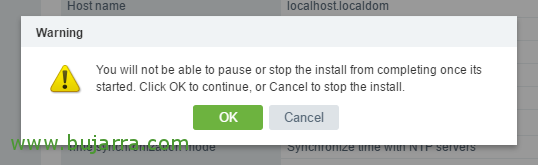
Click on "OK",

And we wait while you set up and start dependent services,

List! vCenter Server Appliance deployed! We'll go to the URL specified with the user we just created to begin the vCenter setup!
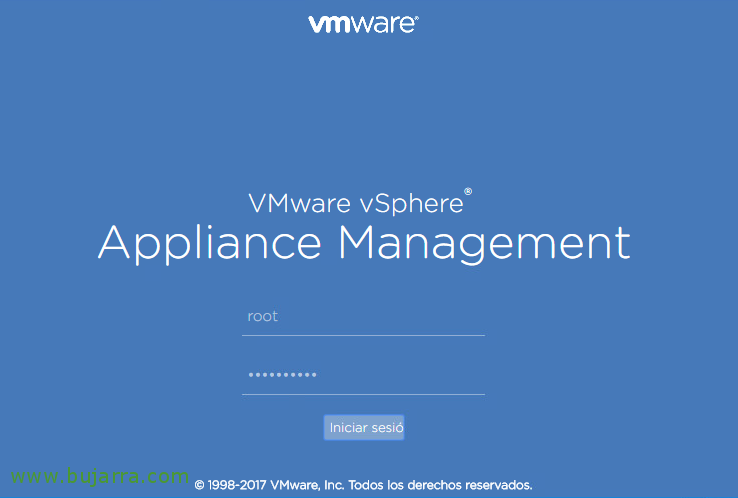
Access to vCSA appliance management
If we want to manage the vCenter appliance under Linux, we can connect via the web or via SSH.

We access https://appliance_vcenter:5480 with root credentials (which are the ones we set up during deployment),

As we log in, we will have access to the Summary view where we will see generically the Status of the team.

In the "Access" tab we can establish whether we allow connecting to the appliance by SSH or through local Shell,

In the "Networks" tab, in the "Monitor" option, We will be able to visualize the traffic and other network parameters of the appliance,

In the "Networks" tab, in the "Manage" option, We can modify the hostname of the appliance, as well as DNS servers, gateway or other network configurations such as the Proxy.
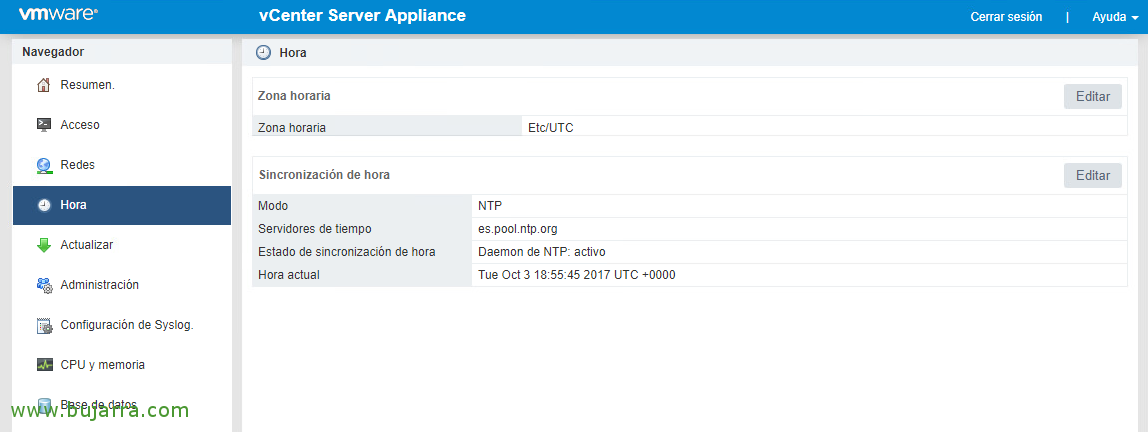
In the "Time" tab we can configure the NTP service, where we can set the time zone and other settings.

In the "Update" tab, We may set certain update download settings, as well as patch or update the appliance.
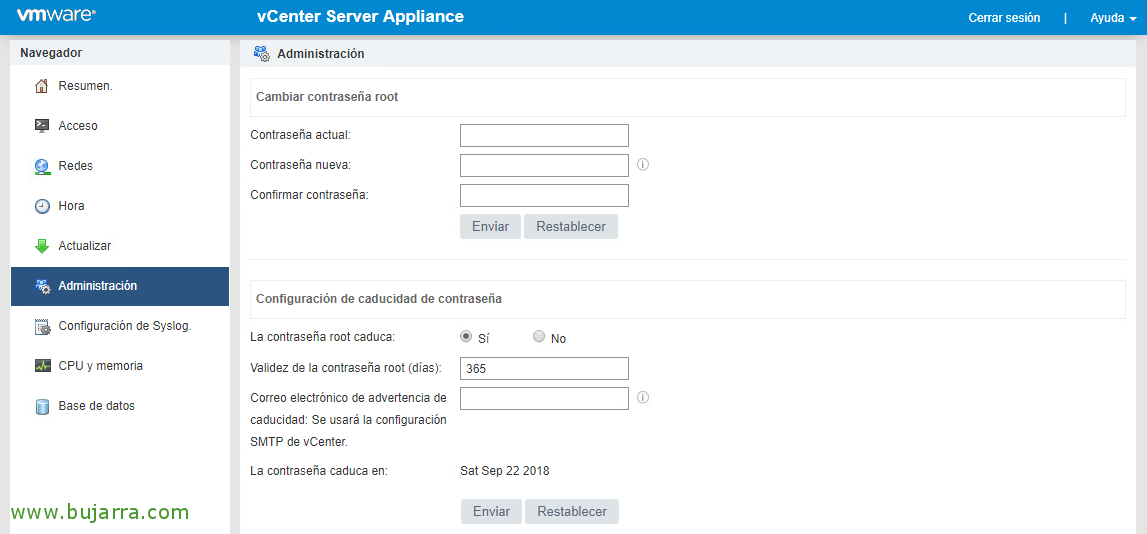
In the "Administration" tab we can modify the root user's password, as well as expiration issues for your password.

In the "Syslog Configuration" tab, we can redirect all the appliance's LOGs to a Logs server or Syslog server, such as VMware vRealize Log Insight.
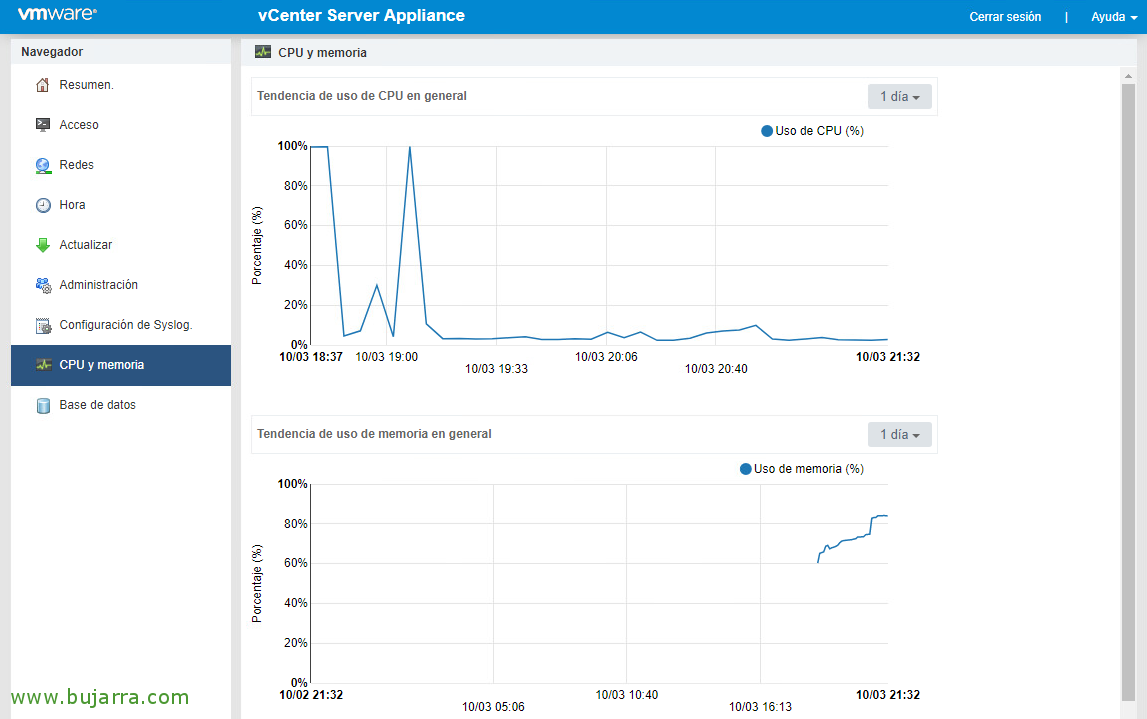
In the "CPU and Memory" tab we will be able to see the resources consumed by the vCenter Appliance, both CPU and RAM, as well as establishing the periods of the graphs to be viewed.
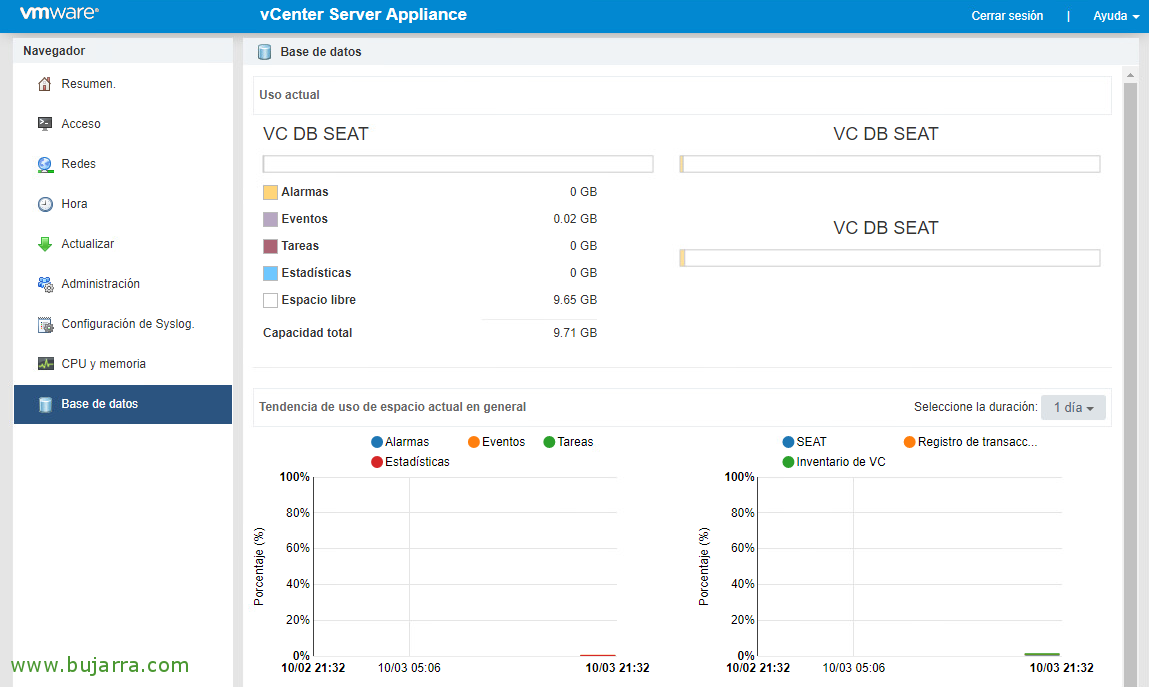
And finally, in the "Database" tab we will see the data of both database usage, and Events, Statistics... It is important to control it to avoid filling the appliance!
List! Now all you have to do is access https://vCenter-Server-Appliance and connect to the Web Client or vSphere Web Client and add the ESXi hosts, Create clusters, Configure everything…. that we will see in future documents!!