Two-factor authentication in OWA with PINsafe

Continuing with Swivel Secure's PINsafe product, we'll see how easy it is to integrate two-factor authentication with Microsoft Exchange OWA. In this way, we will force all users who use mail through OWA to authenticate themselves in a secure way by entering their PIN in addition to their authentication against the Active Directory.

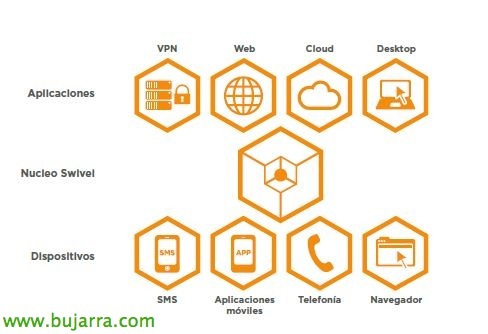
We have already seen in previous documents what PINsafe offers us, If we need info on all its possibilities see this link. It basically consists of adding additional authentication to users, they will only have to remember a PIN code and with that they will have to write an OTC (One Time Code) that will be unique every time; the PIN will be received by the users through an image that they see on the logon screen, by sending an SMS/email or if they have the app on their mobile devices they can use it as a token!! We will be able to integrate PINsafe into most applications or systems that require user validation, we can see a wide summary in its Wiki (And by the way, that if it is not supported it is nothing more than indicating it and they integrate it!!!)
Prior to this deployment, we will have to have the PINsafe appliance already configured in our environment, We can base ourselves on these previous documents where we deployed the appliance Or we rode Our own facility, apart from initially configuring it in a basic way. Continuaremos ahora pues instalando el software necesario en el servidor que publica OWA y finalizaremos con una pequeña configuración en PINsafe, este documento está basado en Exchange 2013, si lo queréis para otras versiones, ver al final del documento los enlaces!

Lo primero será descargar e instalar Swivel OWA 2013 Filter en el servidor o servidores que publican OWA. “Next”,

El path de instalación predeterminado será ‘%ProgramFiles%MicrosoftExchange ServerV15’ si nuestro Exchange lo hemos instalado en otro path habrá que indicarlo! “Next”,

“Next”,

And we press “Install” para comenzar la instalacióm,

… Wait a few seconds…

Mark “Launch Configuration Utility” para conectarnos contra el appliance de PINsafe & “Finish”,

We must specify the IP address of the appliance, the same address for the Proxy and the port, which will be different if it is a manual installation or on appliance, just like the context, we will check that it uses SSL & we indicate a secret that we will configure later when creating the PINsafe Agent.

On the “OWA” we must specify the correct URLs of our mail system,

In “Authentication” we must specify the options that interest us the most, it will always be interesting to check 'Allow non-PINsafe Users'’ to mislead anyone trying to guess users, instead of using the TURing image, we can use the Pinpad…

We will take into account that once modified, upon saving, we must restart IIS!

GOOD, last, deberemos configurar un agente de PINsafe que dará acceso al servidor de Exchange para las consultas del OTC, for this, dentro del appliance, We will go to “Server” > “Agents” > “New”, agregamos el nombre & la IP del Exchange, añadimos el secreto introducido en la configuración del OWA Filter Configuration & “Apply”!

Podremos ya confirmar que en nuestro portal de Outlook Web Access, al introducir el usuario nos sale el cuadro de dialogo donde podremos introducir nuestro OTC basado en nuestro PIN, además podremos cambiar el PIN desde este enlace! Os dejo los enlaces para integrar Swivel PINsafe con otras versiones de Exchange:
– Integración de PINsafe con OWA de Exchange 2003 – HERE.
– Integración de PINsafe con OWA de Exchange 2007 – HERE.
– Integración de PINsafe con OWA de Exchange 2010 – HERE.
– Integración de PINsafe con OWA de Exchange 2013 – HERE.