Installing VMware ESXi 6.5 + DCUI + Host Client

This is the first document in a series of posts where we will look at how to perfectly deploy and configure a VMware vSphere platform 6.5, in this document we will look at the simple installation of the ESXi hypervisor, plus a brief walk through its basic configuration with the DCUI and we will access your Host Client to manage it as well as your virtual machines. We will continue with other documents that will make us grow and optimize our environment!
We can install ESXi on a local SD device, USB, SAS, SATA, SSD, LUN...
The process is very simple and in just 15 minutes we will have the hypervisor mounted, we can dump the ISO image to a bootable USB with UNetbootin or Rufus.
We will need to confirm that the host and its hardware are on the VMware hardware compatibility list, in their HCL.
The installation will be done locally, either on local console or via iLO or similar.
We will need to enable Intel-VT or AMD, as well as HyperThreading.
If we want to download ESXi, we will be able to use This link from the official VMware website. You have a free version and if you want to try all the features, Have 60 days!
ESXi Installation 6.5,
We'll look at the simple steps we'll need to install ESXi, we insert the CD with the ISO recorded and start!

Select the ESXi image to install in the boot & we press ENTER,

Enter to continue,
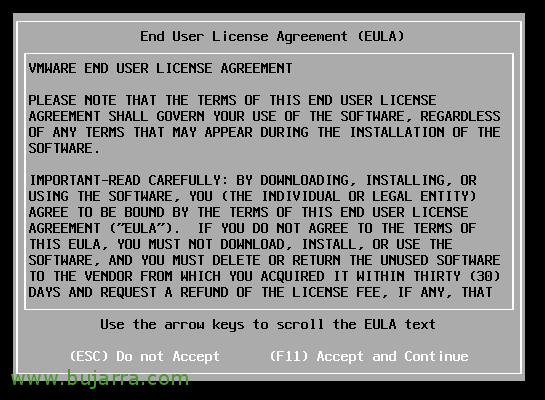
We read the licensing and F11 to accept it.
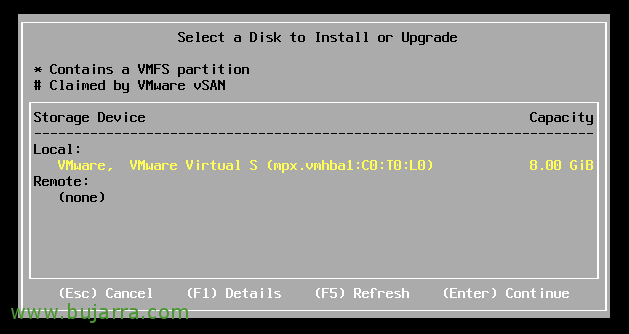
We must select the local disk where we will install ESXi. It may be normal for us to see more than one album, CARE. And above all, avoid having a connection to the SAN, It is advisable to remove the patch cords from the fiber optic to avoid possible human error.

Select the language of the keyboard we are using & Enter,

We set the password to the root user and future administrator,

We confirm that the data is correct and with F11 we could start the installation,

We waited a few minutes...

And we will already have ESXi installed on a server! We restart it and after that, we must enter the DCUI console and configure the basic network parameters and be able to access its configuration through the Host Client, or directly add it to a vCenter and manage it from there.
DCUI,
The Direct Console User Interface is the local management interface that the hypervisor gives us, From it we can do the most basic and initial configuration tasks.
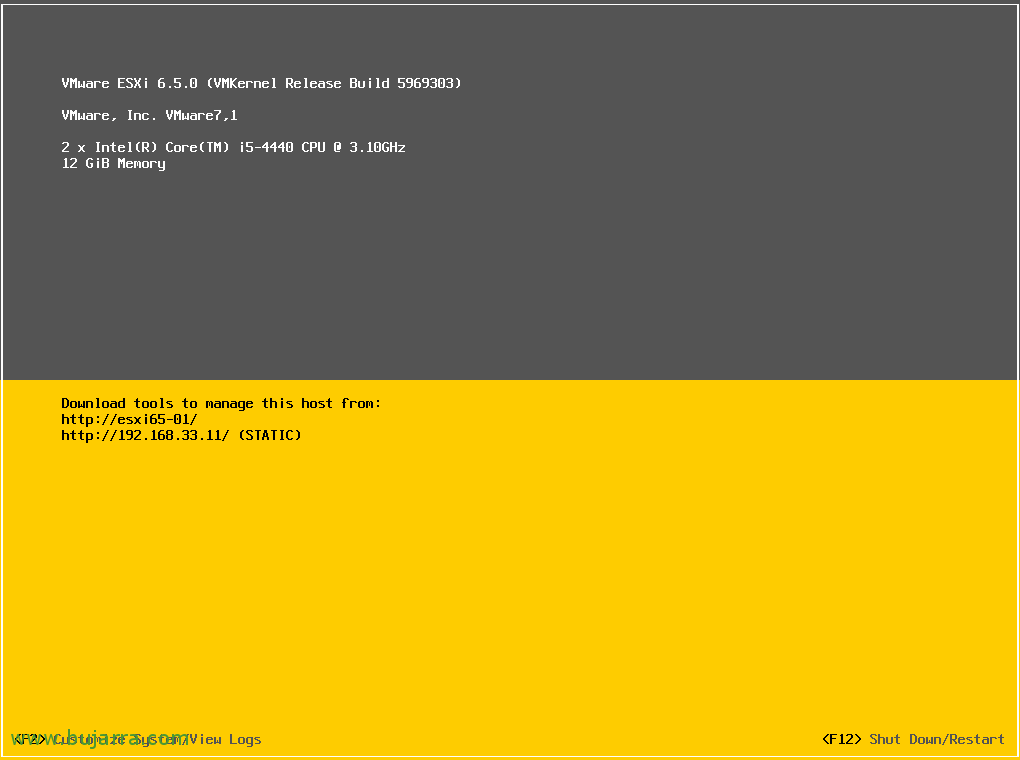
In the server console itself or if we connect with iLO or similar, we can press F2 to unlock the server, plus F12 to restart or shut down this ESXi host.
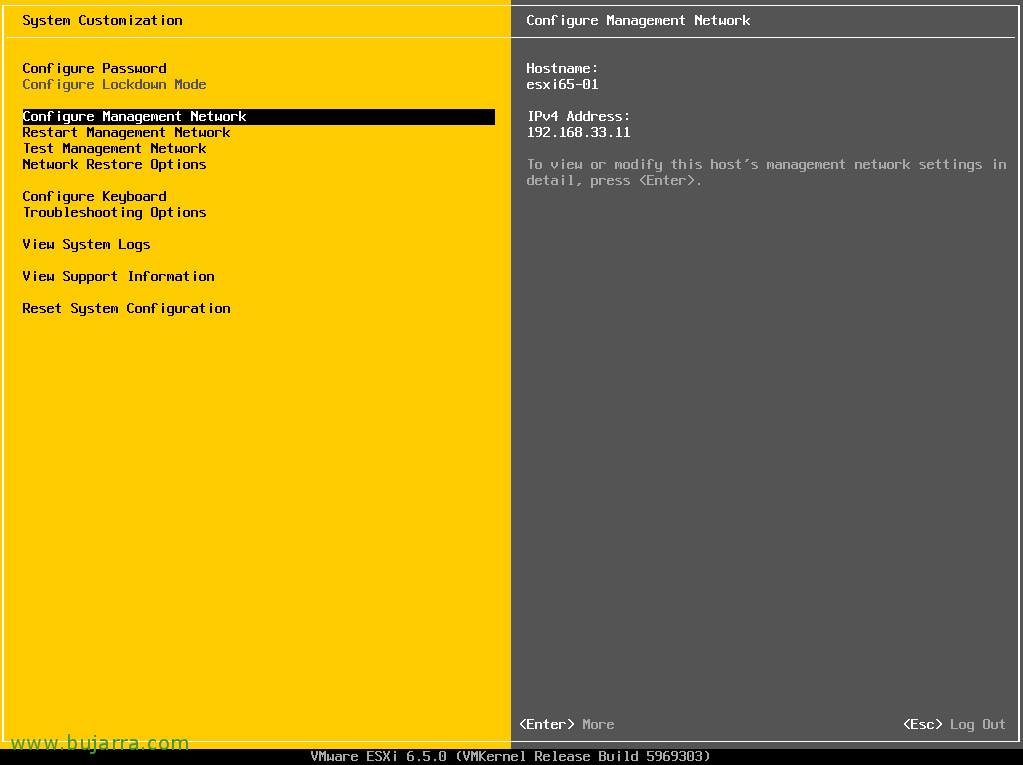
DCUI will allow us to change the root password, set the server lock level, Configure the management network for this host, in addition to configuring troubleshooting options that will allow us, among others, to enable the ESXi shell, enable SSH or restart management agents. And finally we will be able to see the server logs, support information or a beautiful option that will reset the host configuration to factory losing all the configuration.

You should know that if you access the host by SSH for example with a Putty, And on the shell you write 'dcui', you will be able to access the DCUI from the command line, useful on certain occasions!
Host Client,
HTML5 website that will allow us to make configurations on the ESXi host in addition to accessing its virtual machines.

If we access the IP address of the ESXi host with a browser, we can enter the configuration website of this ESXi host, We validate ourselves…

In the main view we will have a summary of our Host, where we will see all kinds of machine information, Available Resources, Configurations…

From the “Administer” We will be able to make configurations on the host, the first thing will obviously be to set the time against a time server or NTP server, as well as if we want to enable automatic virtual machine boots, Enable hardware shortcut, Change Server Power Options, License Management, VIBs installed, services that we can start or stop from the host. As well as creating users and configuring access to this host!

From the “Supervise” We will be able to see the most basic performance graphs that we have at the host level, where we can see its CPU, Memory, Network and Disk. We will also be able to see events generated by the hardware sensors, Server Events or Tasks that are executed; we will also be able to see the system logs or the notifications that the host gives us in alert mode.
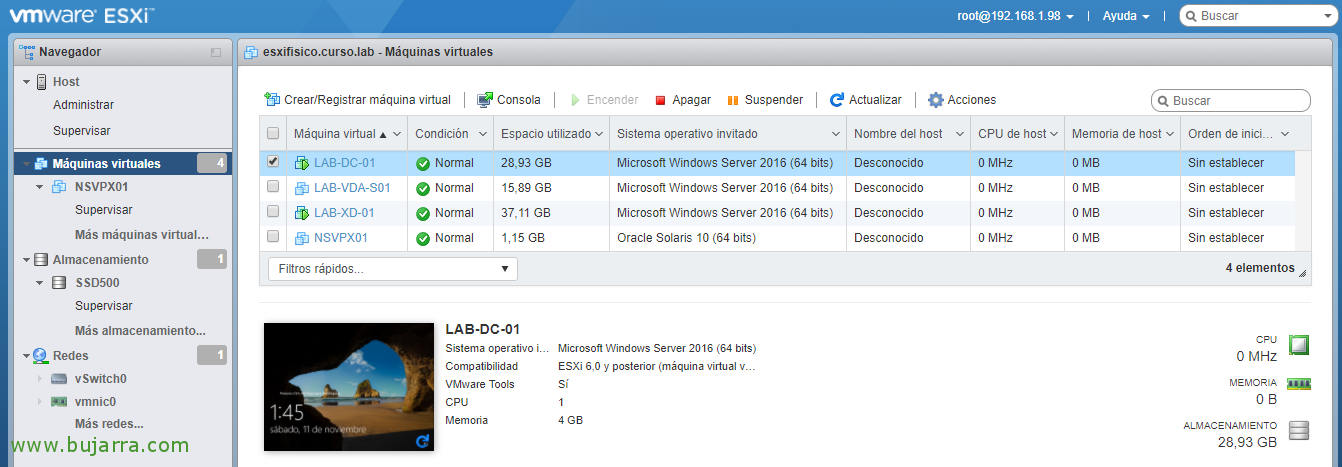
From the “Virtual machines” We will be able to create and manage virtual machines, we will be able to access its console through HTML5 integrated in the browser or better with the remote console or VMRC.
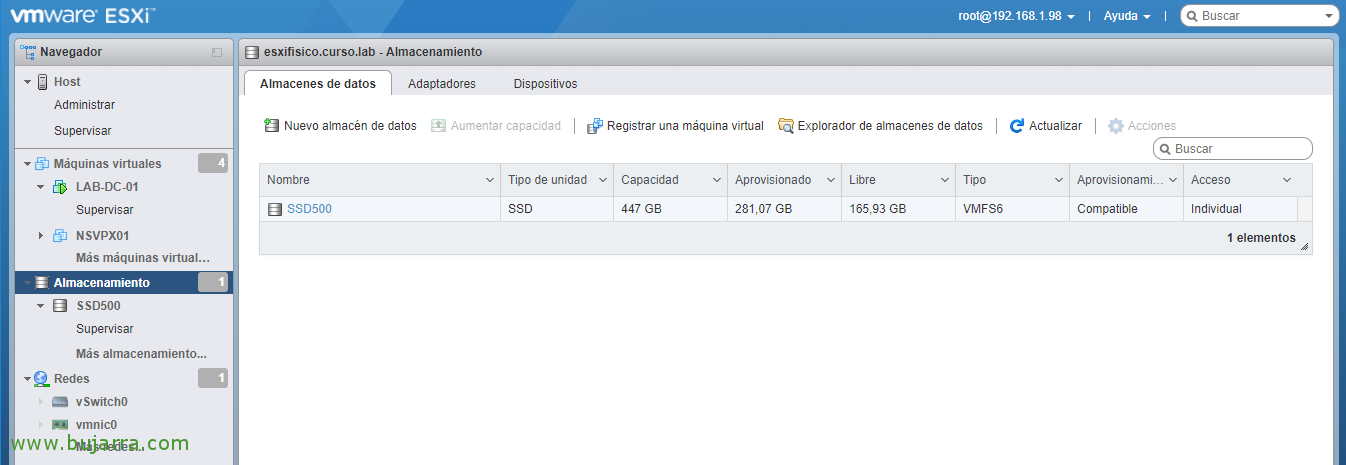
From the “Storage” we will be able to format the local disks of the host and use them as VMFS datastore as a store for the VMs, as well as connect to remote storage arrays and access their LUNs.
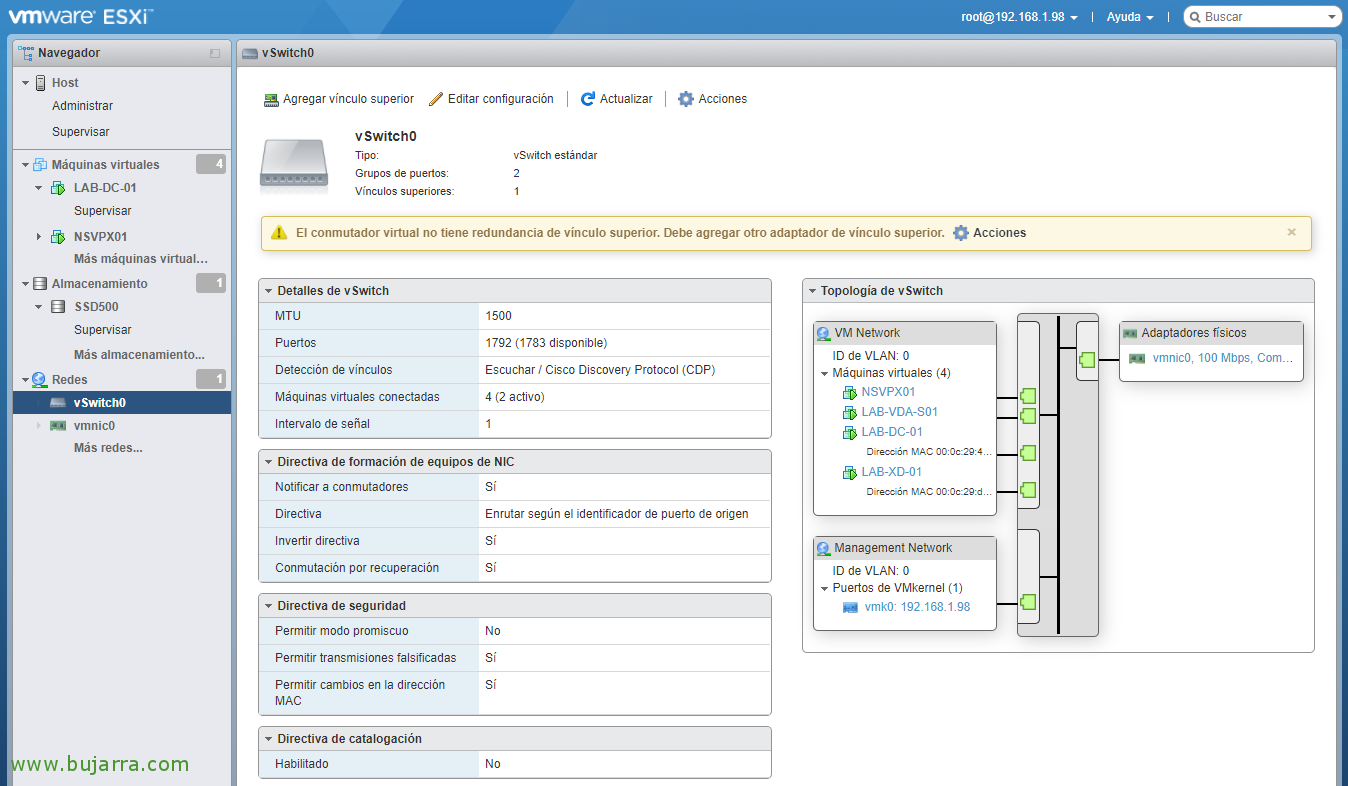
On the “Networks”, it will be where we will create our virtual networks, where we will provide connectivity to the VMs with the outside world and configure the networks and VMKernel ports that we need!