
Installing and configuring Citrix XenDesktop 4

This document shows the installation and configuration of all Citrix XenDesktop components 4.0, which is Citrix's quintessential desktop virtualization infrastructure. With this we will be able to provide our users with desktops directly, to have a thin client environment on our network. With the Citrix controller we can manage the connections to the desktops that interest us, we will be able to connect to virtual machines based on Citrix XenServer or VMware vSphere or VMware Infrastructure 3 or physical directly. We will be able to combine different technologies for the automatic creation of desktops such as Citrix Provisioning Server or VMware Composer. Later we will see different ways to install the agent that will be the necessary software in the virtual desktops and the client for their final connection.

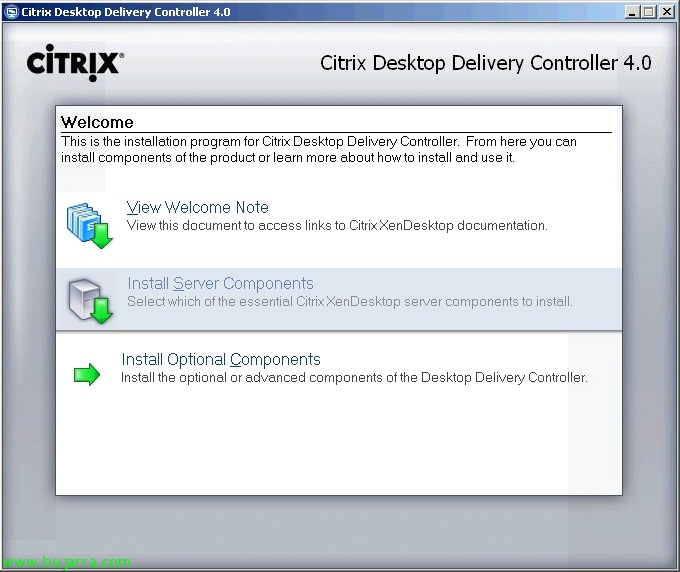
Well, introducing the Citrix Desktop Delivery Controller DVD 4.0 and click on “Install Server components” to install the components needed to run our first XenDesktop server,

We accept the license,

And we check the three elements to be installed, if we already have a license server on the network, We didn't mark it. The main component Citrix Desktop Delivery Controller will be marked and its administration console will also be recommended to have.

How we are going to install the main function of the server (Controller) We have to create a new community or join one of them, “Next”,

We select our edition from the community, “Next”,

If we have a database server on the network, we can locate the XenDesktop database there, otherwise, will install a SQL Express locally, “Next”,

In my case, I have a SQL server on the network, I set up my connection via ODBC…

and after configuring connectivity against the community database, Continue, “Next”,

Pulsamoa “Next” to begin installation, we will have to take into account that we will need the Windows CD since we will have to install the necessary requirements, in addition, the server will be restarted twice during installation,

…

GOOD, Once installed, click on "Finish" leaving the checks of "Configure an Active Directory OU now" and "Start the License Management Console now" checked to configure the Active Directory since it is necessary because XenDesktop needs access to the DA to store configuration information and to manage the accounts of the virtualized computers.

GOOD, we run the wizard to configure our XenDesktop community against our Active Directory, "Next",

We must select a base OU in the DA from “Browse” or create one in the previous one, “Next”,

“Finish” To apply wizard settings,

…

Open the console or click on the “Delivery Services Console”, This will be the main management console for our virtual desktop environment.

We run the console setup wizard for the first time “Skip this screen in future” & “Next”,

“Next”,

We add the local team from “Add Local Computer” and if we have or will have more controllers in our network, we will add/add them, “Next”,

“Next”,

… We wait for it to close…

Already, to give remote access to these desktops, First we will have to create a group of desktops where we will group all the desktops that we have of the same style. Envelope “Desktop Group” Right-click “Create desktop group”,

“Skip this screen in future” & “Next”,

We can have three types of desks, We can have a pool of them, to which users will automatically connect to them indistinctly; we will be able to have them assigned for first use, that the first user who connects to it will be associated with it; or we can have pre-assigned that we will indicate from the beginning the teams per user/group. I select in my case “Pooled” & “Next”,

If these desktops are in a virtualized environment, we will be able to indicate this, whether it's a Citrix XenServer or VMware vSphere or VMware Infrastructure environment 3; or none. “Next”,

We provide the address if it comes from the VMware vCenter server or Citrix XenServer with administrator credentials, “Next”,

Click on “Add..” To add virtual desktops…

We select them… In my case I only take one. “OK”,

“Next”,

We must indicate the users who have to have access to these desktops, “Add…”,

We indicate a group/user…

“Next”,

We give the desktop group a name that users will see when they log in to identify them, “Next”,

We put an icon on it if we are interested, “Next”,

Mark “Configure advanced settings for desktops in this group now” & “Next” to set up something else,

If we want to allow from any connection, “Next”,

We can specify a schedule that suits our organization to keep a minimum of equipment powered on, “Next”,

We indicate if we want someone to restart the virtual desktop when they finish using it (Subtract the virtual desktop) or do nothing (Do nothing), “Next”,

We can set the appearance in color quality, type of encryption and connection protocols we will accept. “Finish”,

If we want to see all the possibilities that we can configure, We will do it at the community level, Right click on it > “Modify farm properties” > “Modify all properties”

In “Connection Access Controls” indicate whether we will accept any connection or only from a CAG (Citrix Access Gateway),

In “Desktop Delivery Controller” > “General” we can configure if XML will return the full name of this server to the computers and if we allow a depth of 32bit of colors.

In “Desktop Delivery Controller” > “Session Reliability” We will configure session reliability, if we want to allow users to continue viewing the desktop in the event of a connection drop and for how many seconds.

In “ICA” > “Auto Client Reconnect” whether we will allow a broken user session to be reconnected automatically or require prior authentication.

In “ICA” > “Keep-Alive” if we want to allow ICA Keep-Alive (in seconds) so that a user can reconnect to a desktop from which they were previously disconnected.

In “License Server” we will indicate which is the license server of the XenDesktop community,

In “HDX” > “Browser Acceleration” if we want to enable it and compress the images to obtain higher performance but worse quality.

In “ICA” > “Flash” if we want to enable the use of the Flash Player.

And from the console “Presentation Server Console” We will be able to configure policies and management of printers/drivers,

What I said, We will be able to create policies to better manage and configure our environment.
Installing the Citrix XenDesktop Agent,

We must bear in mind that this software must be installed on all the computers that we want to use as a virtual desktop, on the Citrix Desktop Delivery Controller DVD 4.0, Click on “Install Virtual Desktop Components”, eye, previously we will have to take into account that it is mandatory to install .NET Framework 3.5 SP1,

Wizard installation, “Following”,

We accept the agreement “I accept the terms in the License Agreement” & “Next”,

Select the port with which the Controller will connect to this equito, “Next”,

If we want to allow the Windows firewall the necessary traffic (1494TCP, 8080TCP and add an exception to the CitrixCGPServer.exe), Mark “Automatically Configure Windows Firewall” & “Next”,

We indicate the Citrix XenDesktop farm to connect to, “Next”,

We press “Install” and the installation of the necessary software and drivers will begin.

…

“Finish”,

And we will have to restart the computer to be able to use it.

We can also install it automatically, We can pass a series of parameters to the agent installer and that's it, But first we'll need to know the community ID, to do this from the console “Citrix Delivery Services Console”, within the community and with the view of “Read-only Propierties” We will get it out by copying it from “Farm Organizational Unit Identifier”.

By creating a GPO and putting the following command line, or directly from a console: 'msiexec /i PATHXdsAgent.msi CONFIGURE_WINDOWS_FIREWALL=1 WCF_PORT=PORT SHOW_FARM_PAGE=0 FARM_GUID=ID /quiet'. Note that the computer will restart once the installation is finished (unless we tell you otherwise). These would be the details of the configurable parameters:
CONFIGURE_WINDOWS_FIREWALL:
0 = Do not touch the Windows firewall.
1 = Configure the firewall to allow connectivity.
WCF_PORT: It is the port for the Controller to connect to this desktop. By default it will be 8080.
SHOW_FARM_PAGE: It will display the selection screen for a community.
1 = Yes (By default)
0 = No
FARM_GUID: It is the GUID of the community in the Active Directory OU. Used to associate the desktop with the community. By default it is not configured.
Installing the Citrix XenDesktop client and connecting to a XenDesktop virtual desktop,
We will need a client to connect to a virtual desktop, we can download it from the Citrix (Always recommended to have the latest version) or directly from the DVD.

Within the DVD options we select “Install Client”,

And the client will be installed without asking for any option.

Well, We can test the connection, everything will depend on which client and which connection, we can configure a Web Interface server that we have for Citrix XenApp and add a second community that connects against the controller; or set up a new site. We see the connection created above that will not be an application but a desktop of some Windows 7.

And we'd go in! We have to take into account that a license server must be configured, A secure connection, Roaming profiles, Virtual desktops will need to be tuned for optimal performance…


