

Hide Local Drives on Citrix Servers

This procedure explains how to hide the local drives of a Citrix server so that users when working against published applications cannot store anything on the server's disks. It is simply a matter of editing a policy template that we will then apply through a policy to the users we are interested in not seeing the server units. This policy can NOT be applied only to the server, rather, it is a user policy, so it must be applied to a user OU. Typically, the Citrix server has letters assigned to it other than C and D, the normal thing would be M, N… and so on respectively, then, We will run into a problem when applying the policy because our disk drives do not come. This document explains how to customize this policy with our disk drives
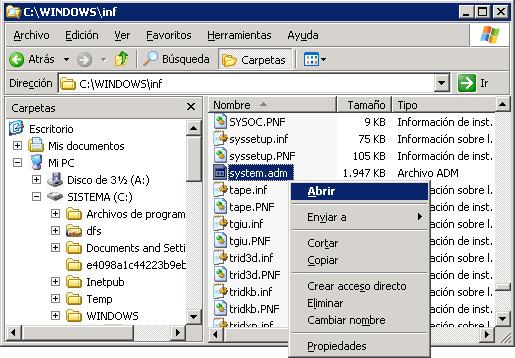
The first thing is to edit the file with Notepad “system.adm” of “C:Windowsinf” of a domain controller, if possible of the principal. Open the file.
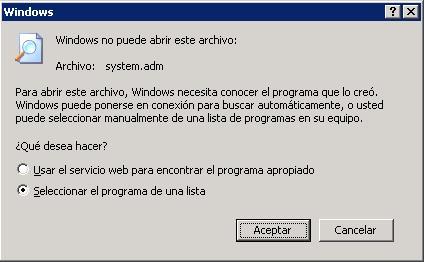
What is a file that does not have an extension associated with any program like?, We open it by selecting a program to open it, with “Select the program from a list” and “Accept”,

Mark “Notepad” and “Accept”,
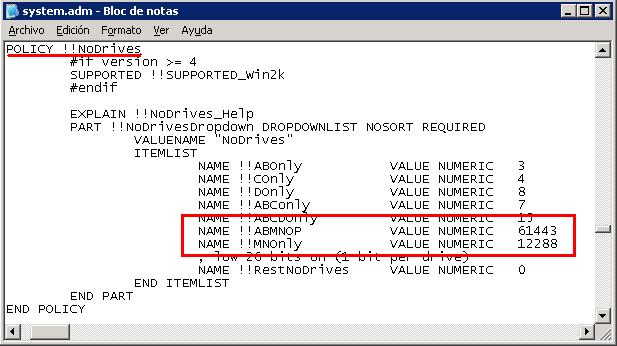
We seek the policy of “!!NoDrives” and in this example I'm going to teach you how to hide the letters M and N; and the letters: To, B, M, N, O and P. To do this, we add the following lines:
NAME !!ABMNOP (or whatever we want to identify it) VALUE NUMERIC 61443 (Decimal value that interests us)
NAME !!MNOnly (or whatever we want to identify it) VALUE NUMERIC 12288 (Decimal value that interests us)
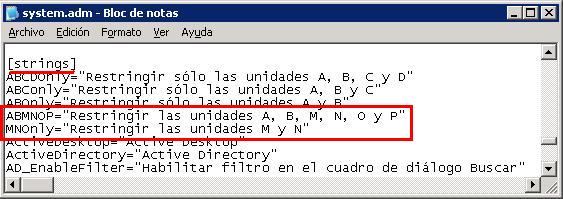
And below we look for the text string [strings] and we add the same name that we have used to identify it (in my example ABMNOP and MNOnly). And we indicate what it does, what letters it forbids in the description on the right.
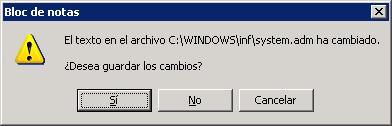
Once these points have been modified, we save the file,
GOOD, If you're interested in hiding other album lyrics, and they are not the ones in this example. How is it calculated?? Simple, The first thing is to know which letters to hide, in my example MN has the value 12288, or ABMNOP has the courage 61443, How to get it? is based on these values:
00000000000000000000000000
ZYXWVUTSRQPONMLKJIHGFEDCBA
A bit must be put (1) to the letter we want to hide, for example to hide MN:
00000000000011000000000000
ZYXWVUTSRQPONMLKJIHGFEDCBA
To hide ABMNOP:
00000000001111000000000011
ZYXWVUTSRQPONMLKJIHGFEDCBA
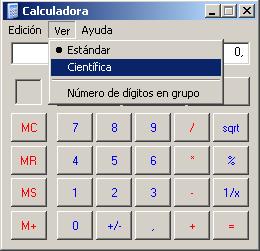
As we can see, these are BINARY values, and they must be converted to DECIMALS, is so simple that with the Windows calculator you can, We open the calculator and put it in a scientific way: “See” > “Scientist”.
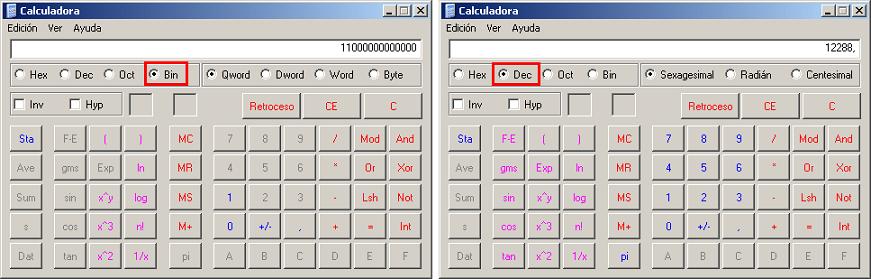
Click on “Bin” and we put the value of MN that would be 00000000000011000000000000, Since the first 0's cannot be put we start from the first bit 1 and we continue with the rest of the 0's that are 12 In my case, To switch to decimal is as simple as after entering the numbers click on “Dec”, there we will obtain the value that we must put into “C:Windowsinfsystem.adm”

Now with the example of the letters A, B, M, N, O and P, we wrote this in Binary: 1111000000000011 and click on “Dec” to convert it to decimal, gives us the courage to 61443, which will be the value to be entered again in the system.adm
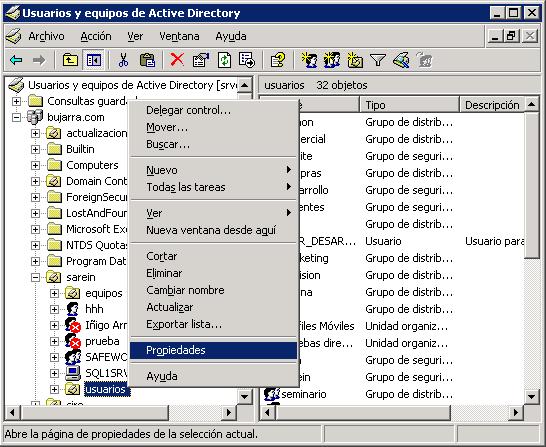
Once that is clear and the file has been modified, we must create a policy to apply it to USERS, about the organizational unit where Citrix users are located (or on any OU, or directly on the domain – More dangerous) > Right Button “Properties”.
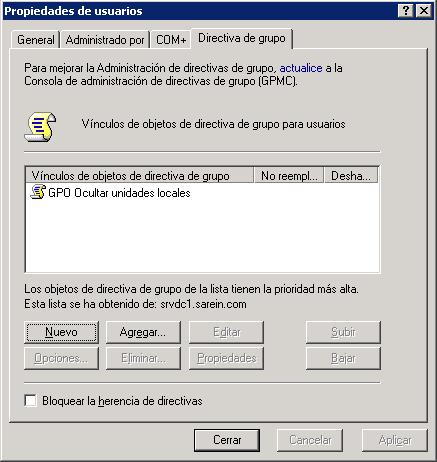
On the “Group Policy”, Click on “New” To create a policy (GPO), We give you a name, For example “GPO Hide Local Drives” and we are going to modify it, for this, Select it and click on “Edit”.
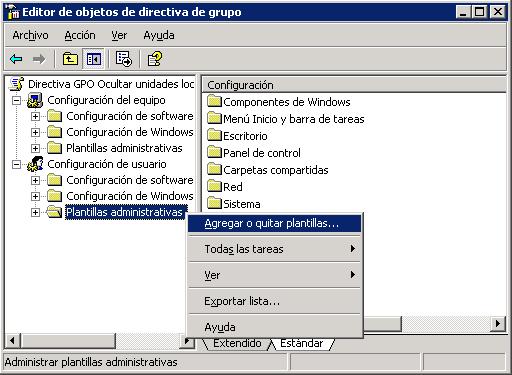
We're going to “User Settings” > “Administrative templates” > Right Button “Add or remove templates…”
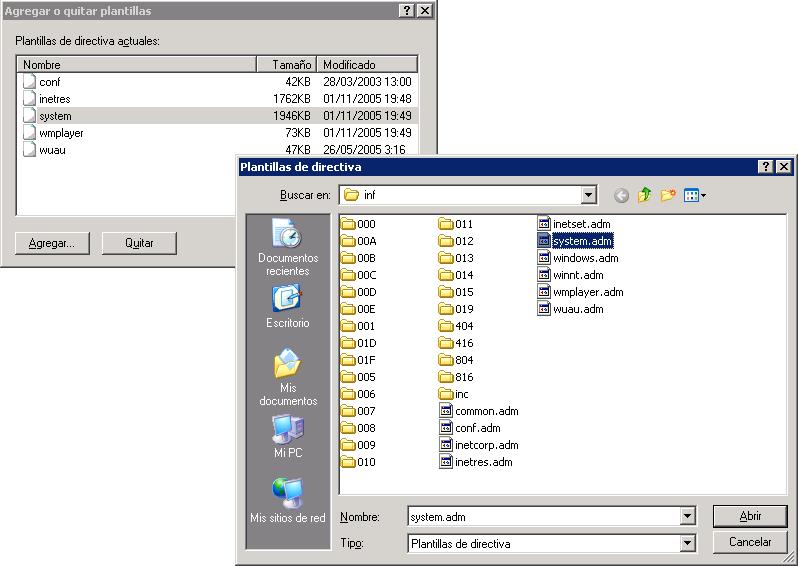
Click on the button “Add…” and we seek the “system.adm” of “C:Windowsinf”, we open it with “Open”,
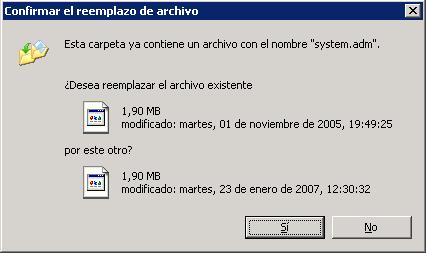
We check that it is the one we have just modified, and we press “Yes”,
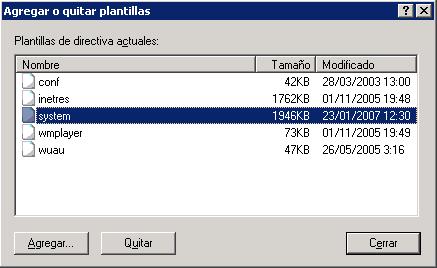
We check the date of the “System” And if it's okay, We're going to “Close”,
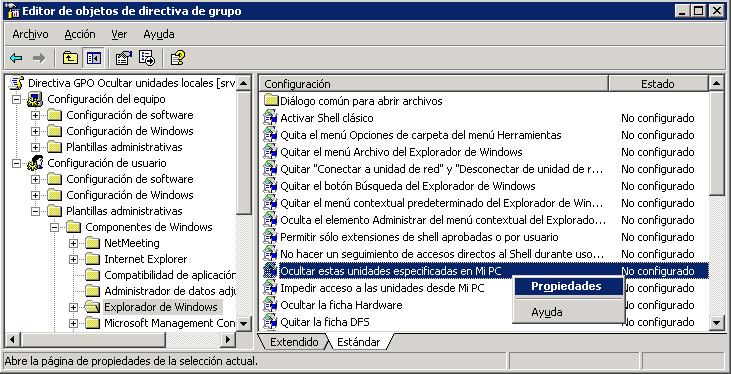
GOOD, Now let's finally edit the policy: We're going to “User Settings” > “Administrative templates” > “Windows Explorer” and we seek the “Hide these specified drives in My Computer”, we right-click and “Properties”.
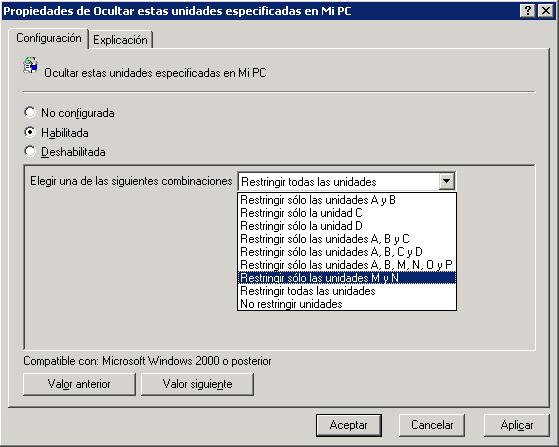
We have to enable it by pressing “Enable” and we will get what we have added to the file, we choose the one that interests us the most and we accept.
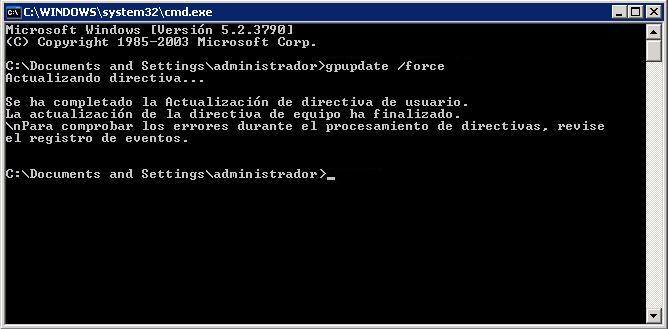
Remember that for a policy to start enforcing immediately, we have to use the GPUPDATE command.


