Uso de VMware Guided Consolidation

In this document we will see one of the VMware products that will help us virtualize our physical environment. VMware currently has two tools to measure what resources it will need when virtualizing a physical environment. The partner tool VMware Capacity Planner and this free and much more basic tool called VMware Guided Consolidation. It is a tool that has three processes:
1.- Search: Search for physical computers on the network to be analyzed.
2.- Analyzes: The selected physical equipment is analyzed and performance data is obtained for each computer.
3.- Consolidate servers: The data obtained is compared with the resources available in the virtual environment and virtualized in the virtual environment with recommendations on ESX hosts.
We must have as requirements a VMware vCenter server in the network and at least one VMware ESX host managed by said Virtual Center. We will need an administrator account to be able to install Guided Consolidation and an administrator account for the computers to be virtualized, whether it's a local account or a domain account. In addition, VMware Converter Enterprise must be mounted to be able to perform virtualizations from the Guided Consolidation itself. In this example we will see, I'm going to mount VMware Guided Consolidation on the VMWare vCenter server itself that also has VMware vCenter Converter.

Introducing the VMware vCenter Server CD 4.0 and select “vCenter Guided Consolidation”,

We select the language for the installation & “OK”,

VMware vCenter Guided Consolidation Installation Wizard Begins, “Next”,

We accept the license agreement “I accept the terms in the license agreement” & “Next”,

Select the installation path, Default: “%ProgramFiles%VMwareInfrastructure” & “Next”,

We must indicate an administrator account for the computers to which we are going to connect, You can be a local administrator or a domain administrator, This could be changed later if needed. “Next”,

We indicate the ports, which by default are 8181tcp for 'VMware vCenter Collector Service Port'’ and 8182tcp for 'VMware vCenter Collector Provider Service Port'. “Next”,

We enter who our VMware vCenter server is to connect to it, We enter the name, the default port is the 443 and an administrator account to be able to register the extension in vCenter. “Next”,

We select how we want to identify our vCenter server on the network, if by DNS name or IP address, “Next”,

“Install” to immediately begin installing VMware vCenter Guided Consolidation,

…

After a couple of minutes we will have it installed. “Finish”.

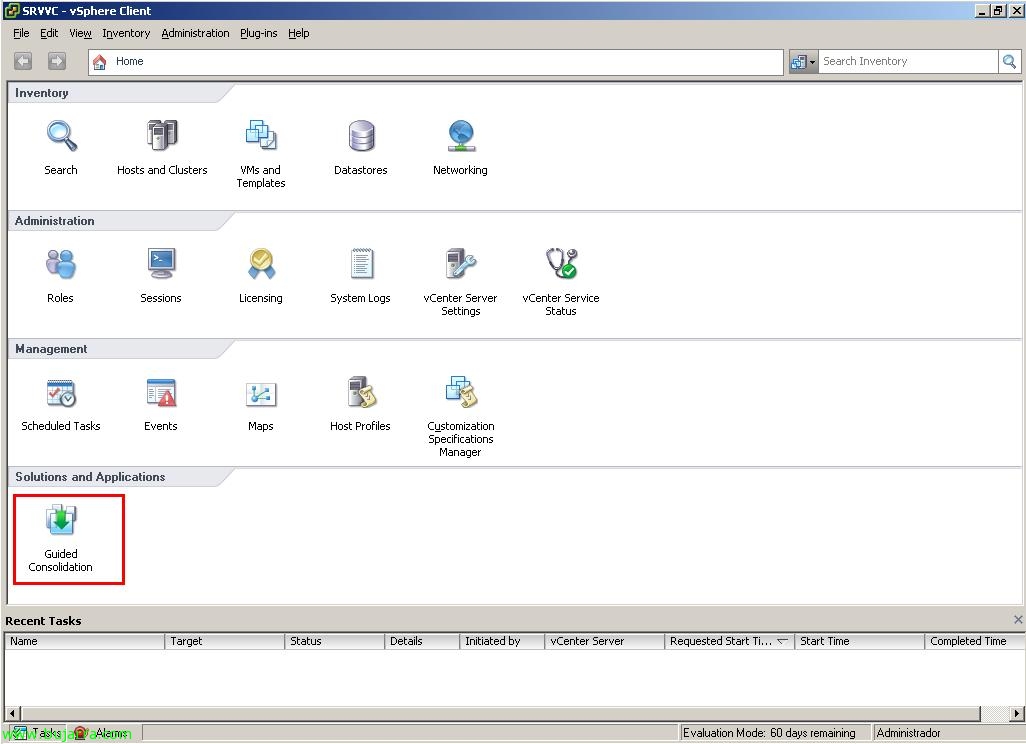
If we open the VMware client, the VMware vSphere Client, we'll see that you've successfully added the extension to be able to use Guided Consolidation, We open it.

If we go to the “Configuration” we will be able to see in the part of “Health Status” the status of Guided Consolidation-dependent services. In “Default System Credentials” are the credentials that we will use to connect to the computers we want to discover and analyze, being able to change it at any time. And in “Active Domains”, We will add our domain so that when it comes to discovering the computers on the network it automatically searches for those in our domain.

On the “Analysis” It is where we can see the status of the analyses we have, as well as how to create/add new analyses or directly consolidate the physical equipment that interests us. The first time we must click on “Start Analysis”,

We can manually add the equipment to be analyzed, Well by name separated with commas, IP address or IP ranges, from a name file… or it will directly look for the equipment we have in the domain we indicate. We add the computers that we would like to virtualize and click on “Add To Analysis”, we can add up to 100 Concurrent analysis (Exam 😉 Question

It will ask us which credentials to use, if the ones we already have stored or some in particular. “OK”,

And we will see how the teams to be analyzed will be first in the 'Collecting system information' state, This process takes about an hour (theoretical) in acquiring the information you require,

After an hour (Approximate) will change the status to 'Analyzing’ and this process can be thrown between 24 and 48 Hours of analysis. We will have to take into account that the column 'Confidence’ Check 'High’ to indicate that it is a more real and accurate analysis than a 'Low', Once I'm done, the state will be 'Ready for consolidation’ and will show us an average of the consumption of the CPU and RAM memory. If we want to consolidate, Virtualize this computer, we would click on “Plan Consolidation…”

Select where we want to host the virtual machine, the datacenter we are interested in or the directories or resource pools. Pressed “Next”,

… wait a few seconds while Guided Consolidation generates recommendations and recommends which ESX host is most feasible to host it on. (Guided Consolidation is generating recommendations for the physical systems).

It will indicate the recommendation with stars, In that host he marks me with 5 which indicates that it is the ideal host to virtualize my physical computer there. “Next”,

And we click on “Finish” for the P2V process to begin (Physical to virtual)…

We just have to wait for it to be virtualized thanks to vCenter Converter Enterprise in an automated way!