Convert VMs to XenServer
If we want to convert VMware Server VMs, VMware ESX, Microsoft Virtual Server or Microsoft Virtual PC to Xen Virtual Appliance Format (XVA) we must use the v2xva Virtual Disk Migration Utility application (a V2V app). We go to their official website and download the binary or the sources depending on our OS. (HTTP://tx.downloads.xensource.com/products/v2xva/), be careful that it is only useful to convert virtual machines with Windows from S.O. client and run it from a Windows XP/2003 R2 or Vista as administrator.
Once downloaded and uncompressed, We execute it.
If we run it with the /y parameter, it will show us the help and possible commands.
Virtual Disk Migration Utility Version 1.1: A V2V tool to convert VMware and Microsoft Virtual Server/Virtual PC virtual machines (with Microsoft Windows VMs installed) to the Xen Virtual Appliance XVA) format.
Usage:
v2xva.exe [/Clean] [/verbose:Loud|Less|Low] [/vhdwindir:Path to Windows Directory of VHD boot partition] /config:{Config-file} [/output:Path to output directory for XVA files]
Options:
/Clean – Reset Virtual Disk Migration Utility device driver state for VMware VMDK conversions. This option does not have any affect for Microsoft VHD conversions. Any other specified options are ignored.
/verbose – Output more information as conversion process proceeds
Loud: Output all information as conversion proceeds
Less: Output lesser information as conversion proceeds
Low : Output minimal information as conversion proceeds (default)
/vhdwindir – Path to Windows Directory of mounted VHD boot partition
Other parameters, except /verbose, are ignored
/config – VMware or MSVS config file
/output – Output directory where converted XVA files will be placed
Ignored for VMware VM conversion
Simply to convert a VM we run the command with the following format: v2xva.exe /config:”PATH_AL_ARCHIVO_VMX_O_VMC” /output:”PATH_DESTINO”
… We wait while he converts it…
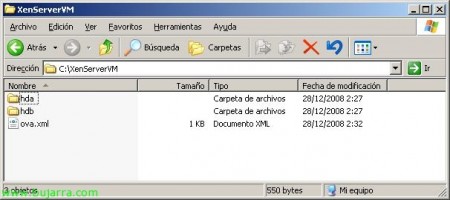
After a few minutes we will have it ready! now all that remains is to take it to the XenSever storage and import it.
🙂
And from the XenServer right-click “Import VM…”
One thing we need to keep in mind, if the source VM is of the Microsoft Virtual Server or Microsoft Virtual PC format, We need to run the following tasks before converting it:
Use the vhdmount utility to mount the disk. VHD Boot Holder.
Run v2xva.exe with the /vhdwindir parameter indicating the full path to the %windir% directory.
Unmounting the disc
Perform the conversion as normal with v2xva.exe
Example:
vhdmount.exe /m “D:MSVirtualServerWindows Server 2003WindowsDisk-1.vhd” F:
v2xva.exe /vhdwindir:”F:Windows”
vhdmount.exe /u “D:MSVirtualServerWindows Server 2003WindowsDisk-1.vhd”
v2xva.exe /config:”D:MSVirtualServerWindows Server 2003Windows.vmc” /output:”E:XEWindows Server 2003″


