Using Veeam Backup & Replication to make backups and replicas of our virtual environment
This Veeam product called Veeam Backup and Replication, offers us the possibility of both backups and replication of our VMware virtual environment, for both VMware Infrastructure 3 How to VMware vSphere 4 (VMware ESX or VMware ESXi, depending on the license purchased, that the product is paid for, but very cheap). It will allow us to make backups of the virtual machines that we indicate in the location that interests us, We will be able to keep as many copies of the same virtual machine as we are interested in, as Veeam will store them incrementally. Personally, what I like is the replication, since the backup is given to us by VCB or VMware Data Recovery, replication can be carried out in another storage array that we have and the replicated virtual machines will be optionally placed in the VMware inventory, just like backups, We can have as many replicas as we want, without duplicating information, in addition to indicating how often we want them to be replicated, etc…
We will be able to download the program from the Veeam website, and try it for a while with a license that will be sent to our email.
Installation doesn't have much, if we want to take advantage and use the product over the fiber network – SAINT (if we have it), We will install it on a server that has access to it. “Next” to get started with the installation,
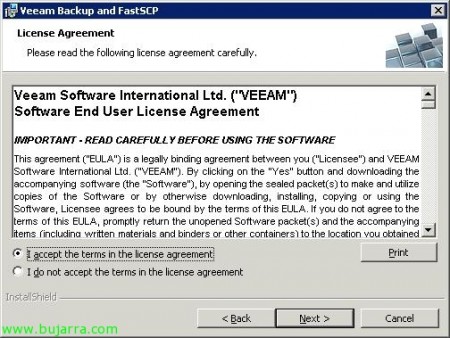
“I accept the terms in the license agreement” & “Next”,
We have to enter the .lic license file, whether it is the good one or the trial that they send us to test the application, “Next”,
We install the product, by default the route will be: %ProgramFiles%VeeamBackup and FastSCP,
You need an instance of SQL to store the information, we can use one that we already have on the server or create a new one, default 'localhostVEEAM', “Next”,
Enter credentials with permissions in that SQL instance, will be the user account that lifts the 'Veeam Backup and FastSCP Service', “Next”,
List, Click on “Install” to immediately install the software,
…
Perfect, After a few minutes we will have the software installed. “Finish”.
Open “Veeam Backup and FastSCP”,
This is the Veeam Backup and FastSCP splash screen, where we can create the jobs (Jobs) backups or replicas. So how to be able to completely recover a virtual machine or directly recover only a file.
The first thing is to register our virtual environment, if you have a VMware Virtual Center or VMware vCenter server, We'll add it; if they are independent hosts as well. To do this,, envelope “Servers” Right Button “Add Server”,
Enter the name of our VirtualCenter or ESX/ESXi server, “Next”,
Enter the administrator credentials for the vCenter server (In this case), “Next”,
We confirm that everything is correct, Click on “Finish”,
And that's it, we will be able to navigate through the folder tree and see both the ESX hosts, How DataStores…
Vale, It is a very intuitive program, So to create a replication task, Let's go to the part of “Jobs” and right-click we can create a replication task “Replication…” With this we will be able to keep a copy of the(s) machine(s) virtual(is) that we are interested in other shared storage in our virtual environment. We can have so many versions of it(s) MV how it interests us, under no circumstances will information be duplicated and inventoried on our VirtualCenter server.
We indicate the name of the replication task, “Next”,
Data will be able to travel over the iSCSI or fiber data network (SAN Network) or over the Ethernet network (Lan) if you do not have a SAN Network. In my case, by having a fiber network, I will mark “VMware Consolidated Backup” with 'VCB mode’ a “SAINT (recommended)”. Otherwise, could be NBD or NBD/SSL (Network Block Device – Network block device). Eye, to use SAN, we need to have the VCB proxy installed on this computer. “Next”,
We select the virtual machines we want to replicate, with the button “>>” we move them to the part of 'Objets to replicate', “Next”,
We must now select a destination, where these VMs will be replicated, We select a datastore (Centralized storage) of our environment. In addition, we will select the suffix that will be put to the virtual machines to be inventoried in the 'VMware Infrastructure' console, default '_replica'. And we will also have to indicate the number of replicas that we want from the virtual machines, being able to return to any of them in time of need, default 'Number of rollbacks to keep’ es de 14 Replica. We press the button “Advanced…”
On the “Advanced…” on the “General”, We may enable email notifications, if any of the virtual machines to be replicated is a Linux we must leave it enabled “Enable VMware Tools quiescence”, since let's say it replaces Microsoft VSS. We can also execute a post task command by enabling it in “Post job activity”,
And on the “Backup File”, we will have the level of compression, from 'Optimal (recommended)’ to 'None’ or 'Best', are the compression ratios, whether we are interested or not.
Well, Continuing with the wizard, we must provide the credentials to log in to that ESX host and be able to store the replica there, since I will connect to the datastore through this host. Click on “Set Credentials”,
“Use service console connection to this server” We enter the 'root' account’ of the ESX host and its password. “OK”,
Following, whether the VMs to be replicated have Windows operating system, We must enable “Enable VSS integration” to avoid data corruption when generating the snapshot, as indicated to perform the replication in a transactional and consistent way. We enter the administrator credentials for the local machines, be a local administrator of them, or domain administrator. “Next”,
This is where we will specify that the task runs automatically and periodically. We can make the replica run once a day by indicating a schedule or specify how often we want the replica task to be executed. Click on “Create”,
“Finish”,
And we will already have this task in 'Jobs', Now it's time to wait for it to start, or we can force it ourselves to check if it will be executed correctly, for this, Right click on it “Start Job”,
… We verify that the replica task is running… To see all the tasks that have been executed and their status, we will go to the “Sessions”
And well, after a few minutes, Depending on our environment and the machines to be replicated, we will already have the replicas. In my case it has been executed a couple of times,
If we open the VMware Infrastructure Client, we will be able to see how the(s) machine(s) virtual(is) with the suffix indicated. All this so that in the event of a fall we can lift this environment replicated at the moment.
If we go to the 'Replicas' part, we will have all the replicas of the virtual machines we have, and with the right button we could force the return of this one, with “Failover to a Particular Version…”
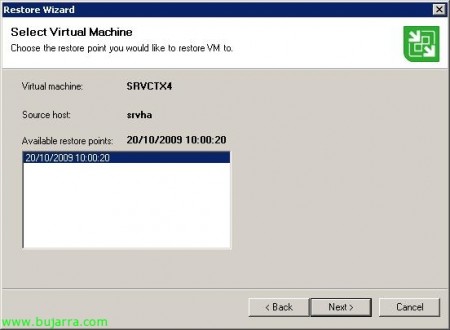
It will show us the possible points of restoration of the machine, if we follow the wizard, it will restore the virtual machine to that date.
With this, the issue of replicas is finalized.
Now let's look at how to back up with Veeam Backup and FastSCP, It is similar to replicas, we are in 'Jobs’ and right-click “Backup…”
We enter the name of the copy task, “Next”,
Same as before, Select the network to make the copy, “Next”,
We must select the(s) machine(s) virtual(is) to make a copy, unfold the tree and pass them to the right. “Next”,
The destination of the copy must be either a local directory of this server or share on our network (This computer or shared folder) or a disk on an ESX host, connecting to their local disks or datastores through them. But the copy will be in .vbk format, It will not be virtual machine format. Well, Select a directory to make the copy, We give a name to the copy. We can make copies of several machines with this wizard, not only to a. And we will mark the number of copies we want to keep per virtual machine. “Next”,
What I said, if they are Windows MV's, we will enable VSS, “Next”,
And this will be when we indicate how often we want to make a copy, The Programming. “Create”.
“Finish”,
And just like the replicas in the 'Jobs' tab’ We can force the backup to be made now to check if it is correct.
… We wait for the copy to be made…
Ok, Correct copy! 'Success'!
We can see that it will generate a .vbk file as indicated,
Now, about the copy we are interested in, We have three options, restore the entire VM on top of the original (Restore entire VM…), Restore the files of the virtual machine i.e. the VMDK files, vmx… (Restore VM files…) or restore the contents of the virtual machine, the files that the virtual machine has, to recover a deleted file or folder (Restore guest files…), We make this example,
We select the restore points we have, “Next”. Eye! to make this recovery, it is necessary to have VMware Player installed where we want to run this wizard. We can always install Veeam Backup on another computer and open the file to be recovered (The .vbk) from it.
“Finish”,
And it will show us the content of the virtual machine that we have indicated, With the right click we can copy the data and recover it!


